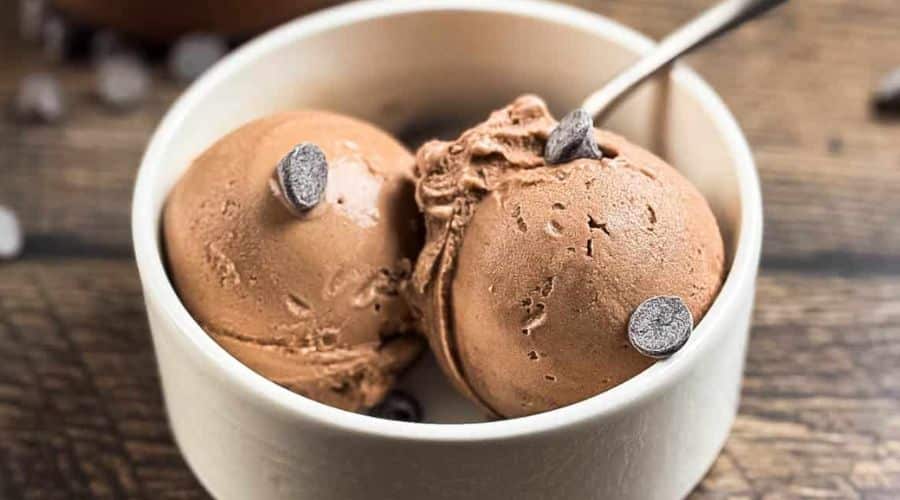
Ice cream is a beloved treat for many, and there are countless variations and flavors to enjoy. However, if you’re looking for a healthier alternative that doesn’t sacrifice flavor, Fairlife ice cream is a fantastic option.
Made with Fairlife’s ultra-filtered milk, this ice cream is not only creamier but also packs more protein and less sugar than traditional ice cream.
Whether you’re looking to indulge in a guilt-free dessert or want a richer ice cream experience, Fairlife ice cream delivers on both taste and health benefits.
In this blog post, we’ll be sharing a simple yet delicious recipe that lets you make your very own Fairlife ice cream at home.
By using Fairlife milk, you’ll be able to enjoy a smooth, creamy treat with fewer calories, while still satisfying your sweet tooth. Get ready to create an indulgent dessert that is both healthy and delicious!

What is Fairlife Ice Cream?
Fairlife is a brand that focuses on offering dairy products with a difference. Their flagship product is Fairlife milk, which is ultra-filtered for a smoother taste, higher protein content, and lower sugar levels.
The milk undergoes a special filtration process that separates the water, protein, and lactose, allowing the company to create a milk that is richer in protein and calcium while keeping sugar levels lower than traditional milk.
Fairlife ice cream is made using this ultra-filtered milk, giving it a velvety smooth texture that you might not find in other store-bought ice creams.
What sets Fairlife ice cream apart is its balance between indulgence and health-conscious ingredients. It’s available in various flavors, including classics like vanilla and chocolate, and newer options like caramel and coffee.
By choosing Fairlife ice cream, you’re opting for a treat that’s more nutritious without compromising on taste. It’s also a great choice for those with dietary restrictions, as Fairlife offers lactose-free options, making it accessible for more people.
Whether you’re after a healthier dessert option or simply enjoy the taste of premium, filtered milk, Fairlife ice cream brings something extra to the table.
Why Choose Fairlife for Your Ice Cream Recipe?
When it comes to making homemade ice cream, choosing the right ingredients is key to getting the best flavor and texture. Fairlife ice cream stands out because it’s made with Fairlife’s ultra-filtered milk, which boasts higher protein, lower sugar, and a creamier texture compared to traditional milk. This means you can enjoy a rich, indulgent ice cream without feeling guilty about excessive sugar or calories.
Fairlife’s milk is also lactose-free, making it a great option for those who are sensitive to lactose or following a dairy-free lifestyle. By using Fairlife in your ice cream recipe, you’re ensuring that your dessert has more nutritional benefits, such as increased protein content, which can help keep you feeling fuller for longer. Additionally, the smoother consistency of Fairlife milk translates into a silky-smooth ice cream that’s easy to scoop and incredibly satisfying.
Another reason to opt for Fairlife is its versatility. Whether you’re making a simple vanilla flavor or experimenting with creative mix-ins, Fairlife’s milk will enhance the flavor and texture of any ice cream recipe. With less sugar than regular milk, you can adjust the sweetness level to your preference, ensuring a healthier yet indulgent treat.
In short, choosing Fairlife for your ice cream recipe means you’re not only making a healthier dessert but also ensuring a richer, creamier, and more satisfying ice cream experience.
Ingredients for the Fairlife Ice Cream Recipe
Making your own Fairlife ice cream at home is simple and rewarding.
Here’s what you’ll need to create a creamy, flavorful batch that you and your family will love:
Fairlife Milk
- The star ingredient of this recipe is Fairlife ultra-filtered milk. It’s available in several flavors, like vanilla, chocolate, and even whole milk options, depending on the flavor of ice cream you wish to create. The higher protein and lower sugar content of Fairlife milk will give your ice cream the perfect texture and sweetness.
Heavy Cream
- Adding heavy cream helps to create the rich, creamy texture that is characteristic of good ice cream. The fat content in heavy cream ensures that your ice cream remains smooth and doesn’t turn icy. You can substitute with coconut cream or another non-dairy option for a dairy-free version.
Sweetener
- To balance out the milk’s natural sweetness, you’ll need a sweetener. This can be granulated sugar, honey, or maple syrup, depending on your flavor preferences. If you’re aiming for a lower-sugar option, you can experiment with sugar alternatives like stevia or monk fruit sweetener.
Vanilla Extract (or Flavor of Choice)
- For a classic, rich flavor, you can’t go wrong with pure vanilla extract. It enhances the overall taste of the ice cream. If you’re feeling adventurous, you can substitute this with other flavorings like chocolate, fruit purees, or even coffee to create unique variations of your ice cream.
A Pinch of Salt
- A small amount of salt helps to balance the sweetness and brings out the natural flavors of the ingredients. It’s a crucial component in the recipe, even though the amount is minimal.
Optional Mix-ins
- Customize your Fairlife ice cream by adding mix-ins like chocolate chips, crushed cookies, chopped nuts, or swirls of caramel. These ingredients allow you to personalize your ice cream and create fun variations that suit your tastes.
With these simple yet high-quality ingredients, you’ll be able to create a delicious batch of homemade Fairlife ice cream that’s both healthier and more flavorful than store-bought options.
Step-by-Step Fairlife Ice Cream Recipe

Creating your own Fairlife ice cream at home is a rewarding and fun experience.
Here’s how to make it from scratch in just a few easy steps:
Step 1: Prepare the Base
Start by combining Fairlife milk and heavy cream in a saucepan. For a simple vanilla ice cream, add about 2 cups of Fairlife milk and 1 cup of heavy cream. Heat the mixture over medium heat, stirring occasionally until it’s warm but not boiling. Be careful not to let it scorch at the bottom.
Once warmed, add your sweetener (about ¾ cup of sugar, honey, or maple syrup depending on your preference) and a pinch of salt. Stir until fully dissolved.
If you’re using vanilla extract, add about 1 tablespoon now. This is the base of your ice cream, and it will set the tone for the final flavor.
Step 2: Chill the Mixture
After the base is well mixed and the sugar is dissolved, remove the pan from the heat. Let it cool down for a few minutes, and then transfer the mixture into a shallow container or bowl.
Place it in the fridge for at least 2 hours to cool completely. If you’re in a hurry, you can also chill it in the freezer, but make sure it doesn’t freeze before you’re ready to churn.
Chilling the mixture helps to prevent the ice cream from developing ice crystals during the freezing process, ensuring a creamy texture.
Step 3: Churn the Ice Cream
Once the mixture has cooled, it’s time to churn! If you have an ice cream maker, pour the mixture into the machine and follow the manufacturer’s instructions. Typically, it will take about 20-25 minutes for the ice cream to reach a soft-serve consistency.
If you don’t have an ice cream maker, no worries! You can still make ice cream by transferring the chilled mixture into a freezer-safe container.
Every 30 minutes, take it out and stir vigorously with a fork to break up any ice crystals. Continue until the ice cream has firmed up (this may take 3-4 hours).
Step 4: Freeze and Set
Once the ice cream has reached the desired consistency, transfer it into an airtight container. Smooth the top with a spatula, and cover it with plastic wrap to prevent freezer burn. Place the container in the freezer for at least 4 hours, or overnight, to firm up fully.
After the freezing period, your Fairlife ice cream is ready to be scooped and enjoyed. For the perfect scoop, let the ice cream sit at room temperature for 5 minutes before serving.
Customizing Your Fairlife Ice Cream Flavor
The beauty of making ice cream at home is the freedom to customize it exactly how you like. Once you’ve mastered the basic Fairlife ice cream recipe, feel free to get creative and try some exciting flavor variations.
Here are a few ideas to get you started:
Chocolate Lovers: Adding cocoa powder or melted chocolate
If you’re a fan of rich, chocolatey ice cream, try adding ½ cup of unsweetened cocoa powder or 4 oz. of melted chocolate to the milk and cream mixture. Stir well to incorporate.
You can even add chocolate chips or chunks during the churning process for an extra chocolatey bite.
Fruity Flavors: Incorporating fruit puree or zest
For a refreshing twist, try blending fresh fruit like strawberries, raspberries, or mangoes into a puree. Swirl the puree into the ice cream after churning, or mix it directly into the base before churning.
You can also add citrus zest, like lemon or orange, for a zesty burst of flavor.
Nutty Additions: Adding crushed nuts or nut butters
If you love a bit of crunch in your ice cream, consider adding crushed nuts such as almonds, pistachios, or pecans. You can either stir them into the mixture before freezing or sprinkle them on top when serving.
Alternatively, you could swirl in nut butters like peanut butter or almond butter for a creamy and nutty flavor.
Swirl Options: Making marbled ice cream with sauces
For a fun twist, try adding swirls of your favorite sauce after the ice cream has been churned. You can use caramel sauce, chocolate fudge, or fruit jams.
Pour the sauce into the container with the ice cream and gently swirl it in with a spatula. The result is a marbled effect that adds both flavor and visual appeal.
Cookie Cravings: Adding crushed cookies or candies
Crushed cookies (like Oreos, chocolate chip cookies, or shortbread) or candy pieces (like crushed candy bars or caramel toffee bits) make delicious mix-ins. Add them just before the ice cream finishes churning so they stay intact but well-distributed throughout the base.
The possibilities are endless when it comes to customizing your Fairlife ice cream. Get creative and experiment with different flavor combinations and textures to make this homemade treat uniquely yours.
Tips for Perfecting Your Fairlife Ice Cream
To ensure your Fairlife ice cream turns out perfectly every time, here are a few helpful tips to keep in mind:
Achieving the Right Consistency
The key to smooth, creamy ice cream is controlling the texture throughout the freezing process. When making ice cream with an ice cream maker, make sure you follow the manufacturer’s instructions closely.
If you’re using the freezer-and-stir method, be patient and stir the mixture every 30 minutes during the freezing process to break up any ice crystals.
Use Full-Fat Dairy for Creaminess
While Fairlife milk is a fantastic base, adding heavy cream will elevate the texture and make your ice cream even creamier. The more fat you use, the smoother your ice cream will be.
If you prefer a lighter version, you can try substituting with low-fat or dairy-free alternatives, but be aware that it may affect the richness of the final product.
Don’t Over-Churn
Over-churning can lead to a grainy texture. Once the mixture reaches the consistency of soft-serve ice cream, stop the churning process. For the freezer-and-stir method, don’t stir the mixture for too long either—once it’s firm enough, let it freeze completely.
Let the Ice Cream Soften Before Scooping
Homemade ice cream tends to freeze harder than store-bought versions due to the absence of stabilizers. Before scooping, let your ice cream sit at room temperature for about 5-10 minutes to soften slightly, making it easier to serve.
Store Properly to Avoid Ice Crystals
Once your ice cream has set, store it in an airtight container and press a layer of plastic wrap directly on the surface of the ice cream to prevent freezer burn. This helps to keep the texture smooth and avoid the formation of ice crystals.
Conclusion
Making your own Fairlife ice cream is a fun and rewarding experience that lets you enjoy a healthier, creamier dessert without compromising on flavor.
By using Fairlife’s ultra-filtered milk, you’re adding extra protein, fewer sugars, and a smoother texture to your homemade treat. Whether you stick to a classic flavor or get creative with mix-ins, this recipe provides endless possibilities for customization.
Homemade ice cream made with Fairlife is not only a great way to indulge in a delicious dessert, but it’s also a fantastic way to enjoy a more nutritious version of your favorite treat.
So gather your ingredients, follow the simple steps, and enjoy the creamy goodness of homemade Fairlife ice cream!
Frequently Asked Questions
1. Can I make Fairlife ice cream without an ice cream maker?
Yes! If you don’t have an ice cream maker, you can still make homemade ice cream by freezing the mixture and stirring it every 30 minutes to break up ice crystals. This process mimics churning and helps achieve a creamy texture.
2. Can I use non-dairy Fairlife alternatives?
While Fairlife offers lactose-free milk, they don’t currently offer a plant-based milk alternative. However, you can substitute Fairlife milk with another dairy-free milk such as almond milk, coconut milk, or oat milk. Keep in mind that this may affect the final texture and flavor of the ice cream.
3. How can I make Fairlife ice cream sweeter?
If you prefer a sweeter ice cream, you can add more sweetener to taste. You can use granulated sugar, honey, maple syrup, or even natural sweeteners like stevia or monk fruit. Be sure to adjust to your personal preference!
4. How long can I store homemade Fairlife ice cream?
Homemade Fairlife ice cream can be stored in an airtight container in the freezer for up to 2-3 weeks. To preserve freshness, place a layer of plastic wrap directly on the surface of the ice cream before sealing the container.
5. Can I make Fairlife ice cream in advance for a special occasion?
Absolutely! Fairlife ice cream can be made in advance and stored in the freezer until you’re ready to serve. Just be sure to let it soften slightly before scooping so it’s easier to dish out when the time comes.

Fairlife Ice Cream
Equipment
- 1 Medium saucepan (for heating the milk and cream)
- 1 Whisk (for stirring)
- 1 Mixing bowl (for chilling the mixture)
- 1 ice cream maker (optional)
- 1 Freezer-safe container (for storing the ice cream)
- 1 Spatula (for stirring and scraping)
Ingredients
- 2 cups Fairlife ultra-filtered milk
- 1 cup Heavy cream
- ¾ cup Sugar or preferred sweetener
- 1 tsp Vanilla extract
- Pinch Salt
Optional Mix-ins (as desired):
- ½ cup Chocolate chips
- ¼ cup Crushed nuts
- 1 cup Fruit puree strawberry, mango, etc.
- 3 tbsp Chocolate syrup or caramel sauce
Instructions
Prepare the base:
- In a medium saucepan, combine the Fairlife milk and heavy cream. Heat over medium heat until warm but not boiling. Stir in the sugar and salt, and mix until fully dissolved. Remove from heat and add vanilla extract.
Chill the mixture:
- Let the mixture cool to room temperature, then transfer it to a shallow container or mixing bowl. Refrigerate for at least 2 hours (or until completely chilled).
Churn the ice cream:
- Once the mixture is fully chilled, pour it into your ice cream maker and churn according to the manufacturer’s instructions (usually 20-25 minutes). If using the freezer-and-stir method, transfer the mixture into a freezer-safe container and freeze. Stir vigorously every 30 minutes to break up ice crystals.
Add optional mix-ins:
- If you’re using any mix-ins like chocolate chips, nuts, or fruit, add them to the mixture during the last 5 minutes of churning or gently swirl them in after churning is complete.
Freeze and set:
- Once the ice cream has reached soft-serve consistency, transfer it to an airtight container. Cover with plastic wrap and freeze for 4-6 hours, or until fully set.
Serve:
- Before serving, let the ice cream sit at room temperature for a few minutes to soften slightly. Scoop and enjoy!
Notes
- Dairy-free alternatives: If you prefer a dairy-free version, substitute the Fairlife milk with almond, coconut, or oat milk. You may need to adjust the texture slightly by adding more cream or a thickening agent.
- Sweetener options: Feel free to use alternative sweeteners like stevia, monk fruit, or maple syrup if you’re cutting back on sugar.
- Storage: Store leftover ice cream in an airtight container in the freezer for up to 2-3 weeks. To maintain smooth texture, press plastic wrap against the surface of the ice cream before sealing it.


