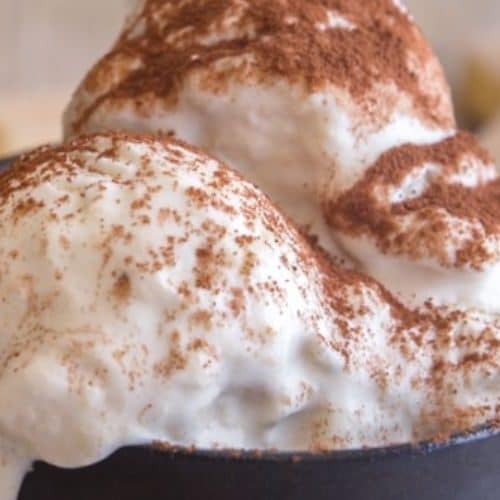
Tiramisu Ice Cream
This Tiramisu Ice Cream is the perfect dessert for those who love both the classic Italian tiramisu and the creamy, indulgent texture of homemade ice cream. Combining rich coffee flavor, smooth mascarpone cheese, and soft ladyfingers, this dessert is a true delight. With the right balance of coffee, cream, and cake, it's a treat that is perfect for any occasion, whether it's a summer celebration or a cozy evening treat. The recipe is simple to follow and provides a luxurious homemade dessert that's both refreshing and indulgent.
Equipment
- 1 ice cream maker (optional) – for churning the ice cream
- 2 Mixing Bowls – for combining ingredients
- 1 Whisk (or electric mixer) – for blending the cream mixture
- 1 Airtight Freezer Container – for storing ice cream
- 1 Spoon or Ice Cream Scoop – for serving
Ingredients
- 2 cups 480 ml Heavy Cream
- 1 cup 240 ml Whole Milk
- 1 can 14 oz Sweetened Condensed Milk
- 1 tsp Vanilla Extract
- 1 cup 240 ml Strong Brewed Coffee or Espresso (cooled)
- 1 tbsp Coffee Liqueur optional, such as Kahlua
- 8 oz 225 g Mascarpone Cheese
- 8-10 Ladyfinger Cookies or more, depending on preference
- 2 tbsp Unsweetened Cocoa Powder for garnish
- 1 oz 30 g Dark Chocolate (optional, for extra garnish)
Instructions
Brew the Coffee
- Brew 1 cup of strong coffee or espresso. Allow it to cool to room temperature.If you want a stronger flavor, add 1 tbsp of coffee liqueur (optional) to the coffee. Set aside.
Prepare the Ice Cream Base
- In a large mixing bowl, whisk together 2 cups heavy cream, 1 cup milk, and 1 can sweetened condensed milk until smooth. Add 1 tsp vanilla extract and stir to combine. Chill the mixture for at least 30 minutes in the refrigerator.
Incorporate the Mascarpone
- In another bowl, gently whisk 8 oz mascarpone cheese until smooth. Fold it into the chilled cream mixture until fully incorporated, ensuring there are no lumps.
Soak the Ladyfingers
- Briefly dip the ladyfinger cookies into the cooled coffee, soaking them just enough to moisten them without turning them soggy. Break the soaked ladyfingers into small pieces and gently fold them into the ice cream mixture.
Churn the Ice Cream
- Pour the mixture into an ice cream maker and churn according to the manufacturer's instructions. Typically, this will take 20-30 minutes. If you're using an alternative method, pour the mixture into a shallow container and freeze, stirring every 30 minutes for 2-3 hours to break up ice crystals.
Freeze and Garnish
- Once the ice cream reaches the desired consistency, transfer it to an airtight container. Freeze for at least 4 hours or overnight.
- Before serving, sprinkle with unsweetened cocoa powder and grated dark chocolate (optional) for an extra touch.
Notes
- No Ice Cream Maker?: If you don’t have an ice cream maker, you can still make this by pouring the mixture into an airtight container and stirring it every 30 minutes while it freezes. This prevents ice crystals and helps achieve a smoother texture.
- Alcohol-Free Version: Skip the coffee liqueur if you prefer an alcohol-free version. The coffee flavor alone will shine through beautifully.
- Customize Flavors: Feel free to adjust the coffee strength by adding more or less brewed coffee or espresso to your liking. You can also experiment with different chocolate garnishes or additional flavoring like cinnamon.
- Storage: Keep the ice cream in an airtight container to avoid freezer burn. It will stay fresh for up to 2 weeks.