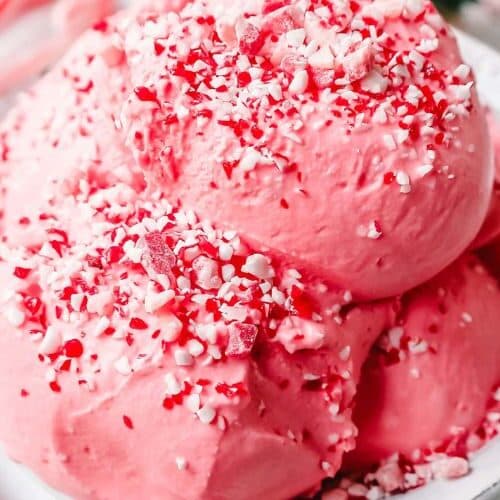
Peppermint Ice Cream
This homemade Peppermint Ice Cream is the perfect way to enjoy the cool, refreshing flavor of peppermint in a creamy, smooth dessert. With a balance of rich creaminess and minty goodness, this recipe makes a perfect holiday treat or a year-round indulgence. Whether you’re using an ice cream maker or opting for a no-churn version, this easy recipe guarantees delicious results. You’ll love how fresh peppermint pairs with the velvety texture of the base to create a decadent and festive treat for any occasion.
Equipment
- Ice Cream Maker: 1 (recommended for best results, but optional for no-churn version)
- Saucepan: 1 medium (for cooking the custard base if using)
- Mixing Bowl: 1 large (for combining ingredients)
- Whisk: 1 (for tempering egg yolks)
- Airtight Container – 1 (for freezing the ice cream)
- Measuring Cups and Spoons: 1 set (for accuracy)
- Plastic Wrap: 1 roll (to prevent ice crystals from forming)
Ingredients
- 2 cups 480 ml Heavy Cream
- 1 cup 240 ml Whole Milk
- ¾ cup 150 g Granulated Sugar
- 4 large Egg Yolks optional, for custard base
- 1 to 1 ½ teaspoons Peppermint Extract
- ¼ cup 30 g Crushed Candy Canes (optional, for texture)
- A few drops Green Food Coloring optional, for a festive touch
Instructions
Prepare the Ice Cream Base:
- In a large mixing bowl, whisk together heavy cream, whole milk, and granulated sugar. If using egg yolks for a custard base, separate the egg yolks and whisk them in a separate bowl with 2 tablespoons of sugar until smooth.
Heat the Mixture:
- In a medium saucepan, heat the milk and cream mixture over medium heat until it begins to steam (don’t let it boil). For custard, slowly add the warm mixture to the egg yolks while whisking constantly, then return to the pan and cook over low heat until the mixture thickens slightly.
Add Peppermint Flavor:
- Once the base is ready, remove it from the heat and stir in peppermint extract. If using, fold in the crushed candy canes and green food coloring.
Chill the Base:
- Pour the mixture into a clean bowl, cover with plastic wrap, and refrigerate for at least 4 hours (overnight is best) to chill.
Churn the Ice Cream:
- Once the base is chilled, pour it into an ice cream maker and churn according to the manufacturer’s instructions (about 20–25 minutes) until it reaches a soft-serve consistency.
Freeze the Ice Cream:
- Transfer the ice cream to an airtight container. Press plastic wrap against the surface to prevent ice crystals from forming, and freeze for at least 4 hours or until firm.
Serve and Enjoy:
- Scoop and serve your homemade peppermint ice cream in bowls or cones. Enjoy the refreshing mint flavor and creamy texture!
Notes
- Chill Time is Key: Make sure to chill the base thoroughly before churning to achieve a creamy texture. Skipping this step may result in ice crystals.
- Egg-Free Option: If you prefer an egg-free version, you can omit the egg yolks and simply mix the cream, milk, and sugar. This will give you a lighter, simpler ice cream, but it won’t have the custard-style richness.
- Vegan & Dairy-Free: For a vegan version, swap the heavy cream and whole milk for coconut milk or almond milk. Ensure that you also use a plant-based sugar and peppermint extract to keep the recipe fully dairy-free.
- Add-Ins: Feel free to experiment by adding chocolate chips, chopped cookies, or a fudge swirl to make the ice cream even more indulgent.
- Storage: Store the ice cream in an airtight container in the freezer for up to 2 weeks for optimal freshness.