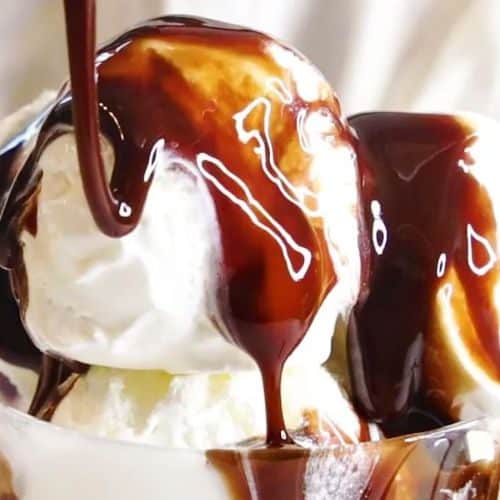
Non Dairy Sugar Free Ice Cream
This Non-Dairy Sugar-Free Ice Cream is a delicious, creamy dessert that’s perfect for anyone following a dairy-free, low-sugar, or vegan lifestyle. Made with simple ingredients like non-dairy milk and natural sweeteners, this ice cream is smooth, rich, and customizable to fit your flavor preferences. Whether you enjoy classic vanilla, rich chocolate, or fruity variations, this recipe gives you the freedom to create a healthier, indulgent treat without the added sugars or dairy. Best of all, it’s easy to make at home with just a few simple steps!
Equipment
- Ice Cream Maker (Optional, for churning)Amount: 1Name: Ice Cream Maker
- Saucepan Amount: 1Name: Medium Saucepan
- Whisk Amount: 1Name: Whisk
- Spatula Amount: 1Name: Rubber Spatula
- Freezer-Safe Container Amount: 1Name: Airtight Container for Freezing
- Measuring Cups & Spoons Amount: 1 Set Name: Measuring Cups & Spoons
Ingredients
- 2 cups Non-Dairy Milk Coconut, Almond, or Oat
- 1/2 cup Sugar-Free Sweetener Erythritol, Stevia, or Monk Fruit
- 1 teaspoon Vanilla Extract or 1/4 cup of fruit puree for a different flavor
- 1 teaspoon Arrowroot Powder or guar gum, for thickening
- Pinch of Salt
Optional Add-ins:
- Chocolate Chips
- Crushed Nuts
- Fruit Puree
- Cocoa Powder for chocolate flavor
Instructions
Heat the Non-Dairy Milk Base:
- Pour the non-dairy milk into a medium saucepan and heat it over medium heat. Stir occasionally, allowing it to warm up without boiling.
Sweeten the Mixture:
- Once the milk is warm, add your sugar-free sweetener (erythritol, stevia, or monk fruit). Stir constantly until the sweetener has dissolved completely.
Thicken the Ice Cream Base:
- Mix the arrowroot powder with a little cold non-dairy milk to form a slurry. Slowly add the slurry into the warm milk mixture, whisking constantly to avoid clumps. Continue cooking for 3-5 minutes until the mixture thickens to a custard-like consistency.
Add Flavoring:
- Remove the saucepan from the heat and stir in your vanilla extract (or cocoa powder if making chocolate ice cream). Let the mixture cool for a few minutes.
Chill the Base:
- Transfer the mixture to a heatproof bowl, cover it, and refrigerate for at least 2 hours or until completely chilled.
Churn the Ice Cream:
- Once chilled, pour the mixture into an ice cream maker and churn according to the manufacturer's instructions (about 20-25 minutes). If you don’t have an ice cream maker, pour the mixture into a shallow dish and freeze, stirring vigorously every 30 minutes until it reaches the desired consistency (2-3 hours).
Add Mix-ins (Optional):
- If desired, fold in chocolate chips, crushed nuts, or fruit puree after churning. Mix gently to distribute the add-ins evenly.
Freeze to Set:
- Transfer the ice cream to a freezer-safe container, smooth the top, and place it in the freezer for at least 4 hours, or until firm.
Serve and Enjoy:
- Scoop and serve your delicious non-dairy sugar-free ice cream with your favorite toppings and enjoy!
Notes
- Chilling Time: Ensure the ice cream base is completely chilled before churning to achieve the best texture.
- Sweetener Options: You can experiment with various sugar-free sweeteners like stevia, erythritol, or monk fruit. Adjust the amount based on your sweetness preference, as some are sweeter than others.
- Flavor Variations: Customize your ice cream with different flavorings, such as cocoa powder for chocolate, fruit purees for fruity ice cream, or peppermint extract for a minty treat.
- No Ice Cream Maker? No worries! Just stir the mixture every 30 minutes while it freezes to break up ice crystals, and you’ll still get a smooth, creamy ice cream.