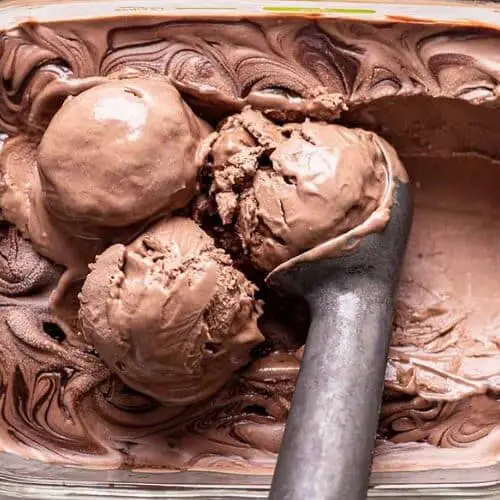
Non Dairy Ice Cream
This Non-Dairy Ice Cream recipe is the perfect homemade dessert for anyone looking for a creamy, dairy-free treat. Made with a rich base of non-dairy milk and sweetened naturally, it’s a customizable dessert that can be adapted to suit your favorite flavors. Whether you’re vegan, lactose intolerant, or just looking to make a healthier alternative to store-bought ice cream, this recipe provides a satisfying and creamy result every time. Best of all, it’s simple to make and you can enjoy it as a classic scoop, sundae, or even milkshake.
Equipment
- 1 Medium Mixing Bowl
- 1 Whisk or Hand Mixer
- 1 spatula
- 1 Ice Cream Maker (optional, but highly recommended)
- 1 airtight freezer-safe container
- 1 blender (optional, for fruit-based ice cream)
Ingredients
For the base:
- 2 cups 480 ml coconut milk (or any full-fat non-dairy milk of your choice)
- 3/4 cup 150 g coconut sugar (or maple syrup, agave, or other sweetener)
- 1 tsp vanilla extract or vanilla bean paste for extra flavor
- 1 tbsp cornstarch optional, to thicken and create a smoother texture
- 1/4 tsp salt
For flavor variations:
- Choose any of the following flavor variations and adjust based on preference
Chocolate flavor:
- Add 1/4 cup 25 g unsweetened cocoa powder or melted dairy-free chocolate
Strawberry flavor:
- Add 1 cup 150 g fresh strawberries, pureed
Peanut Butter flavor:
- Add 1/4 cup 60 g creamy peanut butter
Mint Chocolate Chip flavor:
- Add 1/2 tsp peppermint extract and 1/4 cup 40 g dairy-free chocolate chips
Fruit flavors:
- Add 1-2 cups fresh or frozen fruit like mango or blueberry, pureed
Instructions
Prepare the base:
- In a medium saucepan, combine the non-dairy milk, coconut sugar, salt, and cornstarch (if using). Whisk the mixture together until the sugar is fully dissolved and there are no lumps.
Heat the mixture:
- Place the saucepan over medium heat and bring the mixture to a simmer. Stir frequently for about 5 minutes, or until it thickens slightly. Once it has thickened, remove the pan from the heat and allow it to cool for a few minutes.
Flavor the ice cream base:
- Once the base has cooled slightly, stir in your chosen flavoring (e.g., vanilla extract, cocoa powder, fruit puree, or peanut butter) until fully combined. Taste and adjust sweetness if needed.
Chill the mixture:
- Pour the mixture into a bowl, cover, and place it in the fridge to chill for at least 2 hours, or until it’s completely cold.
Churn the ice cream (optional but recommended):
- Once chilled, pour the mixture into an ice cream maker and churn according to the manufacturer’s instructions, usually about 20-30 minutes.
Freeze the ice cream:
- Transfer the churned ice cream into an airtight container, and freeze for 4-6 hours or overnight until firm. If you don’t have an ice cream maker, simply pour the chilled mixture into a freezer-safe container and stir every 30 minutes during the freezing process to prevent large ice crystals from forming.
Serve and enjoy:
- Allow the ice cream to sit at room temperature for a few minutes before serving to soften slightly. Scoop into bowls or cones and enjoy!
Notes
- Non-Dairy Milk: You can use a variety of plant-based milks such as almond milk, cashew milk, or oat milk. However, coconut milk (full-fat) gives the creamiest results.
- Sweetener Options: Coconut sugar, maple syrup, and agave nectar are all great sweetener options. Feel free to adjust the sweetness to your taste preference.
- Ice Cream Maker Tips: Using an ice cream maker helps achieve a smooth texture with minimal ice crystals. If you don’t have one, use the freezing-and-stirring method outlined above.
- Flavor Variations: This recipe is extremely versatile, so you can adjust the flavors based on what you love. Fruit-based ice creams (like strawberry or mango) can be made by pureeing fresh or frozen fruit and mixing it into the base.
- Storage: Store your ice cream in an airtight container in the freezer for up to 2 weeks. Make sure to let it soften a bit before serving, as homemade ice cream can be quite firm when freshly frozen.