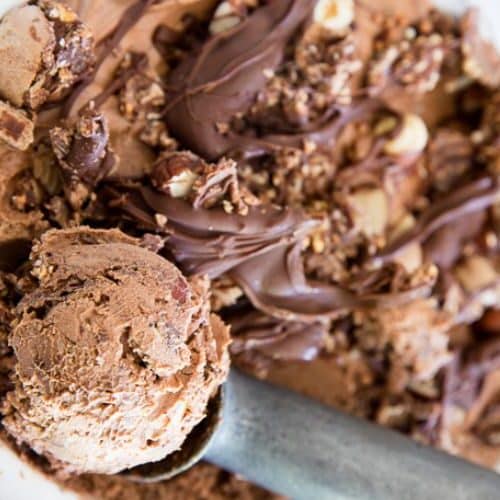
Ice Cream Nutella
This Nutella Ice Cream is a rich, creamy, and indulgent dessert that requires just a few simple ingredients. Whether you make it with or without an ice cream maker, the result is a smooth, chocolate-hazelnut treat that’s perfect for any Nutella lover. Serve it in a cone, bowl, or alongside your favorite desserts for a delightful frozen experience!Nutrition Facts (Per Serving)Calories: 320, Total Fat: 22g, Saturated Fat: 11g, Cholesterol: 70mg, Sodium: 80mg, Total Carbohydrates: 29g, Sugars: 26g, Protein: 4g, Calcium: 10% DV, Iron: 4% DVEstimated based on one serving (assuming 8 servings per batch)
Equipment
- 1 large mixing bowl
- (1) Hand mixer or stand mixer
- 1 spatula
- 1 Measuring cups and spoons
- 1 Loaf pan or airtight container
- 1 Plastic wrap or lid for storage
Ingredients
Basic Ingredients:
- 1 cup 300g Nutella
- 2 cups 480ml heavy whipping cream
- 1 can 14oz/397g sweetened condensed milk
- 1 teaspoon 5ml vanilla extract
- 1 pinch salt
Optional Add-Ins & Toppings:
- ¼ cup 30g chopped hazelnuts
- ¼ cup 40g chocolate chips
- ¼ cup 60ml caramel sauce
- Extra Nutella for drizzling
Instructions
Step 1: Prepare the Nutella Mixture
- In a large mixing bowl, combine Nutella, sweetened condensed milk, vanilla extract, and salt. Stir until fully blended.
Step 2: Whip the Cream
- In another bowl, use a hand mixer or stand mixer to whip the heavy whipping cream on medium-high speed until it forms stiff peaks (about 3–4 minutes).
Step 3: Combine the Mixtures
- Gently fold the whipped cream into the Nutella mixture using a spatula. Fold slowly to maintain the airiness of the whipped cream.
Step 4: Add Mix-Ins (Optional)
- If using hazelnuts, chocolate chips, or caramel sauce, fold them in at this stage. You can also drizzle in extra Nutella for a marbled effect.
- Step 5: Freeze the Ice Cream
- Transfer the mixture into a loaf pan or airtight container. Smooth the top, cover with plastic wrap (pressing it against the surface to prevent ice crystals), and freeze for at least 6 hours or overnight.
Step 6: Serve & Enjoy!
- Once frozen, scoop the Nutella ice cream into bowls or cones. Top with extra Nutella drizzle, nuts, or whipped cream for a decadent treat!
Notes
- Storage: Keep in an airtight container in the freezer for up to 2 weeks.
- Softening Tip: Let the ice cream sit at room temperature for 5–10 minutes before scooping for a creamier texture.
- Churned Version: If using an ice cream maker, simply mix all ingredients and churn according to your machine’s instructions for an ultra-smooth finish.
- Dairy-Free Alternative: Use full-fat coconut milk instead of heavy cream and a dairy-free chocolate hazelnut spread.
- Flavor Boost: Add 1 tablespoon of espresso powder for a Nutella Mocha Ice Cream variation.