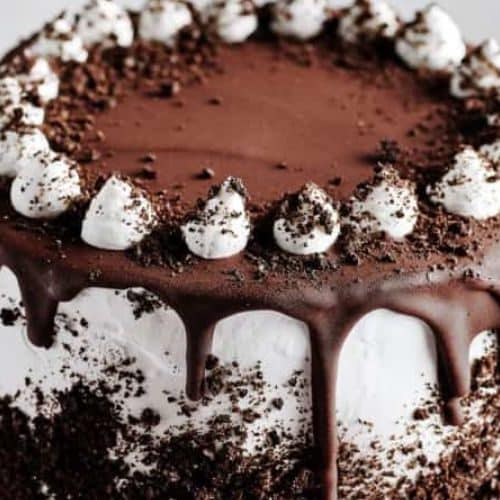
Dairy Free Ice Cream Cake
This Dairy-Free Ice Cream Cake is a refreshing, indulgent dessert that combines creamy dairy-free ice cream with a soft cake base and decadent toppings. Perfect for any occasion, it’s easy to make, customizable, and caters to those with dietary restrictions, offering all the indulgence of a classic ice cream cake without the dairy. Layers of smooth, plant-based ice cream are paired with a crunchy cake or cookie base, topped with whipped cream, fruit, and chocolate drizzle for a show-stopping treat that everyone can enjoy.
Equipment
- Springform Pan – 1 (9-inch round)
- Spatula (1)
- Offset Spatula – 1 (optional, for smoothing ice cream)
- Mixing Bowl – 1 (for crushed cookies, if used)
- Knife – 1 (for slicing the cake)
- Whisk – 1 (if using to whip dairy-free whipped cream)
Ingredients
For the Cake Base:
- 2 cups Crushed Dairy-Free Cookies such as Oreos or graham crackers
- 4 tbsp Dairy-Free Butter melted
For the Ice Cream Layers:
- 1.5 quarts Dairy-Free Ice Cream choose your preferred flavor; coconut, almond, soy, or oat milk-based
- 2 cups Dairy-Free Whipped Cream optional, for topping
For the Toppings:
- 1/2 cup Fresh Fruit berries, sliced bananas, or kiwi
- 1/4 cup Dairy-Free Chocolate Chips or chocolate drizzle
- 1/4 cup Crushed Nuts optional, almonds, walnuts, etc.
Instructions
Prepare the Cake Base:
- If using cookies, crush them in a food processor or by hand. Mix with the melted dairy-free butter until combined.
- Press the mixture into the bottom of a 9-inch springform pan. Use the back of a spoon to pack it down tightly and evenly.
- Freeze the base for at least 15 minutes to set while you prepare the ice cream.
Soften the Ice Cream:
- Remove the dairy-free ice cream from the freezer and allow it to soften for 10-15 minutes. This will make it easier to spread.
Layer the Ice Cream:
- Once the cake base is set, scoop a layer of softened dairy-free ice cream onto the cake base. Use an offset spatula or the back of a spoon to spread it evenly.
- Add additional layers of ice cream, smoothing them as you go. You can use different flavors or keep it simple with one flavor.
Freeze the Cake:
- After layering the ice cream, return the cake to the freezer for at least 4 hours, or overnight, until fully set.
Add Toppings and Decorations:
- Once the cake is frozen and firm, remove it from the springform pan.
- Top with dairy-free whipped cream, fresh fruit, chocolate drizzle, and crushed nuts as desired.
Serve and Enjoy:
- Let the cake sit at room temperature for a few minutes to make slicing easier. Serve and enjoy!
Notes
- Make-Ahead Option: This cake is perfect for preparing ahead of time. You can assemble it the day before and keep it in the freezer until ready to serve.
- Ice Cream Choices: For the best results, choose rich and creamy dairy-free ice cream varieties, such as coconut milk-based ice cream, which gives the cake a smooth texture. You can mix and match flavors for fun combinations.
- Gluten-Free Option: To make this cake gluten-free, use gluten-free dairy-free cookies or a gluten-free cake base.
- Toppings: Feel free to get creative with toppings! You can add a mix of fresh fruit, granola, nuts, or even some crumbled dairy-free cookies for added crunch.
- Serving Tip: For cleaner slices, use a sharp knife and dip it in warm water before cutting into the cake.