All products are selected by our editorial team for quality. If you buy through our links, we may earn a small commission at no extra cost to you.
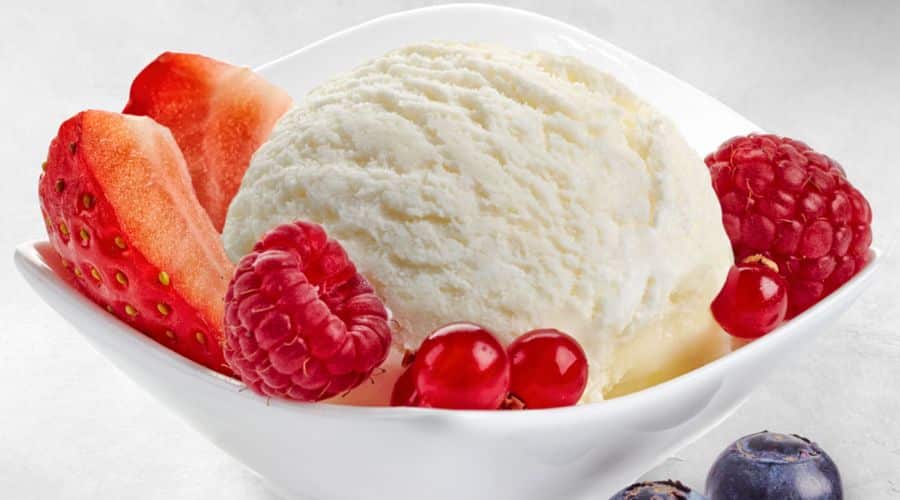
There’s nothing quite as indulgent as a scoop of smooth, creamy vanilla bean ice cream—especially when it’s completely dairy-free and made with wholesome plant-based ingredients.
This vegan vanilla bean ice cream recipe is the perfect treat for anyone looking for a rich, velvety dessert without relying on dairy or artificial flavors.
Unlike store-bought options that often contain preservatives and excessive sugar, this homemade version is crafted with natural ingredients, allowing the delicate yet bold vanilla flavor to shine.
Whether you’re enjoying it on a hot summer day, serving it at a special gathering, or simply satisfying a sweet craving, this ice cream is bound to become a favorite.
Even better? You don’t need any fancy equipment to make it.
While an ice cream maker helps achieve that classic texture, we’ll also cover a no-churn method so you can whip up this frozen delight with just a blender and a little patience.

Why You’ll Love This Recipe
1. Lusciously Creamy Without Dairy
Thanks to full-fat coconut milk and a touch of cashews (optional), this ice cream rivals traditional dairy-based versions.
You get a silky-smooth texture without any heavy cream or eggs.
2. Real Vanilla Flavor
This recipe doesn’t rely on artificial vanilla extracts—it uses real vanilla bean pods for a deep, aromatic flavor that makes each bite truly special.
If you love vanilla, this is the ultimate way to enjoy it.
3. Simple Ingredients, No Preservatives
Unlike commercial vegan ice creams that often include gums and stabilizers, this recipe keeps things simple and natural.
Every ingredient serves a purpose, enhancing both the taste and texture.
4. Easy to Make (With or Without an Ice Cream Maker!)
While churning the mixture in an ice cream maker creates the creamiest consistency, you can still make this recipe without one.
We’ll share a no-churn method that ensures a delicious outcome.
5. Perfect for Any Occasion
Whether you’re topping it with fresh berries, drizzling it with dairy-free chocolate sauce, or serving it alongside a slice of warm pie, this vanilla bean ice cream is a versatile dessert that complements any treat.
Get ready to create a scoop-worthy, homemade vegan vanilla bean ice cream that will have everyone coming back for more! Next, let’s dive into the ingredients you’ll need. 🍦✨
Ingredients Needed
The key to a rich and creamy vegan vanilla bean ice cream lies in using high-quality, plant-based ingredients that mimic the smoothness of traditional dairy ice cream.
Each ingredient plays a role in enhancing texture and flavor, resulting in a perfectly balanced frozen treat.
Main Ingredients:
- Full-Fat Coconut Milk (2 cans, 13.5 oz each) – The base of this ice cream, providing creaminess and a luscious mouthfeel.
- Raw Cashews (½ cup, soaked and drained, optional) – Adds extra richness and a smooth, custard-like texture. (Skip if allergic or prefer a lighter texture.)
- Vanilla Bean Pod (1 whole pod, or 2 tsp pure vanilla extract) – The star ingredient! Using a real vanilla bean delivers a deep, aromatic flavor.
- Maple Syrup or Agave Nectar (½ cup) – A natural sweetener that blends well and keeps the ice cream soft.
- Arrowroot Starch or Cornstarch (1 tbsp) – Helps thicken the mixture for a silkier texture.
- Sea Salt (¼ tsp) – Enhances the vanilla flavor and balances the sweetness.
Optional Add-Ins for Extra Flavor:
- Almond or Oat Milk (¼ cup) – If you prefer a slightly lighter consistency.
- Coconut Sugar or Date Syrup – Can be used instead of maple syrup for a caramel-like sweetness.
- Chopped Nuts or Dairy-Free Chocolate Chips – Stir these in for a crunchy contrast.
Now that we have our ingredients ready, let’s go over the tools you’ll need to make this ice cream effortlessly.
Equipment You’ll Need
Making homemade vegan vanilla bean ice cream is simple, and you don’t need fancy kitchen gadgets.
However, having the right tools will ensure the creamiest consistency.
Essential Tools:
- High-Speed Blender or Food Processor – Blends the ingredients into a silky-smooth base.
- Mixing Bowls & Whisk – For combining and thickening the mixture.
- Saucepan – Used to gently heat and thicken the ice cream base.
- Fine Mesh Strainer (Optional) – Helps remove any lumps for an ultra-smooth texture.
- Ice Cream Maker (Recommended but Optional) – Churns the mixture for the best consistency.
No-Churn Method Equipment:
- Shallow Freezer-Safe Container – A metal loaf pan or glass container works best.
- Spatula or Spoon – For stirring the mixture as it freezes.
- Hand Mixer (Optional) – Helps break up ice crystals for a creamier result.
With these ingredients and tools ready, we’re all set to make the most decadent dairy-free vanilla bean ice cream.
Next, let’s walk through the step-by-step process! 🍦✨
Step-by-Step Instructions

Making vegan vanilla bean ice cream is easier than you might think! Follow these simple steps to achieve a perfectly creamy and flavorful dessert.
Whether you’re using an ice cream maker or a no-churn method, the result will be a deliciously smooth frozen treat.
Step 1: Prepare the Vanilla Bean Base
- Split the Vanilla Bean Pod: Using a sharp knife, slice the vanilla bean pod lengthwise. Scrape out the tiny black seeds with the tip of the knife and set them aside.
- Blend the Ingredients: In a high-speed blender, combine coconut milk, soaked cashews (if using), maple syrup, vanilla bean seeds (or extract), and sea salt. Blend until completely smooth.
Step 2: Heat and Thicken the Mixture
- Transfer to a Saucepan: Pour the blended mixture into a saucepan over medium heat.
- Add the Thickener: Whisk in arrowroot starch or cornstarch until fully dissolved.
- Simmer Gently: Stir continuously for 3-5 minutes until the mixture thickens slightly (it should coat the back of a spoon). Do not boil!
- Cool the Mixture: Remove from heat and let it cool for 10 minutes before transferring to a bowl. Cover and refrigerate for at least 4 hours (or overnight for the best results).
Step 3: Churn the Ice Cream
- Pour into an Ice Cream Maker: Once chilled, transfer the mixture to your ice cream maker and churn according to the manufacturer’s instructions (typically 20-30 minutes).
- Check the Texture: The ice cream should be thick and creamy, similar to soft serve.
Step 4: Freeze and Set
- Transfer to a Container: Pour the churned ice cream into a freezer-safe container. Smooth the top with a spatula.
- Cover and Freeze: Press a piece of parchment paper against the surface (to prevent ice crystals) and freeze for at least 2-4 hours until firm.
No-Churn Method (Without an Ice Cream Maker)
- Pour the chilled mixture into a shallow freezer-safe dish.
- Freeze for 45 minutes, then stir vigorously with a fork or whisk.
- Repeat this process every 30 minutes for about 3 hours. This prevents ice crystals and creates a smooth texture.
Step 5: Serve and Enjoy!
- Let it Soften: Before serving, let the ice cream sit at room temperature for 5-10 minutes for easier scooping.
- Scoop and Indulge: Serve in bowls or cones, and enjoy the rich, creamy vanilla bean goodness!
Tips for the Best Vegan Vanilla Bean Ice Cream
Making homemade ice cream is both an art and a science.
Follow these expert tips to ensure your vegan vanilla bean ice cream turns out smooth, flavorful, and irresistibly creamy every time.
1. Use Full-Fat Coconut Milk for Creaminess
Lite coconut milk or other plant-based milks won’t provide the same richness.
Stick to full-fat coconut milk for the best texture.
2. Don’t Skip the Chilling Time
A well-chilled ice cream base leads to better churning and prevents ice crystals from forming.
Letting the mixture rest overnight enhances the flavor, too!
3. Scrape Every Bit of the Vanilla Bean
Vanilla beans add an intense depth of flavor.
Make sure to scrape out all the tiny seeds and stir them well into the mixture for even distribution.
4. Avoid Ice Crystals with Proper Storage
- Use an airtight, freezer-safe container.
- Press parchment paper directly onto the surface before sealing the lid.
- Store at the back of the freezer to avoid temperature fluctuations.
5. Softening for the Perfect Scoop
Homemade vegan ice cream tends to firm up more than store-bought versions.
Let it sit at room temperature for a few minutes before scooping for the perfect texture.
6. Experiment with Flavor Variations
Want to switch things up? Try these delicious add-ins:
- Swirl in caramel or berry compote before freezing.
- Fold in crushed cookies or toasted nuts for extra crunch.
- Add a dash of cinnamon or espresso powder for a flavor twist.
With these tips, your vegan vanilla bean ice cream will turn out just as creamy and dreamy as any traditional dairy version. Now, let’s explore some fun ways to serve and enjoy this delightful treat! 🍦✨
Serving Suggestions
There’s nothing better than enjoying a scoop (or two!) of homemade vegan vanilla bean ice cream, but why stop there?
Here are some delicious ways to elevate your dessert and make every bite even more exciting.
1. Classic and Simple
- Serve in a bowl or cone with a drizzle of maple syrup or vegan chocolate sauce.
- Sprinkle with chopped nuts, toasted coconut flakes, or cacao nibs for a crunchy contrast.
2. Fresh & Fruity Pairings
- Berry Bliss: Top with fresh strawberries, blueberries, or raspberries for a refreshing twist.
- Tropical Vibes: Add sliced mango, pineapple, or passion fruit for a summery treat.
3. Ice Cream Parfaits & Sundaes
- Layer scoops of ice cream with granola and coconut whipped cream for a delightful parfait.
- Make a sundae with vegan caramel sauce, banana slices, and a sprinkle of sea salt.
4. Pair with Warm Desserts
- Serve alongside a warm slice of vegan brownies, apple pie, or chocolate lava cake.
- Sandwich a scoop between two cookies for a homemade ice cream sandwich.
5. Turn It Into a Drink!
- Vanilla Bean Milkshake: Blend with almond milk for a thick, creamy shake.
- Affogato Twist: Pour a shot of hot espresso over a scoop for a bold coffee-flavored dessert.
No matter how you serve it, this vegan vanilla bean ice cream is the perfect blank canvas for creativity!
Conclusion
Making vegan vanilla bean ice cream at home is easier than you think—and the results are well worth it!
With its smooth, creamy texture and rich vanilla flavor, this dairy-free dessert is a must-try for ice cream lovers.
By using wholesome plant-based ingredients, you can enjoy a treat that’s not only delicious but also free from artificial additives and preservatives.
Whether you serve it in a cone, mix in your favorite toppings, or pair it with another dessert, this ice cream is guaranteed to impress.
Now it’s your turn to try this simple and satisfying recipe! If you make it, let me know how it turned out in the comments below.
And if you have any questions, check out the FAQ section below for helpful tips! 🍦✨
Frequently Asked Questions
1. Can I use almond milk instead of coconut milk?
Coconut milk provides the best creamy texture, but you can substitute almond, oat, or cashew milk.
Keep in mind that the ice cream may turn out slightly less rich and creamy.
2. How long does homemade vegan ice cream last in the freezer?
Stored properly in an airtight container, this ice cream stays fresh for up to 2-3 weeks.
However, for the best texture and flavor, enjoy it within the first week.
3. What if I don’t have an ice cream maker?
No problem! Use the no-churn method by freezing the mixture in a shallow container and stirring every 30 minutes until creamy.
It takes longer but still gives great results!
4. Why is my ice cream too hard to scoop?
Homemade vegan ice cream tends to firm up more than store-bought versions.
Let it sit at room temperature for 5-10 minutes before scooping, or add 1-2 tablespoons of vodka to the mixture before freezing to help keep it softer.
5. Can I add mix-ins like chocolate chips or cookie dough?
Absolutely! Stir in your favorite chopped chocolate, cookie dough pieces, or caramel swirls after churning (or before freezing if using the no-churn method).

Vegan Vanilla Bean Ice Cream
Equipment
- 1 High-Speed Blender (for blending the base)
- 1 Medium Saucepan (to heat the mixture)
- 1 Whisk (for stirring the thickener)
- 1 Mixing Bowl (to chill the mixture)
- 1 Ice cream maker (optional, but recommended)
- 1 Freezer-Safe Container (for storing)
- 1 Spatula (to smooth the mixture)
Ingredients
Base Ingredients:
- 2 cans 13.5 oz each full-fat coconut milk
- ½ cup raw cashews soaked & drained (optional for extra creaminess)
- 1 whole vanilla bean pod or 2 tsp pure vanilla extract
- ½ cup maple syrup or agave nectar
- 1 tbsp arrowroot starch or cornstarch
- ¼ tsp sea salt
Optional Add-Ins:
- ¼ cup almond or oat milk for a lighter texture
- ½ cup dairy-free chocolate chips nuts, or cookie dough (for mix-ins)
Instructions
Step 1: Prepare the Vanilla Bean Base
- Slice the vanilla bean pod lengthwise and scrape out the seeds with a knife. Set aside.
- In a blender, combine coconut milk, soaked cashews, maple syrup, vanilla bean seeds (or extract), and sea salt. Blend until smooth.
Step 2: Heat and Thicken the Mixture
- Pour the blended mixture into a saucepan over medium heat.
- Whisk in arrowroot starch (or cornstarch) until fully dissolved.
- Simmer for 3-5 minutes, stirring constantly, until slightly thickened (do not boil).
- Remove from heat and let it cool for 10 minutes before transferring to a mixing bowl.
Step 3: Chill the Ice Cream Base
- Cover the bowl and refrigerate for at least 4 hours (or overnight for the best texture).
Step 4: Churn the Ice Cream (Skip if using the no-churn method)
- Once chilled, pour the mixture into an ice cream maker and churn according to the manufacturer’s instructions (typically 20-30 minutes).
- The ice cream should be thick and creamy, like soft serve.
Step 5: Freeze and Set
- Transfer the churned ice cream into a freezer-safe container. Smooth the top with a spatula.
- Cover with parchment paper (to prevent ice crystals) and freeze for 2-4 hours until firm.
- No-Churn Method (Without an Ice Cream Maker)
- Pour the chilled mixture into a shallow freezer-safe container.
- Freeze for 45 minutes, then stir vigorously with a fork or whisk.
- Repeat this stirring process every 30 minutes for about 3 hours until smooth and creamy.
Step 6: Serve and Enjoy!
- Let the ice cream sit at room temperature for 5-10 minutes before scooping.
- Serve in cones, bowls, or as part of a dessert and enjoy!
Notes
- For a softer texture: Add 1-2 tbsp vodka or coconut nectar to prevent the ice cream from freezing too hard.
- For a nut-free version: Skip the cashews and use extra coconut milk instead.
- Storage: Keep in an airtight container in the freezer for up to 3 weeks.
- Flavor variations: Try adding cinnamon, espresso powder, or fresh fruit swirls for fun twists!


