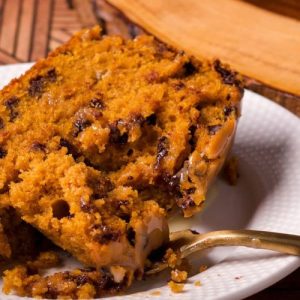
This Pumpkin Chocolate Chip Bread is a perfect blend of moist, tender pumpkin bread and rich chocolate delight, making it ideal for fall or any cozy day.
Packed with fiber from pumpkin and the satisfying goodness of dark chocolate, it’s a balanced treat that’s quick to make, versatile for breakfast, snacks, or dessert, and perfect for meal prep or gifting.
Pumpkin White Chocolate Chip Bread
Equipment
- 1 × 9-inch loaf pan (or mini-loaf pan or muffin pan)
- 1 x Medium Mixing Bowl
- 1 × Small mixing bowl
- 1 × Electric mixer (stand or hand)
- 1 × Whisk
- 1 × Rubber spatula
- 1 × Wire cooling rack
- 1 × Measuring cups and spoons
- 1 × Microwave-safe bowl (for melting chocolate)
Ingredients
For the Bread:
- 4 oz ¾ cup white chocolate chips, chopped if using a bar
- 1 ½ cups + 2 tbsp 195 g all-purpose flour
- 1 ¼ tsp baking powder
- ¼ tsp baking soda
- ¾ tsp table salt or 1 tsp kosher salt
- 2 tsp pumpkin pie spice
- 4 tbsp 2 oz butter, room temperature
- 1 tbsp 12 g vegetable oil
- ¼ cup 50 g granulated sugar
- ½ cup 106 g dark brown sugar
- 2 large eggs room temperature
- ¼ cup 57 g buttermilk
- 1 tsp pure vanilla extract
- 1 ½ cups 340 g pumpkin puree
- 5 oz ¾ cup mini dark chocolate chips
For the White Chocolate Ganache Glaze:
- 3 oz ½ cup white chocolate chips, chopped if using a bar
- ¼ cup 57 g heavy cream
- 1 tbsp 14 g butter, cut into pieces
Instructions
- Preheat and Prepare Your Oven: Begin by preheating your oven to 350°F (176°C). This ensures your loaf or mini loaves will bake evenly from the moment they go in. While the oven warms, select your baking vessel—either a standard 9-inch loaf pan, a mini-loaf pan, or a muffin tin. Proper preparation of the pan is essential to prevent sticking. Grease the pan thoroughly with butter or vegetable shortening, then lightly dust with flour. If using paper liners for mini-loaves or muffins, line each cavity carefully to avoid folds or wrinkles that can affect the shape.
- Melt the White Chocolate: Place 4 ounces of white chocolate chips (or chopped white chocolate bar pieces) in a microwave-safe bowl. Microwave the chocolate at 50% power for 1 ½ minutes. Remove and stir, then continue microwaving in 30-second intervals, stirring each time until completely smooth and melted. Be careful not to overheat, as white chocolate can seize easily. Set the melted chocolate aside to cool slightly while you prepare the batter.
- Combine Dry Ingredients: In a medium-sized mixing bowl, combine the all-purpose flour, baking powder, baking soda, salt, and pumpkin pie spice. Use a whisk to ensure everything is evenly distributed. This step helps prevent uneven rising and ensures each slice has consistent flavor. Set this dry mixture aside.
- Cream the Butter and Sugars: In the bowl of a stand mixer or with a hand mixer, add the softened butter, vegetable oil, granulated sugar, and dark brown sugar. Beat on medium-high speed for 4-5 minutes until the mixture becomes pale, light, and fluffy. Scrape down the sides of the bowl periodically to ensure all ingredients are fully incorporated. The creaming process is key to a soft, airy texture.
- Add Eggs Gradually: Add the eggs one at a time to the creamed butter and sugar. After each egg, beat the mixture on medium speed for about 20 seconds and scrape down the sides of the bowl to prevent pockets of unmixed batter. This step ensures the eggs are fully integrated, helping the bread rise properly and maintain a tender crumb.
- Mix Wet Pumpkin Ingredients: In a small bowl, whisk together the pumpkin puree, buttermilk, and vanilla extract until smooth. This mixture adds moisture, flavor, and richness to the bread. The buttermilk helps balance the sweetness and tenderizes the crumb.
- Combine Wet and Dry Ingredients Alternately: Add the dry flour mixture and the wet pumpkin mixture to the creamed butter-sugar mixture in alternating portions. Begin with a portion of flour, followed by a portion of pumpkin, and continue until all ingredients are incorporated. Mix on low speed and stop as soon as the batter is just combined. Avoid overmixing, which can make the bread dense. Aim for a thick, smooth batter with no large pockets of flour.
- Fold in Chocolates: Gently fold the melted white chocolate into the batter using a spatula or wooden spoon, stirring just until combined. Then, fold in the mini dark chocolate chips evenly. This ensures each bite has a balanced chocolate presence without breaking the structure of the batter.
- Transfer Batter to Pan: Pour the batter into your prepared loaf pan, spreading it evenly with a spatula. If using a mini-loaf or muffin pan, divide the batter evenly among each cavity. The batter should reach nearly to the top, leaving a little room for rising. Smooth the surface lightly for even baking.
- Bake Until Golden and Firm: Place your pan in the preheated oven. Bake mini-loaves or muffins for 20-30 minutes, and a standard 9-inch loaf for 50-60 minutes.Check doneness by inserting a toothpick into the center. If it comes out clean or with only a few moist crumbs, the bread is ready. Avoid opening the oven frequently, as sudden temperature changes can affect the rise.
- Cool Before Removing: Allow the baked bread to rest in the pan for about 5 minutes. Then, carefully invert the loaf, mini-loaves, or muffins onto a wire cooling rack. Cooling completely prevents the bread from becoming soggy and ensures the ganache can be applied without melting into the surface.
- Prepare the White Chocolate Ganache: Place 3 ounces of white chocolate in a small bowl. Heat ¼ cup of heavy cream in a microwave-safe container until it just begins to boil, about 45-60 seconds. Pour the hot cream over the chocolate and let it sit for 5 minutes to soften. Stir gently until the ganache is completely smooth, then add 1 tablespoon of butter, stirring until fully incorporated. Allow the ganache to cool slightly until it reaches a pourable but not runny consistency.
- Glaze the Bread: Drizzle the ganache over mini loaves or muffins using a spoon or piping bag. For a standard loaf, you can spread the ganache evenly over the top. Let it set at room temperature until slightly firm, creating a glossy, decadent finish.
- Slice, Serve, and Enjoy: Once the bread has cooled and the ganache is set, slice and serve. The loaf is perfect for breakfast, snacks, or dessert. Store leftovers in an airtight container at room temperature for up to 3 days, or refrigerate for longer freshness. Each slice is moist, tender, and bursting with chocolate and pumpkin flavor.
Notes
- This bread is extremely versatile: you can bake it as a standard 9-inch loaf, mini-loaves, or muffins depending on your needs.
- Shredding pumpkin or using canned pumpkin puree gives consistent moisture; avoid overly watery pumpkin, as it can make the bread dense.
- For best results, use room-temperature eggs and butter to ensure smooth, even mixing and a tender crumb.
- White chocolate can be substituted with milk or dark chocolate, though the sweetness balance may change slightly.
- Always check the loaf for doneness with a toothpick; baking times can vary slightly depending on your oven or pan type.
- This bread freezes beautifully—wrap slices tightly to enjoy later without losing moisture or flavor.
Chef’s Secrets For Moist Bread
The key to achieving the perfect pumpkin chocolate chip bread lies in balancing moisture and structure.
Using both butter and oil gives richness while keeping the loaf tender, and alternating dry and wet ingredients ensures the bread rises evenly without overmixing.
For the chocolate, melting white chocolate separately and folding it in gently prevents clumps and maintains a smooth texture throughout.
Don’t skip the resting time before glazing; it allows the bread to cool properly so the ganache doesn’t sink into the loaf.
Finally, fresh pumpkin puree contributes natural sweetness and fiber, giving the bread a light, airy crumb without compromising flavor.
Serving Suggestions For Maximum Enjoyment
This bread is versatile enough to serve in multiple ways. For breakfast, pair a slice with a cup of coffee or a warm chai latte.
For an indulgent dessert, drizzle extra white chocolate or even a touch of caramel over each slice.
Mini-loaves make perfect gifts or party treats, and muffins are ideal for school lunches or on-the-go snacks.
Adding a light spread of cream cheese or nut butter enhances richness and creates a satisfying balance of protein and flavor.
Storage Tips For Long-Lasting Freshness
Pumpkin chocolate chip bread keeps well when stored properly.
Allow the loaf or mini-loaves to cool completely before storing to prevent condensation and sogginess.
Wrap in plastic wrap or place in an airtight container at room temperature for up to 3 days.
For longer storage, slices can be individually wrapped and frozen for up to 3 months.
When ready to enjoy, thaw at room temperature or warm gently in a microwave or oven to restore softness and aroma.
Always store ganache-topped bread separately or drizzle the ganache just before serving to maintain its glossy finish.
Frequently Asked Questions
1. Can I make this bread dairy-free?
Yes! Substitute butter with a plant-based margarine or coconut oil, and replace buttermilk with a dairy-free milk plus a teaspoon of vinegar.
The bread may have a slightly different texture but will remain moist and flavorful.
2. What type of pumpkin is best to use?
Use canned pumpkin puree or fresh pumpkin that’s been cooked and pureed. Avoid pumpkin pie filling, which contains added sugar and spices.
Fresh sugar pumpkin is ideal for natural sweetness and fiber.
3. Can I use other chocolate instead of white chocolate?
Absolutely! You can use milk, semi-sweet, or dark chocolate in place of white chocolate.
Adjust sweetness if using a darker variety. Chocolate chunks or chips work equally well.
4. How do I prevent the bread from being dry?
Do not overmix the batter, as this develops gluten and makes the bread dense.
Ensure ingredients are at room temperature, and measure flour carefully.
Alternating wet and dry ingredients also keeps the crumb light and moist.
5. Can I double the recipe?
Yes, you can double the ingredients for multiple loaves, but bake them in separate pans rather than one large pan to ensure even baking.
Adjust baking time slightly for mini-loaves and always check doneness with a toothpick.
