All products are selected by our editorial team for quality. If you buy through our links, we may earn a small commission at no extra cost to you.
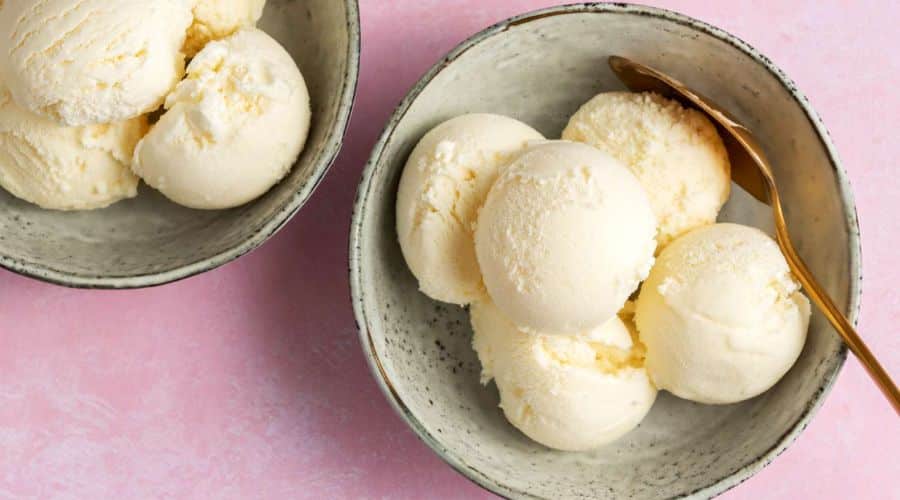
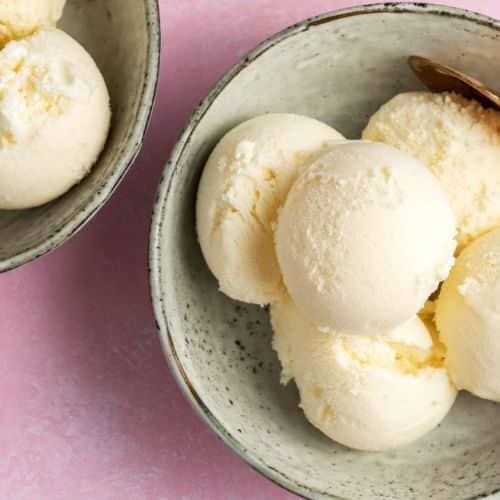
There’s something truly magical about the rich, creamy flavor of homemade vanilla ice cream.
Whether enjoyed on a hot summer day or as a sweet end to a hearty meal, it has a timeless appeal that never goes out of style.
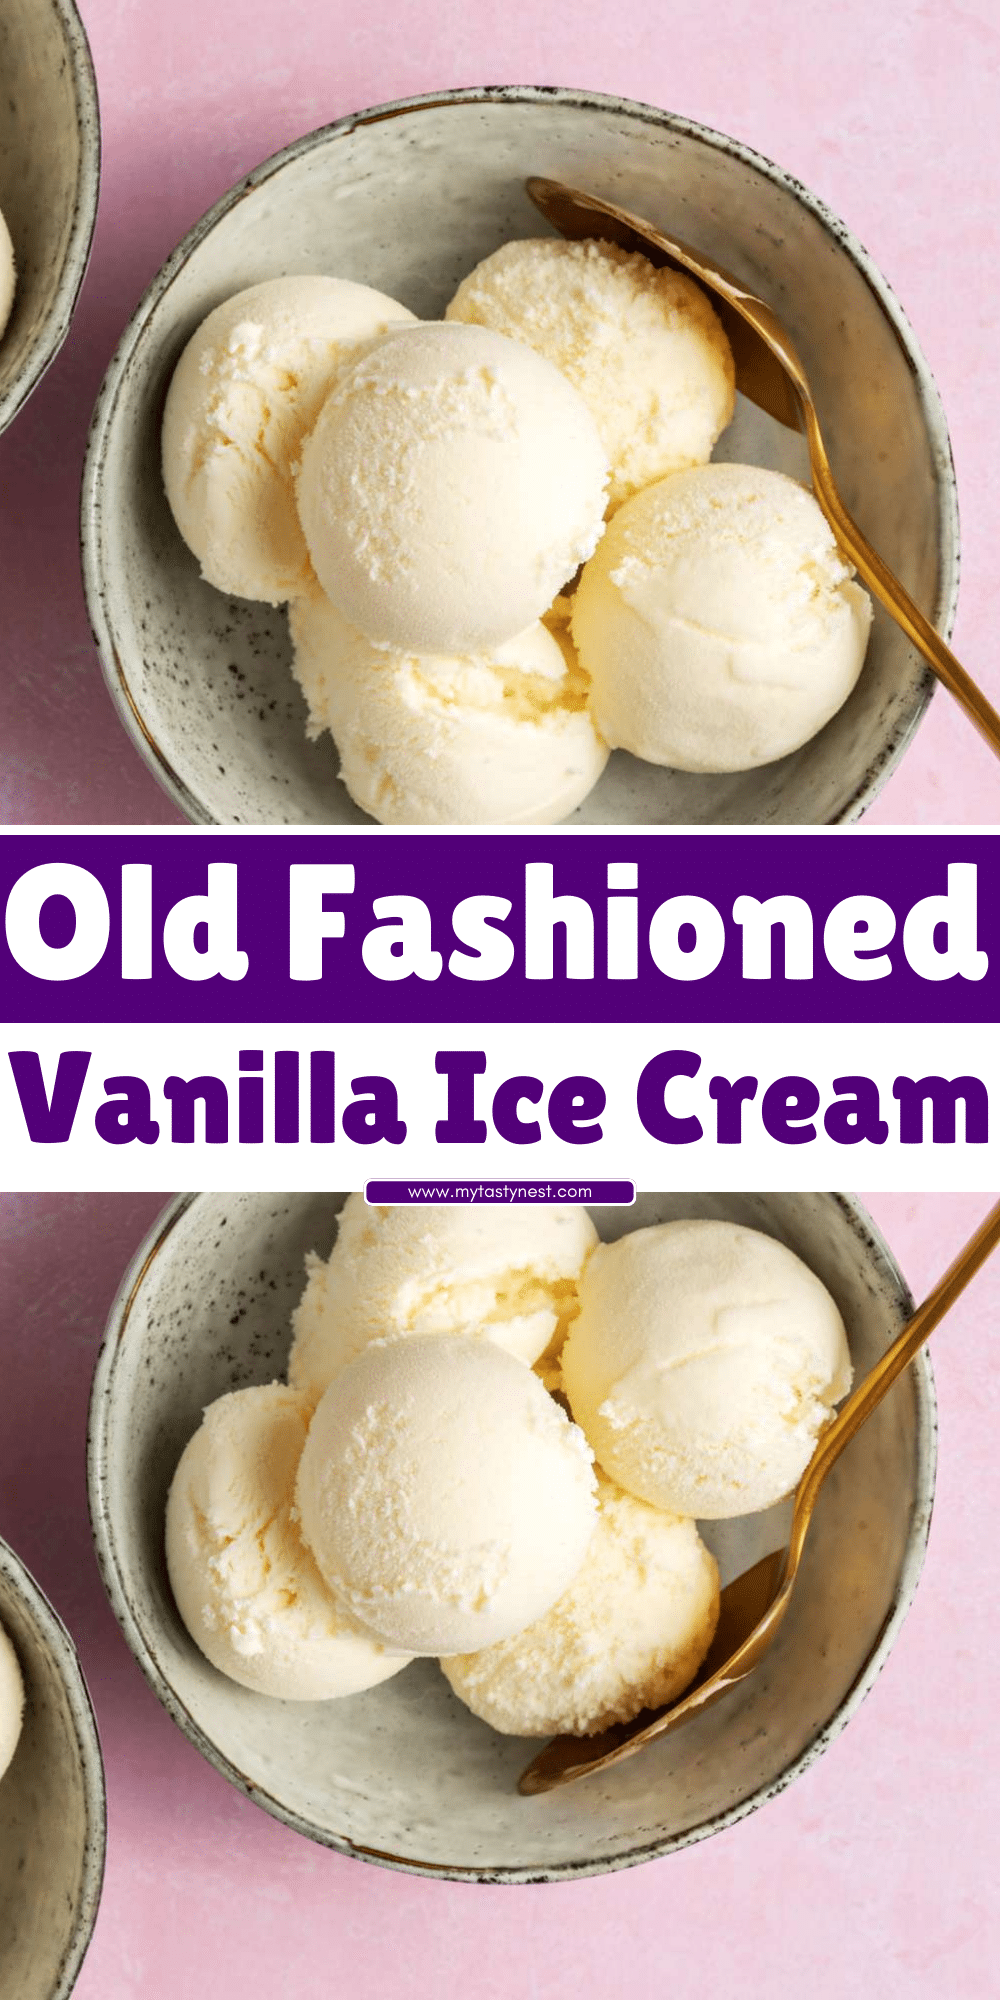
This Old Fashioned Vanilla Ice Cream recipe brings back memories of simpler times, where vanilla was the undisputed classic, loved for its smooth texture and pure, comforting taste.
Unlike store-bought versions that often contain artificial flavorings and preservatives, making your own vanilla ice cream at home allows you to control every ingredient, ensuring a fresher, tastier, and more satisfying treat.
It’s not just about flavor — it’s the texture, the creaminess, and the indulgence that comes with each bite.
In this recipe, we’ll guide you through a simple, yet classic method that results in the perfect bowl of ice cream every time.
Get ready to savor the authentic taste of old-fashioned vanilla ice cream, made from scratch with love and care.
Ingredients for Old Fashioned Vanilla Ice Cream
To make a batch of Old Fashioned Vanilla Ice Cream, you only need a few key ingredients.
This recipe sticks to the basics, letting the vanilla shine through with every spoonful.
Here’s what you’ll need:
Base Ingredients
- Heavy Cream: The foundation of this ice cream’s rich, velvety texture. Full-fat heavy cream creates the smooth and luxurious mouthfeel that makes homemade ice cream so special.
- Whole Milk: Used to balance the richness of the cream while maintaining a creamy consistency.
- Sugar: Granulated sugar sweetens the ice cream just enough without overpowering the natural vanilla flavor.
- Salt: A small pinch of salt enhances the flavors, making the sweetness more pronounced.
Flavoring
- Vanilla Bean: For a true, authentic vanilla flavor, using the seeds from a real vanilla bean is the best option. The little black specks add an elegant touch and the flavor is unparalleled.
- Vanilla Extract: If vanilla beans are unavailable or if you’re looking for a quicker alternative, high-quality vanilla extract will work wonders to achieve the same great taste.
The Custard Base
- Egg Yolks: The custard base is what sets this ice cream apart from simpler recipes. Egg yolks add richness and contribute to the creamy texture, helping the ice cream freeze smoothly without becoming icy.
These ingredients come together to create the perfect foundation for old-fashioned vanilla ice cream.
With these basics, you can easily experiment with add-ins or toppings, but this simple, classic version is a treat on its own.
Equipment You’ll Need
Making Old Fashioned Vanilla Ice Cream at home requires a few essential tools to get the best results.
Here’s a list of the equipment you’ll need to create that perfect, creamy texture:
Ice Cream Maker
The key piece of equipment for this recipe is an ice cream maker.
Whether you have a manual or electric model, this will help churn the custard into a smooth, frozen dessert.
Ice cream makers are designed to prevent large ice crystals from forming, resulting in the creamy texture that makes homemade ice cream so special.
Mixing Bowls
You’ll need a couple of mixing bowls: one for the egg yolks and sugar, and another for combining the milk and cream.
Glass or stainless steel bowls work best as they help maintain the temperature and allow you to mix the ingredients effectively.
Whisk and Spatula
A whisk is necessary for beating the egg yolks and mixing the custard base.
A spatula will come in handy for scraping the sides of your bowls and for transferring the custard into the ice cream maker.
Measuring Cups and Spoons
To get the proportions right, make sure you have accurate measuring cups and spoons. Precision is key in recipes like this, where balance between ingredients makes a big difference in the final result.
Freezer-Safe Container
Once your ice cream is churned, you’ll need a freezer-safe container to store it in.
A shallow, wide container will help the ice cream freeze evenly. Be sure it’s airtight to prevent ice crystals from forming and to preserve the texture.
How to Make Old Fashioned Vanilla Ice Cream: Step-by-Step Instructions

Now that you have your ingredients and equipment ready, it’s time to make this creamy, old-fashioned vanilla ice cream.
Follow these simple steps for a homemade dessert that rivals any ice cream shop.
Step 1: Prepare the Custard Base
Start by combining heavy cream, whole milk, sugar, and salt in a saucepan.
Heat the mixture over medium heat, stirring occasionally, until the sugar dissolves completely and the mixture is warm, but not boiling.
Meanwhile, in a separate bowl, whisk egg yolks until they are smooth and pale in color.
This process helps create a smooth custard when combined with the warm milk mixture.
Gradually pour the warm milk and cream mixture into the egg yolks, a little at a time, whisking constantly.
This is called “tempering” the eggs, which prevents them from scrambling.
Once all the milk has been added to the eggs, return the entire mixture to the saucepan.
Step 2: Cook the Custard
Place the saucepan back on the stove over low to medium heat.
Stir the custard constantly with a spatula or wooden spoon, scraping the bottom and sides of the pan to prevent the mixture from sticking or burning.
Continue to cook until the custard thickens enough to coat the back of the spoon. This process should take about 5-7 minutes.
To test if the custard is ready, dip a spoon into the mixture and run your finger through it. If the line stays intact, the custard is done.
Step 3: Add the Vanilla Flavor
Remove the custard from the heat. Scrape the seeds from a vanilla bean and add them to the custard.
If you’re using vanilla extract, simply stir it in at this stage.
Stir well to ensure the vanilla is evenly distributed.
Allow the custard to cool to room temperature.
Once cooled, cover it and place it in the refrigerator for at least 4 hours, or preferably overnight.
Chilling the custard before churning helps achieve the smoothest texture and best flavor.
Step 4: Churn the Ice Cream
Once your custard has cooled completely, pour it into your ice cream maker and follow the manufacturer’s instructions for churning.
Typically, the ice cream will take around 20-30 minutes to reach a soft-serve consistency.
As the mixture churns, it will slowly begin to freeze, becoming thick and creamy. Be patient — this step is key to achieving that perfect texture.
Step 5: Freeze the Ice Cream
After churning, the ice cream will be soft. Transfer it into a freezer-safe container and smooth the top with a spatula.
Cover it tightly and freeze for at least 4 hours, or until it’s firm and scoopable.
Once frozen, your homemade Old Fashioned Vanilla Ice Cream is ready to serve!
Enjoy it as a standalone treat or with your favorite toppings.
These simple steps will yield a classic dessert that brings out the true essence of vanilla, combining the rich flavor with a perfectly creamy texture.
Tips for the Perfect Old Fashioned Vanilla Ice Cream
Creating the perfect batch of Old Fashioned Vanilla Ice Cream requires a little attention to detail, but with these helpful tips, you’ll ensure every scoop is rich, creamy, and bursting with flavor:
1. Use High-Quality Ingredients
The flavor of your ice cream is only as good as the ingredients you use. Opt for fresh, high-quality heavy cream and whole milk.
If possible, use pure vanilla extract or real vanilla beans.
The quality of the vanilla will significantly impact the final flavor of the ice cream.
2. Don’t Skip the Egg Yolks
Egg yolks play a crucial role in creating a smooth and creamy texture.
They act as an emulsifier, helping the fat from the cream and milk blend together without separating.
Be sure to whisk the egg yolks well to avoid any lumps in the custard.
3. Properly Temper the Eggs
When adding the hot cream mixture to the egg yolks, it’s essential to temper them slowly to prevent curdling.
Gradually add the warm liquid to the eggs while whisking continuously.
This gentle process will create a smooth custard without scrambled eggs.
4. Chill the Custard
For the smoothest texture, chill the custard thoroughly before churning.
This allows the mixture to firm up slightly and improves the freezing process in the ice cream maker.
Aim for at least 4 hours of chilling time, but overnight is even better.
5. Churn Thoroughly
Don’t rush the churning process. Depending on your ice cream maker, it may take 20 to 30 minutes to achieve the right consistency.
If your ice cream maker is working too quickly or slowly, adjust the settings accordingly to ensure even churning.
6. Freeze Long Enough
After churning, make sure you allow the ice cream to freeze for at least 4 hours before serving.
This helps the texture set and ensures you get that scoopable, firm consistency.
7. Keep the Ice Cream Maker’s Bowl Frozen
If you’re using a bowl-type ice cream maker, make sure the bowl is completely frozen before use.
It should be in the freezer for at least 24 hours prior to churning.
This helps the ice cream freeze evenly and keeps it from becoming too soft during the process.
Serving Suggestions for Old Fashioned Vanilla Ice Cream
Once your Old Fashioned Vanilla Ice Cream is ready, it’s time to serve and enjoy!
Here are some creative and delicious ways to serve this homemade treat:
Classic Ice Cream Cone
For a traditional serving, scoop the homemade vanilla ice cream into a crispy waffle cone.
The crunchiness of the cone complements the smoothness of the ice cream, creating the perfect bite.
Sundae Style
For a fun, indulgent treat, serve your vanilla ice cream as a sundae.
Top with your favorite toppings like chocolate syrup, crushed nuts, whipped cream, or sprinkles.
Add a cherry on top for that classic sundae look!
Ice Cream Sandwiches
Use soft cookies (chocolate chip, oatmeal, or snickerdoodle) to create ice cream sandwiches.
Scoop the vanilla ice cream between two cookies and press gently.
Freeze for a few minutes to help them set, then enjoy a delicious frozen treat.
As a Side to Fruit Pies or Cakes
Homemade vanilla ice cream is the perfect complement to fruit-based desserts.
Serve a scoop alongside a warm apple pie, peach cobbler, or cherry tart.
The creamy ice cream balances the tartness of the fruit while enhancing the flavors of the dessert.
Affogato-Style Dessert
For a grown-up twist, serve your vanilla ice cream with a shot of espresso poured over the top.
The bitter coffee contrasts beautifully with the sweetness of the ice cream, creating a delightful treat.
With Fresh Berries
Pair your vanilla ice cream with a medley of fresh berries like strawberries, blueberries, or raspberries.
The fruit adds a refreshing, tart element that balances the richness of the ice cream.
Milkshakes
Blend a scoop or two of vanilla ice cream with milk for a thick and creamy milkshake.
Add in mix-ins like chocolate syrup, strawberries, or caramel sauce to customize it to your liking.
In a Parfait
Layer scoops of vanilla ice cream with granola, fresh fruit, or chocolate sauce to create a delicious ice cream parfait.
Serve it in tall glasses for a visually appealing and tasty treat.
Topped with Caramel or Chocolate Sauce
For a simple yet decadent treat, drizzle caramel or chocolate sauce over a scoop of vanilla ice cream.
The richness of the sauces complements the smooth, creamy texture of the ice cream perfectly.
No matter how you serve it, Old Fashioned Vanilla Ice Cream is sure to be the star of the show!
Troubleshooting Common Ice Cream Issues
Making homemade ice cream is a fun and rewarding process, but sometimes things don’t go as planned.
Don’t worry — many common issues can be easily resolved.
Here are some tips to help troubleshoot problems that may arise while making your Old Fashioned Vanilla Ice Cream:
1. Ice Cream is Too Hard or Icy
If your ice cream turns out too hard or icy, this could be a sign that the custard wasn’t churned enough, or that it wasn’t frozen quickly enough after churning. Here’s how to avoid this:
- Ensure that your ice cream maker is working properly and that it’s churning for the full amount of time suggested in the instructions.
- Chill your custard thoroughly before churning. If the mixture is too warm when added to the ice cream maker, it can freeze unevenly and lead to an icy texture.
- If your ice cream is stored in the freezer for too long without being served, it can become rock-hard. Be sure to let it sit at room temperature for a few minutes to soften before serving.
2. Ice Cream is Too Soft
If your ice cream is too soft after churning, it may not have been chilled enough before churning, or it may not have been churned long enough. You can:
- Chill the custard mixture for at least 4 hours or overnight before churning.
- Make sure you follow the ice cream maker’s instructions for churning time. Some models require longer churning to get a firm texture.
- After churning, place the ice cream in the freezer to firm up for at least 4 hours before serving.
3. Grainy Texture or Curdled Custard
A grainy texture can happen if the egg yolks were cooked too quickly or if the custard was overheated. To prevent this:
- When tempering the egg yolks with the hot milk mixture, pour the liquid in slowly and whisk constantly to avoid cooking the eggs too quickly.
- Keep the heat low and stir the custard continuously while cooking. If the custard begins to bubble or splatter, remove it from the heat immediately.
- If your custard curdles or appears grainy, you can try blending it in a blender to smooth it out. This can help salvage the texture.
4. Ice Cream Won’t Freeze Properly
If your ice cream isn’t freezing properly in the ice cream maker, it could be because:
- The ice cream maker’s bowl wasn’t frozen long enough. Make sure the bowl is thoroughly frozen for at least 24 hours before using.
- The custard mixture wasn’t chilled enough before churning. Always chill your mixture completely for the best results.
- The ice cream maker is overloaded. If you’re making a larger batch than recommended, the machine may not have enough space to churn the mixture effectively.
5. Too Much Vanilla Flavor or Not Enough
Balancing the vanilla flavor is important, and this can be tricky if you’re using both vanilla beans and vanilla extract. If the flavor is too strong:
- Reduce the amount of vanilla extract slightly, as it tends to have a more intense flavor than vanilla beans.
- If it’s too subtle, try adding a little more vanilla extract or scrape in an extra vanilla bean to enhance the flavor.
By following these tips, you’ll be able to troubleshoot and resolve most ice cream-making issues. Remember, even if things don’t turn out perfectly the first time, practice makes perfect, and every batch will get better!
How to Store Leftover Vanilla Ice Cream
Homemade ice cream is best when fresh, but if you have any leftovers, proper storage will help maintain its creamy texture and flavor.
Follow these tips to store your Old Fashioned Vanilla Ice Cream and enjoy it later:
1. Use an Airtight Container
When storing ice cream, it’s essential to keep it in an airtight container.
This will prevent ice crystals from forming and keep the ice cream from absorbing any unwanted freezer odors.
A shallow container works best, as it allows the ice cream to freeze evenly and makes scooping easier.
2. Cover with Plastic Wrap
To prevent ice crystals from forming on top of your ice cream, press a piece of plastic wrap directly onto the surface of the ice cream before sealing the container.
This extra layer will help keep the ice cream smooth and creamy.
3. Store in the Coldest Part of the Freezer
Place your container of ice cream in the coldest part of the freezer, typically near the back.
This ensures the ice cream freezes quickly and stays at the right temperature.
Avoid placing it in the door, as the temperature fluctuates with frequent opening and closing.
4. Let It Set Before Serving
Homemade ice cream can be a bit soft immediately after freezing.
If you store it for a while and need to scoop it later, let it sit at room temperature for 5 to 10 minutes to soften slightly.
This will make scooping much easier and help prevent it from breaking apart.
5. Don’t Keep It in the Freezer Too Long
While homemade ice cream can last for about 2 to 3 weeks in the freezer, it’s best enjoyed within a week or two for optimal freshness. After this time, ice cream can begin to lose its creamy texture, and the flavor may start to dull.
By following these storage tips, you can keep your Old Fashioned Vanilla Ice Cream fresh and delicious for an extended period.
So, go ahead and store any leftovers — they’ll be just as tasty when you’re ready for another scoop!
Conclusion
Making Old Fashioned Vanilla Ice Cream at home is a rewarding experience that results in a creamy, rich, and nostalgic treat.
With the right ingredients, careful attention to detail, and a little patience, you can create a dessert that rivals any store-bought variety.
Whether you’re enjoying it on its own, pairing it with a pie, or serving it as part of a sundae, homemade vanilla ice cream always brings a touch of joy to any occasion.
By following the steps and tips shared in this blog, you can ensure that every batch is perfect.
Don’t forget to experiment with different mix-ins and serving suggestions to make this classic ice cream your own.
Enjoy the process, and most importantly, savor each delicious bite of your homemade Old Fashioned Vanilla Ice Cream!
Frequently Asked Questions
1. Can I make Old Fashioned Vanilla Ice Cream without an ice cream maker?
Yes, you can! While an ice cream maker helps achieve a smooth texture, you can make ice cream by freezing the custard mixture in a shallow container.
Every 30 minutes, stir the ice cream with a fork to break up any ice crystals until it reaches the desired consistency.
This process may take a bit longer, but it will still yield delicious results.
2. Can I use vanilla bean paste instead of vanilla extract?
Yes, vanilla bean paste is a great alternative to vanilla extract.
It provides a richer flavor and visible specks of vanilla beans in the ice cream.
Use an equal amount of vanilla bean paste as you would extract for the same great flavor.
3. Why is my ice cream too icy or hard?
Icy or hard ice cream can occur if the custard mixture wasn’t chilled enough before churning or if it wasn’t churned long enough.
Ensure the custard is thoroughly chilled (preferably overnight) before churning, and don’t skip the churning process — it’s essential for creating the smooth texture.
4. How long can I store homemade ice cream?
Homemade ice cream is best enjoyed within 2 to 3 weeks.
After this time, it may begin to lose its creamy texture and flavor.
Be sure to store it in an airtight container and place it in the coldest part of your freezer for optimal results.
5. Can I add mix-ins like chocolate chips or fruit?
Absolutely! You can add chocolate chips, crushed cookies, or fresh fruit to your vanilla ice cream.
Add these mix-ins in the final few minutes of churning when the ice cream has thickened but is still soft enough to incorporate the ingredients.
This will allow you to create your own customized version of Old Fashioned Vanilla Ice Cream.
Old Fashioned Vanilla Ice Cream
Equipment
- Ice Cream Maker – 1 (make sure the bowl is frozen)
- Saucepan – 1 (for heating the milk and cream)
- Mixing Bowl – 1 (for tempering the eggs)
- Whisk – 1 (for beating the eggs and stirring the custard)
- Strainer – 1 (for straining the custard)
- Airtight Container – 1 (for freezing the ice cream)
Ingredients
- 2 cups – Whole Milk
- 2 cups – Heavy Cream
- 3/4 cup – Granulated Sugar
- 5 large – Egg Yolks
- 2 teaspoons – Pure Vanilla Extract or 1 vanilla bean
- 1/4 teaspoon – Salt
Instructions
Prepare the Custard Base:
- In a medium saucepan, combine 2 cups of whole milk and 2 cups of heavy cream. Heat the mixture over medium heat, stirring occasionally, until it begins to steam and small bubbles form along the edges, but do not bring it to a boil.
Temper the Egg Yolks:
- In a mixing bowl, whisk together 5 egg yolks and 3/4 cup of sugar until smooth. Gradually pour a small amount of the hot milk mixture into the egg mixture while whisking constantly. Slowly increase the amount of milk mixture until the egg yolks are warmed through.
Cook the Custard:
- Pour the egg mixture back into the saucepan with the remaining milk mixture. Cook over low heat, stirring constantly with a wooden spoon or heatproof spatula, until the custard thickens enough to coat the back of the spoon (around 170°F to 175°F). Do not let it boil.
Strain and Cool:
- Remove the saucepan from the heat. Pour the custard through a fine mesh strainer into a clean bowl to remove any cooked egg bits. Stir in 1/4 teaspoon of salt and 2 teaspoons of vanilla extract (or the scraped seeds from 1 vanilla bean).
Chill the Custard:
- Let the custard cool to room temperature. Once cooled, cover the bowl and refrigerate for at least 4 hours or overnight for the best results.
Churn the Ice Cream:
- Pour the chilled custard into your ice cream maker and churn according to the manufacturer’s instructions. This usually takes about 20-25 minutes.
Freeze the Ice Cream:
- Transfer the churned ice cream to an airtight container and freeze for at least 4 hours or until firm.
Serve and Enjoy:
- Scoop and serve your homemade Old Fashioned Vanilla Ice Cream. Enjoy!
Notes
- Vanilla Options: If you prefer a more intense vanilla flavor, use 1 vanilla bean instead of vanilla extract. Scrape the seeds from the bean and add them to the custard mixture with the vanilla extract.
- Ice Cream Maker: For best results, ensure that the ice cream maker’s bowl is frozen for at least 24 hours before use.
- Make Ahead: This ice cream can be made ahead of time. Just make sure to store it in an airtight container to prevent freezer burn.
- Texture Tip: For a super creamy texture, make sure to churn the ice cream for the full recommended time in the ice cream maker. Churning incorporates air, which creates a smoother, softer consistency.
- Flavor Variations: Feel free to customize this ice cream with chocolate chips, fruit, or your favorite mix-ins once it’s finished churning. Just add them in the last few minutes of churning.
