All products are selected by our editorial team for quality. If you buy through our links, we may earn a small commission at no extra cost to you.
Homemade bread is one of the most rewarding foods to make. It fills your home with an irresistible aroma and delivers a fresh, warm loaf that’s perfect for any occasion.
If you’re a bread lover but hesitant about trying your hand at baking, this No Knead Bread Recipe is your answer.
No kneading, no stress — just incredible results with minimal effort.
This recipe uses simple ingredients and a long fermentation process to create an artisan-style bread with a crispy crust and tender crumb.
It’s perfect for beginners and experienced bakers looking for an easy, hassle-free method.

Why No Knead Bread?
No knead bread has revolutionized home baking with its simplicity and incredible results.
Here’s why this recipe is a game-changer:
1. No Special Equipment Required
All you need is a mixing bowl, a spoon, and a Dutch oven or any oven-safe pot with a lid.
There’s no need for a stand mixer, bread machine, or fancy tools.
2. Minimal Effort, Maximum Reward
The long fermentation process does all the hard work of developing gluten and flavor.
Your role? Mix, wait, bake, and enjoy.
3. Bakery-Quality Results at Home
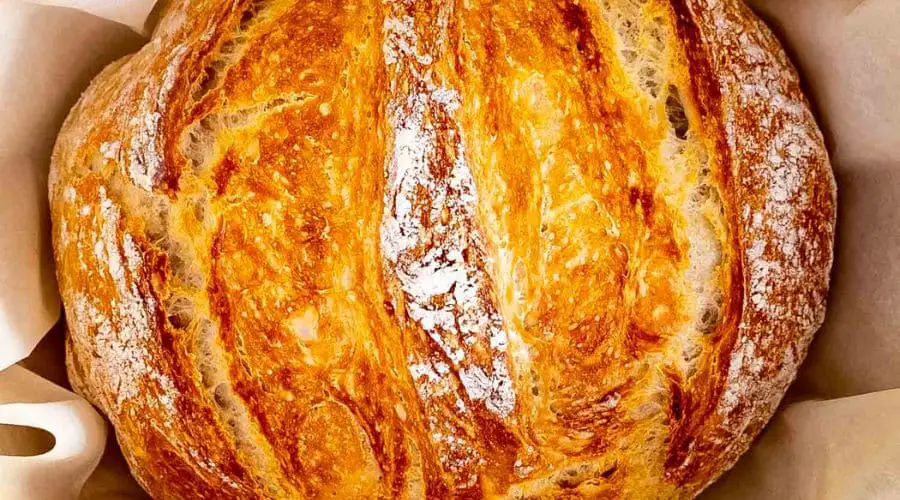
You’ll achieve a golden, crackling crust and soft, airy interior that rivals any artisan loaf from a bakery.
Ingredients for No Knead Bread
This recipe keeps it simple with just four pantry staples:
- 3 cups (375g) all-purpose flour
- 1½ teaspoons salt
- ½ teaspoon instant or active dry yeast
- 1½ cups (350ml) water (room temperature)
Optional Add-Ins
- Herbs and spices (e.g., rosemary, thyme, garlic powder)
- Seeds (e.g., sunflower, sesame, or flax seeds)
- Cheese (e.g., grated Parmesan or cheddar)
Step-by-Step No Knead Bread Recipe

Let’s dive into the easiest bread-making method you’ll ever try:
Step 1: Mix the Dough
- In a large mixing bowl, whisk together the flour, salt, and yeast.
- Add the water and stir until a sticky, shaggy dough forms.
No need to knead — it’s supposed to look messy!
Step 2: Rest and Ferment
- Cover the bowl tightly with plastic wrap or a clean kitchen towel.
- Let the dough sit at room temperature for 12–18 hours.
During this time, the yeast will slowly ferment, creating bubbles and developing flavor. - When ready, the dough should have doubled in size and appear bubbly and elastic.
Step 3: Shape the Dough
- Lightly flour your work surface and your hands.
Turn the dough out onto the surface. - Gently shape it into a round loaf by folding the edges toward the center.
Be careful not to deflate the dough too much.
Step 4: Second Rise
- Place a piece of parchment paper in a bowl or proofing basket and transfer the dough onto it.
- Cover the dough loosely with a kitchen towel and let it rise for another 1–2 hours. It should puff up slightly.
Step 5: Preheat the Oven and Dutch Oven
- About 30 minutes before baking, place your Dutch oven (or any oven-safe pot with a lid) in the oven and preheat to 450°F (230°C).
A preheated pot ensures a crispy crust.
Step 6: Bake the Bread
- Carefully remove the hot Dutch oven from the oven and lift the parchment paper with the dough into the pot.
- Cover with the lid and bake for 30 minutes.
- Remove the lid and bake for an additional 10–15 minutes, or until the crust is golden brown and crispy.
Step 7: Cool and Enjoy
- Transfer the bread to a wire rack and let it cool completely before slicing.
This step is crucial for the bread’s texture to set properly. - Slice, serve, and enjoy your homemade artisan bread with butter, jam, or your favorite toppings.
Tips for Perfect No Knead Bread
- Use High-Quality Flour: The better the flour, the better the bread.
Experiment with bread flour for extra chewiness or whole wheat flour for a heartier loaf. - Hydration is Key: The dough will be sticky and wet, which is essential for creating an airy crumb.
Resist the urge to add more flour. - Let the Dough Rest Fully: The longer the fermentation, the better the flavor. Don’t rush this step!
- Preheat Your Dutch Oven: This traps steam during baking, which is essential for a crackling crust.
- Experiment with Add-Ins: Mix in dried herbs, seeds, or even grated cheese to create unique variations.
Common Questions About No Knead Bread
Can I Use Whole Wheat Flour?
Yes! Replace up to 50% of the all-purpose flour with whole wheat flour for a nuttier flavor.
Note that whole wheat flour absorbs more water, so you may need to slightly increase the hydration.
What If I Don’t Have a Dutch Oven?
You can use any oven-safe pot with a tight-fitting lid.
If you don’t have a lid, cover the pot with aluminum foil for the first 30 minutes of baking.
How Long Does No Knead Bread Stay Fresh?
Store the bread in a paper bag or loosely covered at room temperature for up to 2–3 days.
For longer storage, freeze the loaf in an airtight bag for up to 3 months.
Variations of No Knead Bread
Herbed Garlic Bread
Mix 1 tablespoon of minced garlic and 1 teaspoon of chopped rosemary into the dough for a fragrant, savory loaf.
Cheesy Jalapeño Bread
Add 1 cup of grated cheddar cheese and 1 finely chopped jalapeño for a spicy twist.
Seeded Multigrain Bread
Incorporate a mix of sunflower, sesame, and flax seeds for added crunch and nutrition.
Why This Recipe Works
The genius of no knead bread lies in its long resting time.
The extended fermentation allows gluten to form naturally, eliminating the need for kneading while enhancing the bread’s flavor.
The high hydration of the dough creates an airy crumb, while the Dutch oven traps steam to produce a golden, crackling crust.
This simple yet transformative method has made artisan-style bread accessible to home bakers of all skill levels.
Conclusion: Baking Made Simple
This No Knead Bread Recipe is a must-try for anyone who loves bread but dreads complicated recipes.
With minimal effort and maximum reward, you’ll have a rustic, bakery-quality loaf that’s perfect for every occasion.
Whether you’re a beginner or a seasoned baker, this foolproof method will deliver delicious results every time.
So, grab your ingredients, mix up the dough, and let time work its magic. Your homemade masterpiece is just a few steps away!
Frequently Asked Questions (FAQ) About No-Knead Bread
1. Can I use instant yeast instead of active dry yeast?
Yes! You can use instant yeast instead of active dry yeast.
The only difference is that instant yeast does not need to be dissolved in water before mixing.
You can add it directly to the flour.
However, since this recipe relies on a long fermentation process, both types of yeast will work similarly.
2. What if my dough is too sticky?
A slightly sticky dough is normal for no-knead bread since high hydration is key to its soft, airy texture.
However, if your dough is excessively wet and difficult to handle, try dusting your hands and work surface with flour when shaping it.
Avoid adding too much flour, as this can make the bread dense.
3. How can I make no-knead bread without a Dutch oven?
While a Dutch oven helps create the perfect crust by trapping steam, you can still make no-knead bread without one.
Try these alternatives:
- Bake the bread on a preheated baking stone or sheet pan and place a tray of hot water in the oven to create steam.
- Use a deep oven-safe pot with a lid (like a cast-iron or ceramic pot).
- Cover the bread loosely with foil for the first half of baking to mimic the Dutch oven effect.
4. Can I let the dough rise for more than 18 hours?
Yes, but be cautious. Over-fermenting the dough (beyond 24 hours) can weaken its structure, causing it to deflate.
If you need to extend the rise time, refrigerate the dough after 12–18 hours to slow down fermentation.
5. Why is my crust too hard or too soft?
- Too hard: If your crust is excessively tough, it might be due to overbaking or insufficient steam in the oven. |
Try baking at a slightly lower temperature or covering the bread for the first half of baking. - Too soft: If the crust softens after cooling, it may be due to excess moisture.
Let the bread cool completely on a wire rack before storing it to prevent condensation from softening the crust.

No Knead Bread
Equipment
- 1 large mixing bowl
- 1 Wooden spoon or spatula
- 1 measuring cup
- 1 measuring spoon set
- 1 clean kitchen towel or plastic wrap
- 1 Dutch oven (or an oven-safe pot with a lid)
- 1 Parchment paper
Ingredients
- 3 cups 375g all-purpose flour (or bread flour)
- 1 ½ teaspoons salt
- ½ teaspoon instant yeast or active dry yeast
- 1 ½ cups 360ml warm water
Instructions
Step 1: Mix the Dough
- In a large mixing bowl, whisk together the flour, salt, and yeast.
- Add warm water and stir with a wooden spoon or spatula until a shaggy, sticky dough forms.
- Cover the bowl with plastic wrap or a clean kitchen towel.
Step 2: Let the Dough Rise (12–18 Hours)
- Let the dough sit at room temperature (around 70°F/21°C) for 12–18 hours. The dough should expand and become bubbly.
Step 3: Shape the Dough
- Lightly flour a clean surface and gently turn the dough onto it. Avoid overhandling to maintain air pockets.
- Shape the dough into a round loaf and place it on parchment paper. Cover loosely with a towel and let it rest for 30–60 minutes.
Step 4: Preheat the Oven and Dutch Oven
- Preheat your oven to 450°F (230°C) with a Dutch oven inside for at least 30 minutes.
Step 5: Bake the Bread
- Carefully transfer the parchment paper with the dough into the preheated Dutch oven. Cover with the lid and bake for 30 minutes.
- Remove the lid and bake for another 10–15 minutes, or until the crust is deep golden brown.
Step 6: Cool and Enjoy
- Remove the bread from the oven and let it cool on a wire rack for at least 30 minutes before slicing.
Notes
- For a Crispier Crust: Let the bread cool completely before slicing and store it uncovered for a few hours to maintain crispiness.
- Alternative Baking Method: If you don’t have a Dutch oven, bake on a sheet pan with a small pan of water in the oven for added steam.
- Flavor Variations: Add fresh herbs, garlic, shredded cheese, or seeds to the dough for extra flavor.
- Storing Leftovers: Keep the bread at room temperature in a paper bag or bread box for up to 3 days. Freeze slices in an airtight bag for up to 3 months.


