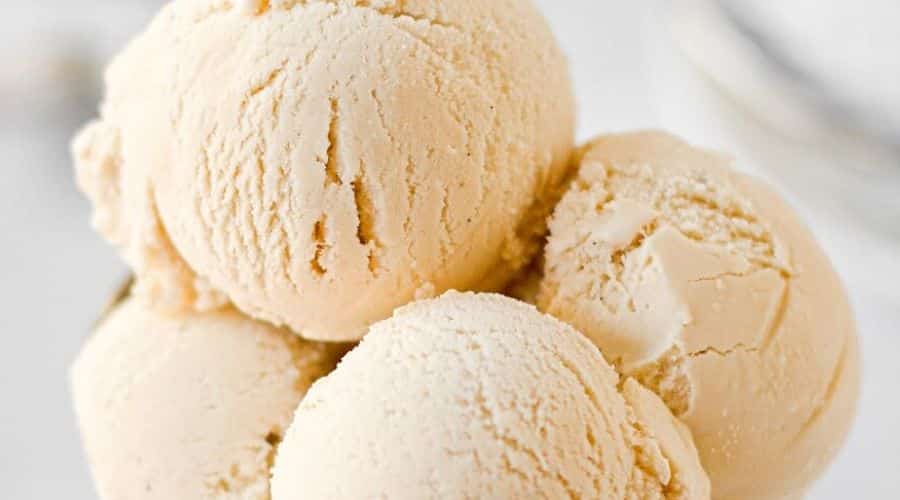
Ice cream is a universally loved treat, bringing joy to people of all ages.
While traditional recipes often rely on eggs to create a creamy texture, this No Egg Vanilla Bean Ice Cream offers a rich and smooth experience without the need for eggs.
This recipe is perfect for those with dietary restrictions or anyone who simply wants to try something different.
It brings out the pure, natural flavor of vanilla beans and creates a dessert that’s both indulgent and satisfying.
Whether you’re making it for a special occasion or just because, this homemade ice cream is sure to impress.

What Makes This No Egg Vanilla Bean Ice Cream Special?
What sets this ice cream apart is the absence of eggs, which are traditionally used to create a custard base.
By skipping eggs, we focus on enhancing the natural vanilla flavor, allowing it to shine through in every spoonful.
The rich texture is achieved through the careful balance of cream, milk, and sugar, resulting in an ice cream that’s as smooth and creamy as any egg-based version.
Additionally, the use of real vanilla beans gives this treat an authentic flavor that cannot be replicated with vanilla extract alone.
The process is simple yet effective, creating a deliciously creamy ice cream with the most comforting, pure vanilla taste.
Ingredients You’ll Need
To make this rich and creamy No Egg Vanilla Bean Ice Cream, you’ll need just a handful of ingredients, all of which contribute to its smooth texture and indulgent flavor.
Here’s what you’ll need:
- Heavy cream – 2 cups (this provides the luxurious, creamy base)
- Whole milk – 1 cup (for a rich and smooth consistency)
- Granulated sugar – 3/4 cup (balances the flavor and sweetness)
- Vanilla beans – 2 pods (fresh, natural vanilla flavor that elevates the ice cream)
- Salt – a pinch (to bring out the flavor)
- Vanilla extract – 1 teaspoon (optional, but can enhance the vanilla profile)
These ingredients combine to create a simple yet decadent ice cream that doesn’t require eggs to achieve that signature creamy texture.
Step-by-Step Instructions for Making No Egg Vanilla Bean Ice Cream

Making this ice cream is easier than you might think, and the results are absolutely worth it.
Follow these steps to create your own batch of creamy, egg-free vanilla bean ice cream:
1. Prepare the Vanilla Beans
Start by slicing the vanilla beans in half lengthwise.
Use the back of your knife to scrape out the tiny seeds from each pod.
Set the seeds aside – this is where the magic happens!
You’ll use both the seeds and the empty pods for maximum flavor extraction.
2. Heat the Cream and Milk
In a medium saucepan, combine the heavy cream and whole milk.
Add the scraped vanilla seeds and the empty vanilla pods to the pan as well.
Heat the mixture over medium heat, stirring occasionally, until it’s warm but not boiling.
You should see small bubbles forming around the edges, but do not let it come to a full boil.
3. Infuse the Vanilla Flavor
Once the mixture is warmed, remove it from the heat and let it steep for about 10–15 minutes.
This will allow the vanilla to infuse deeply into the cream and milk, creating a rich base for your ice cream.
4. Combine Sugar and Salt
While the cream and milk are steeping, whisk together the sugar and a pinch of salt in a separate bowl.
Once the steeping process is complete, strain the mixture to remove the vanilla pods and any remaining seeds.
Then, stir in the sugar and salt mixture until fully dissolved.
5. Chill the Mixture
After the sugar has dissolved, allow the mixture to cool down to room temperature.
Once it has cooled, cover the mixture and place it in the refrigerator for at least 3-4 hours, or until it is completely chilled.
Chilling the base will help create a smoother texture when churning.
6. Churn the Ice Cream
Once chilled, pour the mixture into your ice cream maker.
Follow the manufacturer’s instructions for your specific model.
Typically, this will involve churning the ice cream for about 20-25 minutes until it reaches a soft-serve consistency.
7. Freeze Until Firm
Once the ice cream has been churned, transfer it to an airtight container.
For a firmer texture, place the container in the freezer for at least 2–3 hours, or until the ice cream is set to your desired consistency.
8. Serve and Enjoy
Once your ice cream is frozen, scoop it into bowls or cones and enjoy the smooth, velvety texture and the delightful flavor of natural vanilla.
You can also garnish it with fresh berries or a drizzle of caramel for an extra touch.
How to Serve and Enjoy Your No Egg Vanilla Bean Ice Cream
There are countless ways to enjoy your No Egg Vanilla Bean Ice Cream, whether you’re serving it as a standalone treat or pairing it with other desserts.
Here are a few ideas:
- Classic Cone: Scoop the ice cream into a cone for a traditional, nostalgic treat.
- Sundae Style: Top your ice cream with chocolate syrup, fresh fruit, whipped cream, or a sprinkle of nuts. Get creative with toppings!
- With Pie or Cake: This ice cream pairs beautifully with warm desserts like apple pie or chocolate cake, balancing out the richness with its creamy vanilla flavor.
- In a Milkshake: Blend your ice cream with a bit of milk and a drizzle of syrup for a thick and creamy milkshake.
- As a Filling: Use the ice cream as a filling for sandwiches made with cookies or waffles for a fun and delicious treat.
No matter how you serve it, this ice cream will always be a crowd-pleaser.
Final Thoughts
This No Egg Vanilla Bean Ice Cream is a game-changer when it comes to homemade desserts.
With its rich, creamy texture and pure vanilla flavor, it’s hard to believe it’s egg-free!
Whether you’re following a specific dietary preference or just looking for a simpler recipe, this ice cream proves that sometimes less is more.
It’s easy to make, wonderfully versatile, and the perfect treat for any occasion.
So, next time you’re craving ice cream, skip the store-bought options and whip up a batch of this smooth, egg-free vanilla bean delight. You won’t regret it!
Frequently Asked Questions
1. Can I use vanilla extract instead of vanilla beans?
Yes, you can substitute vanilla extract for vanilla beans if you prefer.
Use about 1 tablespoon of vanilla extract in place of the beans.
However, vanilla beans provide a more intense and authentic flavor.
2. Can I make this ice cream without an ice cream maker?
Yes! If you don’t have an ice cream maker, simply pour the chilled mixture into a shallow dish and freeze.
Stir the mixture every 30 minutes for the first 2-3 hours to break up any ice crystals and ensure a creamy texture.
3. How long will the ice cream last in the freezer?
Your homemade ice cream will stay fresh in the freezer for up to 2-3 weeks, as long as it’s stored in an airtight container.
4. Can I add mix-ins like chocolate chips or fruit?
Definitely! Once the ice cream has churned to a soft-serve consistency, you can fold in chocolate chips, crushed cookies, or fresh fruit.
Then, freeze as usual.
5. Is this ice cream suitable for people with egg allergies?
Yes, this ice cream is perfect for anyone with egg allergies since it’s completely egg-free.
It offers a creamy, delicious alternative without compromising on taste or texture.

No Egg Vanilla Bean Ice Cream
Equipment
- Ice Cream Maker (optional) – For churning the ice cream, if you have one.
- Medium saucepan – For heating the cream and milk.
- Whisk – For mixing ingredients.
- Strainer – To remove the vanilla pods and any seeds after steeping.
- Airtight Container – To store the finished ice cream in the freezer.
Ingredients
- 2 cups – Heavy cream
- 1 cup – Whole milk
- 3/4 cup – Granulated sugar
- 2 pods – Vanilla beans or 1 tablespoon vanilla extract
- Pinch – Salt
- 1 teaspoon – Vanilla extract optional, for extra vanilla flavor
Instructions
Prepare the Vanilla Beans:
- Split the vanilla beans lengthwise and scrape the seeds into a small bowl. Set the seeds aside and add the empty pods to your mixture.
Heat the Cream and Milk:
- In a medium saucepan, combine the heavy cream, whole milk, and vanilla bean pods. Heat over medium, stirring occasionally, until it’s warm but not boiling.
Steep the Vanilla:
- Remove the saucepan from heat once it’s warm and let it steep for about 10-15 minutes to infuse the vanilla flavor into the cream and milk.
Add Sugar and Salt:
- Strain the mixture to remove the vanilla pods. Stir in the sugar and a pinch of salt until fully dissolved.
Chill the Mixture:
- Let the mixture cool to room temperature, then cover and refrigerate for 3-4 hours, or until fully chilled.
Churn the Ice Cream:
- Pour the chilled mixture into your ice cream maker and churn according to the manufacturer’s instructions (typically about 20-25 minutes).
Freeze:
- Transfer the churned ice cream to an airtight container and freeze for 2-3 hours, or until the desired consistency is reached.
Serve:
- Scoop the ice cream into bowls or cones and enjoy!
Notes
- Vanilla Beans: The use of real vanilla beans gives this ice cream an authentic and rich flavor. If you don’t have vanilla beans, feel free to substitute with 1 tablespoon of vanilla extract.
- Ice Cream Maker: An ice cream maker will provide a smoother texture, but if you don’t have one, you can still make this ice cream by freezing the mixture and stirring it every 30 minutes to break up ice crystals.
- Add-Ins: You can mix in chocolate chips, crushed cookies, or fruit after churning the ice cream for added texture and flavor.
- Storage: Store the ice cream in an airtight container in the freezer for up to 2-3 weeks. For the creamiest texture, allow it to sit at room temperature for a few minutes before scooping.


