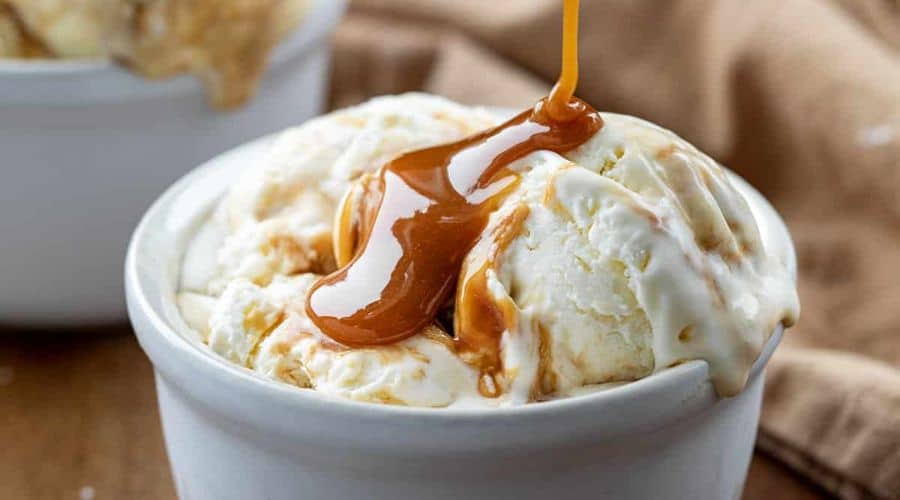
Making homemade ice cream has never been easier or more delicious. If you’re a fan of creamy, indulgent ice cream but don’t want the hassle of churning or using an ice cream maker, then this No Churn Ice Cream recipe is just what you need.
With just a few simple ingredients and a little bit of patience, you can enjoy a rich, velvety treat right in the comfort of your own kitchen.
No churn ice cream is perfect for any occasion, whether you’re looking to satisfy a late-night craving, treat your family to a fun dessert, or impress guests at a summer gathering.
What makes this recipe so special is its simplicity—there’s no need for specialized equipment, and the results are incredibly smooth and flavorful. Plus, it’s customizable! You can add in your favorite mix-ins or create unique flavor combinations with ease.
Ready to make your own creamy batch of no churn ice cream? Let’s dive into the ingredients you’ll need!

Ingredients You’ll Need for No Churn Ice Cream
One of the best parts of making no churn ice cream is how minimal the ingredients are. No complicated steps, no fancy tools required—just a handful of staples you probably already have in your pantry.
Here’s what you’ll need:
Heavy Cream
Heavy cream is the backbone of this recipe. When whipped, it provides the ice cream with its luxurious, creamy texture. You’ll want to use full-fat heavy cream to ensure that perfect, smooth consistency that melts in your mouth.
The richness of heavy cream is what makes no churn ice cream so indulgent, without needing any churning or complicated processes.
Sweetened Condensed Milk
This is the secret ingredient that eliminates the need for sugar and egg yolks, which are often used in traditional ice cream recipes. Sweetened condensed milk adds both sweetness and a smooth, creamy body to the ice cream.
It helps create that dense, melt-in-your-mouth texture that you love. The natural sweetness of condensed milk also balances out the richness of the cream.
Vanilla Extract (or Other Flavorings)
Vanilla extract is a classic addition, enhancing the flavor of your no churn ice cream and rounding out its sweetness. However, feel free to get creative here!
You can substitute vanilla with other extracts like almond, hazelnut, or mint, or even use fruit purees or chocolate to create your own signature flavors. The base is incredibly versatile and can adapt to whatever flavor profile you desire.
Optional Mix-ins and Add-ins
While the base recipe itself is already rich and delicious, the beauty of no churn ice cream lies in how easily it can be customized. Popular mix-ins include chocolate chips, crushed cookies, candy pieces, chopped nuts, or fresh fruit.
Whether you prefer swirls of caramel, chunks of brownie, or a fresh berry infusion, the options are endless. Just remember to fold them in gently to avoid deflating the whipped cream.
These ingredients are all you need to create a batch of creamy, decadent no churn ice cream! As you prepare the base, feel free to experiment with different flavors and textures to make it truly your own. Ready to get started? Let’s move on to the next steps in crafting your homemade ice cream!
Step-by-Step Instructions to Make No Churn Ice Cream

Making no churn ice cream is incredibly easy and requires just a few simple steps.
Follow this guide for the creamiest, most delicious homemade ice cream you’ve ever tasted.
1. Whip the Heavy Cream
The first step in making no churn ice cream is to whip the heavy cream to stiff peaks. Start by pouring the heavy cream into a large mixing bowl. Using a hand mixer or stand mixer, begin whipping the cream on medium speed.
Gradually increase the speed to high and continue whipping until stiff peaks form—this means that when you lift the whisk, the cream holds its shape and doesn’t collapse.
This process incorporates air into the cream, creating the light and fluffy texture that’s key to smooth ice cream.
2. Mix the Sweetened Condensed Milk and Flavoring
In a separate bowl, combine the sweetened condensed milk with your choice of flavoring. If you’re using vanilla extract, add it to the condensed milk and stir until well combined.
You can also get creative here and use fruit purées, chocolate syrup, or even coffee for a richer, more complex flavor. Make sure the condensed milk is fully blended with the flavoring to ensure a consistent taste throughout your ice cream.
3. Fold in the Whipped Cream
Once your condensed milk mixture is ready, it’s time to gently fold in the whipped cream. Add about one-third of the whipped cream into the condensed milk mixture and fold with a spatula to combine.
Repeat this process in two more additions, folding gently to preserve the airiness of the whipped cream. Be sure not to overmix—this will keep the ice cream light and fluffy rather than dense.
4. Add Your Favorite Mix-ins
Now that your base is ready, it’s time to get creative with mix-ins. You can fold in chocolate chips, crushed cookies, nuts, or even fruit like strawberries or mangoes for a fun twist.
If you’re adding swirls like caramel or fudge, drizzle them into the mixture and gently fold them to create a marbled effect.
5. Freeze Until Firm
Once everything is mixed together, transfer the ice cream mixture into a loaf pan or another freezer-safe container. Smooth the top with a spatula to level it out.
To avoid ice crystals forming on top, cover the surface with plastic wrap or parchment paper before sealing with a lid or aluminum foil.
Freeze the ice cream for at least 4–6 hours, or overnight for the best results. When you’re ready to serve, simply scoop and enjoy!
Tips for Perfect No Churn Ice Cream
While the recipe is simple, there are a few tips and tricks to ensure your no churn ice cream comes out perfectly creamy and delicious every time.
How to Achieve a Creamy Texture
The key to achieving the perfect creamy texture is to properly whip the heavy cream. Be sure to whip it to stiff peaks—this is what helps the ice cream stay light and smooth, even without churning. When folding the whipped cream into the condensed milk mixture, be gentle. Over-mixing can cause the air to deflate, making the ice cream denser and less creamy.
Custom Flavor Ideas
While vanilla is a classic flavor for no churn ice cream, there’s no limit to the possibilities! Here are a few ideas to get you started:
- Chocolate Peanut Butter: Swirl in peanut butter and chocolate chips for a rich, nutty flavor.
- Strawberry Swirl: Add fresh or pureed strawberries for a fresh, fruity taste, or mix in a store-bought strawberry jam for convenience.
- Cookies and Cream: Crush up your favorite cookies (Oreos, for example) and fold them in for a crunchy, creamy texture.
- Coffee or Mocha: Add brewed coffee or espresso and a bit of cocoa powder for a coffee lover’s dream.
Making Dairy-Free No Churn Ice Cream
If you’re looking to make a dairy-free version of no churn ice cream, it’s easy to substitute the ingredients. Instead of heavy cream, use full-fat coconut cream for a rich, creamy base. Replace the sweetened condensed milk with a dairy-free alternative, such as sweetened condensed coconut milk, or use a blend of coconut milk and sugar. This way, you can still enjoy all the creamy goodness without the dairy!
Avoiding Ice Crystals
One common challenge when making no churn ice cream is ice crystals, which can make the texture gritty. To prevent this, make sure to store the ice cream in an airtight container and cover the surface with plastic wrap or parchment paper before sealing it. The plastic wrap will prevent air from getting to the ice cream and help maintain a smooth, creamy texture. If you have a particularly long freezing time, try stirring the mixture halfway through freezing to help break up any initial ice crystals that may form.
With these tips and a step-by-step guide, your no churn ice cream will turn out rich, creamy, and irresistible every time. So go ahead and get creative with your flavors and mix-ins—it’s easier than ever to make a delicious homemade dessert!
Serving Suggestions
Once your no churn ice cream is perfectly frozen and ready to go, it’s time to serve up this creamy treat in style.
Whether you’re dishing it out for a family dessert or serving it at a party, here are some ideas to make your ice cream experience even more delightful.
Scoops in Bowls or Cones
The classic way to serve no churn ice cream is in a bowl or cone. For bowls, simply scoop out generous portions and garnish with a sprinkle of your favorite toppings like chocolate chips, nuts, or fruit slices. If you’re serving in cones, you can dip the top of each cone in melted chocolate, then roll it in sprinkles or crushed cookies for a fun and delicious twist.
Creative Toppings
Toppings can elevate your ice cream experience to the next level! Try adding:
- Whipped Cream: A dollop of freshly whipped cream adds an extra layer of fluffiness and pairs perfectly with any flavor.
- Hot Fudge or Caramel Sauce: Drizzle on a warm sauce for a melt-in-your-mouth experience.
- Fresh Berries: Adding a handful of fresh fruit, like raspberries, strawberries, or blueberries, brings a bright, refreshing contrast to the rich ice cream.
- Crushed Treats: Crushed cookies, candy bars, or even pretzels can add a delightful crunch and flavor to your ice cream.
Sundae Bar
For a fun gathering, create a DIY sundae bar! Lay out several toppings and allow your guests to build their own ice cream creations. You can include crushed Oreos, sprinkles, chopped fruits, caramel sauce, marshmallow fluff, and more. It’s a fun way to let everyone customize their dessert exactly how they like it!
Ice Cream Sandwiches
For a fun and portable dessert, make ice cream sandwiches. Simply scoop the ice cream between two cookies, waffles, or brownies. It’s a playful way to enjoy your homemade treat!
Conclusion
No churn ice cream is a game-changer when it comes to easy, homemade desserts. Not only is it simple to make, but it’s also incredibly versatile, allowing you to create endless flavor combinations that suit every taste.
Whether you’re sticking with classic vanilla or getting adventurous with mix-ins, this recipe is sure to become a staple in your dessert repertoire.
The beauty of no churn ice cream lies in how customizable it is. With just a few ingredients, you can whip up a batch of rich, creamy ice cream without the need for an ice cream maker or a lot of time. Plus, it’s perfect for summer get-togethers, family nights, or just when you need a sweet treat at home.
Now that you know how easy it is, grab your ingredients, get creative, and start making your own creamy, no churn ice cream today!
Frequently Asked Questions (FAQs)
1. Can I make no churn ice cream without sweetened condensed milk?
While sweetened condensed milk is a key ingredient for creating the perfect creamy texture, you can make a similar ice cream base using alternatives. You can try using coconut condensed milk for a dairy-free option, or substitute it with a mixture of heavy cream and powdered sugar for a more traditional ice cream texture. The result may be slightly different, but it will still be delicious.
2. How long does no churn ice cream last in the freezer?
No churn ice cream can last up to 2-3 weeks in the freezer when stored properly. Make sure to store it in an airtight container and cover the surface with plastic wrap or parchment paper before sealing it to prevent ice crystals from forming.
3. Can I use a different base for no churn ice cream?
Yes, you can experiment with other bases like Greek yogurt or mascarpone cheese for a tangy or rich flavor. These bases may require some additional sweetener or flavorings to balance the taste, but they offer great variations to the traditional no churn ice cream.
4. Can I use an ice cream maker with this recipe?
Yes, while the beauty of no churn ice cream is that it doesn’t require an ice cream maker, you can use one if you prefer. Simply follow the recipe up to the point where you fold in the whipped cream, then pour the mixture into your ice cream maker and churn according to the manufacturer’s instructions. Once churned, freeze the ice cream to firm it up.
5. How can I make no churn ice cream without a mixer?
If you don’t have an electric mixer, you can still make no churn ice cream by whipping the heavy cream by hand. Use a large whisk and some elbow grease to whip the cream until stiff peaks form. This may take a bit longer, but it’s entirely possible to achieve the same airy, creamy texture without a mixer.

No Churn Ice Cream
Equipment
- 1 large mixing bowl
- 1 hand mixer or stand mixer (Optional: whisk for hand whipping)
- 1 spatula
- 1 loaf pan or freezer-safe container
- 1 plastic wrap or parchment paper (for covering)
Ingredients
- 2 cups 480 ml Heavy cream
- 1 can 14 oz or 396 grams Sweetened condensed milk
- 2 teaspoons 10 ml Vanilla extract
- Optional mix-ins: chocolate chips crushed cookies, fruit, etc. (to your preference)
Instructions
Whip the Heavy Cream
- Pour the heavy cream into a large mixing bowl. Using a hand mixer or stand mixer, whip the cream on medium-high speed until stiff peaks form. This will take about 3-5 minutes. The whipped cream should hold its shape when you lift the beaters or whisk.
Mix the Sweetened Condensed Milk and Vanilla
- In a separate bowl, combine the sweetened condensed milk and vanilla extract (or any other flavoring you’re using). Stir to mix well.
Fold in the Whipped Cream
- Add about one-third of the whipped cream to the condensed milk mixture and fold gently using a spatula. Continue adding the rest of the whipped cream in two more batches, folding gently each time until fully combined. Be careful not to deflate the whipped cream.
Add Mix-ins
- Gently fold in any mix-ins like chocolate chips, crushed cookies, or fruit (if desired). Be sure to incorporate them evenly without over-mixing the ice cream base.
Freeze the Mixture
- Transfer the ice cream mixture to a loaf pan or another freezer-safe container. Smooth the top with a spatula. Cover the surface with plastic wrap or parchment paper to prevent ice crystals. Freeze the ice cream for at least 4-6 hours or overnight for the best texture.
Serve and Enjoy
- Once frozen, scoop the ice cream into bowls, cones, or serve as a topping for other desserts. Enjoy your homemade, creamy no churn ice cream!
Notes
- Whipping the Cream: Ensure that your heavy cream is very cold before whipping. This helps it achieve stiff peaks more easily.
- Customization: This base recipe is incredibly versatile. You can swap out vanilla for different extracts (e.g., almond, hazelnut) or add fruit purées, chocolate syrup, or swirls of caramel for different flavors. Don’t forget the fun mix-ins like candy pieces, crumbled cookies, or chopped nuts!
- Dairy-Free Version: To make a dairy-free version, substitute the heavy cream with coconut cream and the sweetened condensed milk with sweetened condensed coconut milk, or use a coconut milk and sugar mixture.
- Storage: Keep the ice cream covered tightly in an airtight container in the freezer. It should last for about 2-3 weeks, though it’s best enjoyed within the first week for optimal freshness.


