All products are selected by our editorial team for quality. If you buy through our links, we may earn a small commission at no extra cost to you.
When the craving for something sweet strikes, ice cream is often the go-to treat.
However, indulging in a creamy scoop can sometimes come with a hefty dose of sugar, fat, and extra calories that we don’t always want.
This Low Fat Ice Cream Recipe offers the perfect solution!
By using healthier ingredients, you can enjoy the same satisfying texture and flavor of traditional ice cream, but with significantly less guilt.
Not only does this recipe cater to those mindful of their calorie intake, but it’s also incredibly easy to make at home, allowing you to skip the preservatives and artificial flavors often found in store-bought versions.
Whether you’re following a low-fat diet, watching your sugar intake, or simply looking for a lighter alternative, this homemade ice cream will become your new go-to treat.

Health Benefits of Low Fat Ice Cream
1. Heart-Friendly Alternative
By replacing heavy cream with fat-free milk and yogurt, this recipe significantly reduces saturated fat intake, making it a smarter choice for those managing cholesterol or cardiovascular health.
2. Lower Calorie Dessert Option
Ideal for anyone on a calorie-controlled diet, this low-fat ice cream allows you to indulge your sweet tooth without overloading on energy-dense ingredients.
3. Rich in Protein and Calcium
Thanks to the dairy base, each serving delivers a solid dose of protein to support muscle health, and calcium to strengthen bones and teeth.
4. Good for Gut Health
Using fat-free yogurt introduces probiotics—beneficial bacteria that support digestion and may help balance gut flora.
5. Customizable for Dietary Needs
The ability to switch out ingredients for dairy-free or sugar-free versions makes this a flexible treat suitable for various dietary restrictions including lactose intolerance, gluten-free, and low-sugar diets.
6. Avoids Additives and Preservatives
Homemade means no artificial colors, flavors, or stabilizers commonly found in commercial low-fat ice cream.
Ingredients You Will Need
Making low-fat ice cream doesn’t require a long list of ingredients.
The beauty of this recipe is that it keeps things simple and uses healthier alternatives without compromising on taste.
Here’s what you’ll need to get started:
Base Ingredients:
- Fat-Free Milk: The cornerstone of this recipe, fat-free milk creates a creamy base while keeping the fat content minimal.
It’s a great substitute for the heavy cream found in traditional ice cream recipes. - Fat-Free Yogurt: This ingredient enhances the creaminess of the ice cream while adding a slight tang, making your treat richer in texture without the extra calories.
- Sweetener of Choice: While sugar can be used, opting for a natural sweetener like honey, agave syrup, or stevia will help reduce the overall sugar content.
The sweetener will ensure the ice cream has just the right amount of sweetness without overloading it. - Vanilla Extract: A splash of vanilla extract adds depth and flavor to the base.
This classic ingredient enhances the overall taste, giving it that familiar ice cream flavor we all love.
Optional Add-Ins and Flavor Variations:
While the base of this recipe is simple, you can easily customize it to your liking.
Here are some ideas for flavor variations and add-ins that can take your low-fat ice cream to the next level:
- Fresh Fruit (e.g., strawberries, bananas, or mangoes): Adding fruit not only boosts the flavor but also provides natural sweetness and fiber.
You can either blend it into the base or swirl it in after churning. - Chocolate (low-fat cocoa powder or dark chocolate chips): For chocolate lovers, a small amount of low-fat cocoa powder or dark chocolate chips can be mixed in to give the ice cream a rich, indulgent taste.
- Nuts or Seeds: A handful of chopped nuts, such as almonds or walnuts, or even seeds like chia or flaxseed, can be added for texture and a touch of healthy fats.
- Extracts or Spices: Experiment with other extracts (like almond or mint) or spices (such as cinnamon) to create unique flavors.
Just a teaspoon or so can transform your low-fat ice cream into something truly special.
These optional ingredients allow you to get creative, ensuring that your homemade low-fat ice cream is customized to your taste preferences while keeping it healthy.
Step-by-Step Instructions

Making low-fat ice cream at home is surprisingly easy, and with a few simple steps, you’ll have a delicious treat ready to enjoy.
Follow these instructions for a smooth, creamy, and guilt-free dessert.
Step 1: Prepare the Base
Start by gathering all of your ingredients.
In a medium-sized bowl, combine the fat-free milk and fat-free yogurt.
Use a whisk to mix them together until the mixture is smooth and uniform.
This will be the creamy foundation of your ice cream.
If you’re using a sweetener like honey or stevia, add it to the mixture now and whisk until fully incorporated.
Step 2: Sweeten and Flavor
Once your base is smooth, it’s time to add flavor.
Pour in the vanilla extract and give it a quick stir to evenly distribute the flavor throughout the mixture.
If you’re adding any flavorings, such as cocoa powder or fruit purees, now is the time to mix those in as well.
For extra sweetness, taste the mixture and adjust the amount of sweetener according to your preference.
Step 3: Chill the Mixture
For the best texture, place the mixture in the fridge for about 1 to 2 hours.
Chilling helps the base to firm up slightly and ensures it freezes evenly once it’s placed in the ice cream maker or freezer.
Step 4: Freezing Process
Once your base is chilled, it’s time to freeze it.
If you have an ice cream maker, pour the chilled mixture into the machine and follow the manufacturer’s instructions.
Typically, it takes about 20 to 30 minutes for the mixture to reach a soft-serve consistency.
If you don’t have an ice cream maker, don’t worry! Pour the mixture into a shallow dish, cover it, and place it in the freezer.
Stir the mixture every 30 minutes for the first 2 hours to break up any ice crystals, ensuring a smoother, creamier texture.
Step 5: Stir for Smoothness (Optional)
If you’re making the ice cream without a machine, be sure to stir the mixture periodically as it freezes to avoid large ice crystals.
This step is essential for achieving that smooth, creamy consistency.
Once it has frozen to your desired firmness, your homemade low-fat ice cream is ready to be served.
Tips for the Perfect Low Fat Ice Cream
While making low-fat ice cream is simple, a few helpful tips can ensure your homemade treat comes out perfectly every time.
Here’s what to keep in mind:
Consistency Matters
Achieving the right consistency is key to making a successful low-fat ice cream.
Since you’re using fat-free milk and yogurt instead of heavy cream, your ice cream may freeze a bit harder than traditional versions.
To prevent this, make sure you stir the mixture regularly during the freezing process.
This will help to break up ice crystals and keep the texture smooth.
If your ice cream becomes too hard, let it sit at room temperature for a few minutes to soften before serving.
Avoiding Over-Sweetening
Because this is a low-fat recipe, it’s tempting to add extra sweeteners to boost the flavor.
However, it’s important not to overdo it.
Too much sweetener can overpower the flavor of your ice cream and even result in an undesirable texture.
Taste the base before freezing it and adjust the sweetness gradually, remembering that frozen desserts often taste less sweet than their liquid counterparts.
Serving Suggestions
While your homemade low-fat ice cream is tasty on its own, you can take it to the next level with some fun and healthy toppings.
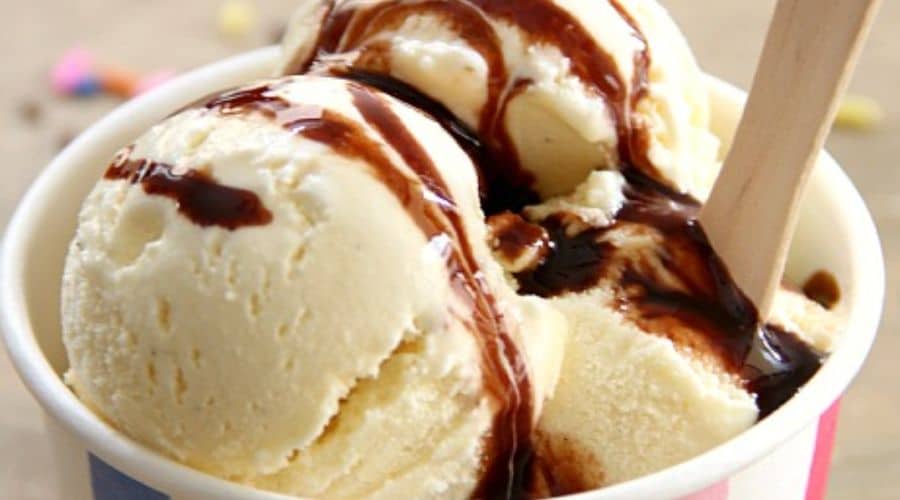
Fresh fruit, a drizzle of dark chocolate syrup, or a sprinkle of chopped nuts can add flavor and texture.
If you’re looking for a creative spin, consider adding a few crushed graham crackers for a “s’mores” effect or a spoonful of peanut butter for extra richness.
Freeze in Small Batches for Even Freezing
If you’re making a large batch of ice cream, consider dividing the mixture into smaller containers.
Smaller portions freeze more evenly and help the mixture chill faster, reducing the formation of large ice crystals and ensuring a smoother end result.
Be Patient with No-Churn Recipes
If you’re following a no-churn method, be patient and let the ice cream freeze fully before serving.
It may take longer than you expect to reach the perfect texture, but the results are well worth the wait.
By following these tips, you’ll ensure that your low-fat ice cream is both delicious and perfectly smooth, making it the ideal treat for any occasion.
Nutritional Benefits of Low Fat Ice Cream
Low-fat ice cream isn’t just a tasty alternative; it also offers several nutritional benefits that make it a great choice for those looking to indulge without compromising their health goals.
Here’s why this homemade treat can be part of a balanced diet:
Lower in Calories
One of the main advantages of low-fat ice cream is that it contains fewer calories than traditional ice cream.
By using fat-free milk and yogurt, you significantly cut down on the calorie count, allowing you to enjoy a scoop (or two!) without the excess.
Reduced Fat Content
The most obvious benefit is the lower fat content.
Traditional ice cream often contains high amounts of saturated fats from cream, which can contribute to higher cholesterol levels.
This low-fat version swaps in fat-free alternatives, making it a heart-healthier choice.
You’ll still get the creamy texture, but without the unnecessary fats.
High in Protein and Calcium
By using fat-free yogurt and milk, this recipe is also a good source of protein and calcium.
Protein is essential for muscle repair and growth, while calcium is crucial for strong bones and teeth.
Plus, the probiotics in yogurt offer digestive benefits, making this dessert both a treat and a functional food.
Customizable for Dietary Needs
With the ability to adjust sweeteners and even make the recipe dairy-free, this low-fat ice cream can accommodate various dietary needs, including those watching their sugar intake or those following vegan or gluten-free diets.
Customizing it to your personal preferences allows you to enjoy a dessert that fits your lifestyle.
This healthier version of ice cream doesn’t sacrifice taste or texture, proving that delicious treats can still align with a balanced, nutritious diet.
Storage Instructions
To keep your low-fat ice cream fresh and maintain its creamy texture, store it in an airtight container in the freezer.
Ideally, use a shallow, freezer-safe container to encourage even freezing and minimize ice crystal formation.
Press a piece of parchment paper or plastic wrap directly onto the surface of the ice cream before sealing the container—this helps reduce freezer burn and keeps the texture smooth.
For best results, consume within 1 to 2 weeks.
Because this recipe doesn’t contain stabilizers or high-fat content like store-bought ice cream, it may harden more over time.
If it becomes too firm, let it sit at room temperature for 5–10 minutes before scooping.
Recipe Variation
Dairy-Free/Vegan Option:
Swap out the fat-free milk and yogurt with plant-based alternatives like unsweetened almond milk, coconut milk, or soy milk, and use a non-dairy yogurt.
Be sure to choose options that are plain and unsweetened to control flavor and sugar content.
Fruit Swirl Version:
Blend your favorite fruits (like berries or mango) into a purée and swirl it into the base before freezing.
You can also layer the purée for a ripple effect, giving your ice cream a fruity twist with every bite.
Chocolate Banana Nice Cream:
Blend two frozen bananas with 1 tablespoon of low-fat cocoa powder and a splash of vanilla extract for a naturally sweet, chocolatey version.
No added sweetener needed—just freeze and enjoy.
Mint Chocolate Chip:
Add ½ teaspoon of peppermint extract and a handful of mini dark chocolate chips to the base mixture for a refreshing and indulgent trea
Serving Suggestions
- Classic Scoop: Serve in a chilled bowl or cone with a light dusting of cinnamon or cocoa powder for an elegant finish.
- Fruit Parfait: Layer the ice cream with fresh berries, granola, and a dollop of extra yogurt for a balanced and beautiful dessert.
- Affogato Style: Pour a shot of hot espresso over a scoop of your low-fat ice cream for a low-fat twist on the Italian classic.
- Healthy Sundae: Top with sliced bananas, chopped nuts, and a drizzle of warm honey or dark chocolate for a nutritious sundae.
- Frozen Sandwiches: Spread the ice cream between two low-fat cookies or graham crackers and freeze for a fun, handheld treat.
Conclusion
Making low-fat ice cream at home is easier than you think, and the benefits are too good to pass up.
This simple, yet satisfying treat allows you to indulge in the creamy, comforting goodness of ice cream while keeping your health goals intact.
Whether you’re looking to cut down on calories, reduce your fat intake, or just enjoy a lighter dessert, this homemade low-fat ice cream is the perfect solution.
Feel free to get creative with flavors, toppings, and add-ins to make this recipe your own.
With just a few basic ingredients and a little patience, you’ll have a delicious treat that’s sure to become a regular in your dessert rotation.
So, go ahead—treat yourself to a scoop (or two) of this guilt-free, indulgent ice cream!
Frequently Asked Questions (FAQs)
- Can I make low-fat ice cream without an ice cream maker?
Yes! If you don’t have an ice cream maker, you can still make this recipe.
Simply pour the chilled mixture into a shallow dish and place it in the freezer.
Stir the mixture every 30 minutes for the first 2 hours to break up any ice crystals.
This will help achieve a smoother texture without the need for an ice cream machine.
- Can I use a dairy-free alternative for the milk and yogurt?
Absolutely! You can easily make this recipe dairy-free by substituting the fat-free milk and yogurt with alternatives like almond milk, coconut milk, or soy milk.
Opt for dairy-free yogurt to maintain that creamy texture. Just ensure the sweetener and flavorings are adjusted to your taste.
- How long does this low-fat ice cream last in the freezer?
Homemade low-fat ice cream can last for about 2 to 3 weeks in the freezer if stored properly.
Be sure to place it in an airtight container to prevent freezer burn.
You may need to let it sit at room temperature for a few minutes before serving, as it can become quite firm.
- Can I make this recipe without using any sweetener?
If you prefer a sugar-free option, you can omit the sweetener or use a natural sugar substitute like stevia or monk fruit sweetener.
Keep in mind that the flavor may be slightly less sweet, but the natural taste of the vanilla or fruit will still shine through.
- Can I add mix-ins like chocolate chips or nuts to this recipe?
Yes! Adding mix-ins like chocolate chips, chopped nuts, or fruit is a great way to customize your low-fat ice cream.
After the ice cream has churned (or started freezing), gently fold in your mix-ins.
Just be mindful of the portion size if you’re trying to keep the calorie count lower.

Low Fat Ice Cream
Equipment
- 1 Medium Bowl
- (1) Whisk
- Ice cream maker (Optional)
- Shallow Freezer-Safe Dish (for no-churn method)
- Spatula (for mixing and scraping)
Ingredients
- 2 cups Fat-free Milk
- 1 cup Fat-free Yogurt plain or vanilla
- 1/2 cup Sweetener e.g., honey, agave syrup, or stevia, adjust to taste
- 2 teaspoons Vanilla Extract
- Optional Add-ins: 1/2 cup Chopped fruits, chocolate chips, or nuts (adjust based on preference)
Instructions
Mix the Base
- In a medium-sized bowl, combine the fat-free milk and fat-free yogurt. Use a whisk to mix until smooth and uniform. Add your sweetener of choice (honey, stevia, or agave) and vanilla extract, stirring until fully incorporated.
Chill the Mixture
- Place the mixture in the refrigerator and chill for 1-2 hours. Chilling the mixture ensures the ice cream freezes evenly and achieves the best texture.
Freeze the Ice Cream
- If using an ice cream maker, pour the chilled mixture into the machine and follow the manufacturer’s instructions (typically, it will churn for about 20-30 minutes). If using the no-churn method, pour the mixture into a shallow dish, cover it with plastic wrap, and freeze for 4-6 hours, stirring every 30 minutes for the first 2 hours to avoid ice crystals.
Serve
- Once your ice cream reaches a soft-serve or firm consistency, serve it in bowls or cones. Garnish with any additional toppings like fresh fruit, nuts, or a drizzle of chocolate syrup.
Notes
- Sweetener: Adjust the amount of sweetener to suit your personal taste. If using stevia or other sugar substitutes, be sure to check their sweetness equivalence to sugar.
- Consistency: If the ice cream becomes too hard after freezing, let it sit out for a few minutes before scooping to soften it up.
- Add-ins: Feel free to mix in your favorite fruits, chocolate chips, or nuts for additional flavor. Add these after churning or during the last stage of freezing to ensure even distribution.
- Dairy-Free Option: To make this recipe dairy-free, substitute the fat-free milk with almond milk or coconut milk, and use a dairy-free yogurt alternative.


