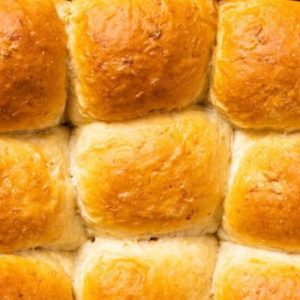
These honey oat dinner rolls are soft, golden, and lightly sweetened, making them perfect for breakfast, dinner, or snacks.
Packed with fiber from oats and a touch of plant-based goodness from whole milk, they offer a balance of good fats and moderate protein.
Quick to prepare and delightfully fluffy, they’re an everyday-friendly, wholesome bread option that pleases the whole family.
Honey Oat Dinner Rolls
Equipment
- Large mixing bowl (1)
- Measuring Cups and Spoons
- Wooden Spoon or Spatula (1)
- 9×13-inch baking dish (1)
- Oven thermometer (optional, 1)
- Pastry brush (optional, 1)
Ingredients
- 8 tbsp unsalted butter room temperature
- ¼ cup honey
- 1 cup oats
- 1 tsp kosher salt
- 1 cup hot water
- ½ cup whole milk
- 1 large egg
- 4 cups all-purpose flour
- 2 ¼ tsp instant yeast 1 package
- 1 tbsp neutral oil for greasing
Instructions
- Prepare the Wet Base: Start by gathering a large mixing bowl to combine your main wet ingredients. Add the softened unsalted butter, honey, oats, and kosher salt. Pour in the hot water gradually while stirring continuously with a wooden spoon or spatula. This helps the butter melt evenly and integrates the honey and oats, creating a warm, slightly sticky mixture. Allow this mixture to cool to no less than 110°F (warm to the touch but not hot) for about 5–6 minutes, ensuring it won’t kill the yeast in the next step.
- Incorporate Milk and Egg: Once the base has cooled to a safe temperature, stir in the whole milk and the beaten egg. Mix thoroughly until the liquids are well combined, forming a slightly creamy, cohesive base. The egg will add richness and softness, while the milk enhances the tenderness of the dough.
- Add Flour and Yeast: Sprinkle in 2 cups of all-purpose flour along with the instant yeast. Using a sturdy wooden spoon or spatula, stir the mixture until it starts forming a sticky dough. At this stage, it will appear somewhat wet and lumpy. This is normal and ensures your rolls will be soft and airy.
- Gradually Build Dough Consistency: Add the remaining flour, one cup at a time, kneading gently after each addition. This step allows you to control the dough texture. You want a dough that is slightly tacky to the touch but not overly sticky, and it should pull away from the sides of the bowl as you knead. Avoid adding too much flour, as it can make the rolls dense.
- Knead the Dough: Once all the flour is incorporated, turn the dough onto a lightly floured surface and knead for 3–5 minutes.Press, fold, and stretch the dough rhythmically, working in circular motions. The goal is to develop a soft, elastic texture that holds together without being stiff. The dough should feel smooth and pliable, ready to rise.
- First Rise (Proofing): Lightly drizzle 1 tablespoon of neutral oil around the sides of the mixing bowl and over the dough to prevent sticking. Cover the bowl with a clean kitchen towel or plastic wrap and place it in a warm, draft-free area. Allow the dough to rise until it doubles in size, approximately 40–60 minutes. You’ll know it’s ready when gently pressing the dough leaves a slight indentation.
- Shape the Rolls: After the first rise, gently punch down the dough to release excess air. Turn it out onto a lightly floured surface and knead briefly to smooth it out. Divide the dough into 15 even portions using a bench scraper or knife. Roll each portion into a smooth, round ball, taking care to maintain an even size so the rolls bake uniformly.
- Arrange in Baking Dish: Prepare a 9×13-inch baking dish by greasing it with butter. Place each dough ball in the dish, arranging them evenly with a little space to allow for the second rise. Cover loosely with a kitchen towel or plastic wrap and let the rolls rise again in a warm spot for 35–50 minutes, until they puff up and nearly double in size.
- Preheat Oven and Bake: While the rolls are completing their second rise, preheat your oven to 350°F (175°C). Place the baking dish in the center of the oven and bake for 20–25 minutes, or until the tops are golden brown and a thermometer inserted into the center reads 190°F. The aroma of warm honey and oats will fill your kitchen during baking.
- Cool and Serve: Remove the rolls from the oven and let them cool in the pan for 20 minutes before serving. This resting period allows the interior to set, ensuring the rolls remain soft, tender, and easy to pull apart. Serve warm with butter, honey, or your favorite spread for a satisfying treat.
Notes
- Butter and Honey: Use room-temperature butter for easier mixing and a richer flavor. Honey can be substituted with maple syrup if desired.
- Oats: Rolled oats work best; they add texture and fiber, making the rolls slightly heartier.
- Temperature Matters: Ensure the water is warm (around 110°F) but not hot, as too high heat can kill the yeast.
- Kneading: Don’t over-knead; the dough should be soft and slightly tacky for light, fluffy rolls.
- Rising: A warm, draft-free environment speeds up the dough rise. Covering with a damp cloth prevents drying out.
Chef’s Secrets For Perfect Rolls
The key to soft, fluffy honey oat rolls is balancing moisture, yeast activation, and kneading.
Begin with warm water to wake up the yeast without shocking it. Incorporating oats adds texture and fiber while keeping the rolls tender.
Gentle kneading is essential—too much flour can make them dense.
For extra flavor, brush the tops with melted butter immediately after baking to enhance aroma and create a golden, soft crust.
Using high-quality honey or sweetener elevates the flavor naturally, making these rolls taste bakery-fresh every time.
Serving Suggestions And Pairings
These honey oat rolls are incredibly versatile.
Serve them warm with butter or cream cheese for breakfast, alongside soups or stews for lunch or dinner, or as a side for roasted meats and vegetables.
They also pair beautifully with sweet spreads like jam or honey butter.
For a more decadent twist, slice the rolls and use them for mini sandwiches or sliders.
Their slightly sweet and nutty flavor complements both savory and sweet toppings, making them ideal for any meal occasion.
Storage Tips And Best Practices
To keep your rolls fresh, store them in an airtight container at room temperature for up to 2–3 days.
For longer storage, freeze the rolls in a sealed freezer bag for up to 2 months.
When ready to eat, thaw at room temperature and warm in the oven for a few minutes to regain their soft texture.
Avoid refrigeration, as this can dry out the rolls and affect their fluffiness.
Reheating in a microwave with a damp paper towel can also restore moisture for a quick snack.
Frequently Asked Questions
1. Can I use instant oats instead of rolled oats?
Yes, instant oats can be used, but they may create a softer, less textured roll. Rolled oats provide a slight chewiness and more fiber.
2. Can I make these rolls without eggs?
Absolutely! Eggs add richness and tenderness, but you can replace one egg with ¼ cup unsweetened applesauce or yogurt for a similar texture.
3. Why aren’t my rolls rising properly?
Check the yeast and water temperature. Yeast may be expired or water too hot/cold.
Make sure the dough rests in a warm, draft-free spot for proper proofing.
4. Can I use all whole wheat flour instead of all-purpose?
You can, but whole wheat flour absorbs more liquid and produces denser rolls.
Consider using a 50/50 mix of all-purpose and whole wheat flour for a lighter texture.
5. How do I keep the rolls soft longer?
Brush baked rolls with melted butter and store in an airtight container at room temperature.
Freezing and reheating also helps maintain softness and freshness.
