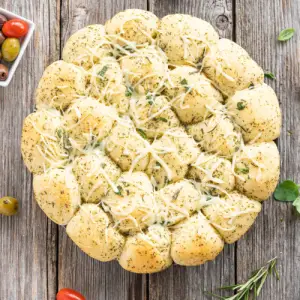
This garlic and herb pull-apart bread is a savory, cheesy delight that’s both comforting and nourishing.
Made with a soft yeast dough brushed in herb butter, it offers plant-based fats from olive oil and fiber-rich flour for a healthier bite.
Low in saturated fat yet bursting with flavor, it’s the perfect side for family meals, barbecues, or weeknight dinners—easy to prepare, irresistibly fluffy, and satisfying for any occasion.
Cheesy Garlic Pull-Apart Bread
Equipment
- 1 large mixing bowl
- 1 Dough Scraper or Sharp Knife
- 1 11-inch (28 cm) Round Baking Pan
- 1 pastry brush
- Measuring Cups and Spoons
Ingredients
For the Dough:
- 450 g 3 ⅔ cups all-purpose flour
- 7 g 1 sachet dry yeast
- ½ teaspoon sugar
- 90 ml 6 tablespoons lukewarm water
- 160 ml ¾ cup lukewarm milk
- 1 ½ teaspoons salt
- 30 g 2 tablespoons olive oil
- 1 teaspoon fresh chopped herbs
For Brushing & Filling:
- 140 g ⅔ cup herb butter, softened
- 1 teaspoon fresh chopped herbs
- 70 g ⅔ cup grated cheese (optional)
Instructions
- Activate the Yeast: Begin by preparing the base of your dough. In a small bowl, mix the lukewarm water, sugar, and dry yeast together. Stir lightly and let it sit for about 5–7 minutes, until a foamy layer appears on the surface. This step proves that the yeast is active and will help your bread rise properly.If the mixture doesn’t bubble, start again with fresh yeast to ensure success.
- Combine Wet and Dry Ingredients: In a large mixing bowl, add the flour and salt. Create a small well in the center and pour in the yeast mixture, lukewarm milk, olive oil, and chopped herbs. Using a wooden spoon or your hands, gradually bring the ingredients together until they form a sticky dough. The warmth of the milk and water helps the yeast activate, while the olive oil ensures a tender crumb.
- Knead the Dough Thoroughly: Transfer the dough onto a lightly floured surface and knead it for 8–10 minutes. Push the dough forward with the heel of your hand, fold it back over itself, and turn it slightly each time.The dough should become smooth, elastic, and no longer sticky. If it feels too wet, add a sprinkle of flour; if too dry, work in a teaspoon of water at a time. Kneading is crucial because it builds gluten, which gives the bread its structure and airy texture.
- First Rise – Let the Dough Rest: Shape the kneaded dough into a round ball and place it into a lightly oiled bowl. Cover the bowl with a clean kitchen towel or plastic wrap. Allow it to rise in a warm, draft-free spot for about 45 minutes to 1 hour, or until it has doubled in size. This resting period develops flavor and creates the light, fluffy base for the bread.
- Prepare the Baking Pan: While the dough is rising, generously grease your 11-inch (28 cm) baking pan or springform pan with about 40 g of herb butter. Spread it evenly over the bottom and sides so that the rolls won’t stick and will bake with a flavorful buttery crust.
- Divide the Dough into Portions: Once the dough has doubled, punch it down gently to release the air. Transfer it back to a floured surface and knead briefly, just enough to tighten its structure. Using a dough scraper or sharp knife, cut the dough in half. Cut each half again, and continue dividing until you have 26–30 small, equal portions. This size ensures that each ball bakes evenly and creates the pull-apart effect.
- Shape the Dough Balls: Take each portion and roll it gently between your palms to form smooth, round balls. Aim for uniform size so they bake evenly. Place the balls side by side in the buttered pan, arranging them closely together but not pressing down too hard. As they rise again, they’ll puff up and touch, creating the signature pull-apart look.
- Second Rise – Proof the Dough Balls: Cover the pan loosely with a towel and let the shaped balls rise for another 20–25 minutes. This second proofing helps them expand and become extra light and fluffy once baked. Meanwhile, preheat your oven to 360°F (180°C) so it’s fully heated by the time the bread is ready to bake.
- Brush with Butter: Melt the remaining herb butter until it’s just softened and spreadable (not too hot). Using a pastry brush, carefully coat the tops of the dough balls with the melted butter. This not only adds flavor but also encourages a golden-brown crust.
- Bake the Bread: Place the pan into the preheated oven and bake for 20 minutes. At this stage, the bread should be lightly golden. Remove it briefly, sprinkle the tops with fresh herbs and grated cheese (if using), then return it to the oven for an additional 5–10 minutes, or until the cheese melts and the tops turn deep golden brown.
- Cool Slightly Before Serving: Once baked, take the pan out of the oven and let the bread rest for about 5–10 minutes. This cooling time helps the texture settle and makes it easier to pull apart. Serve warm as a shareable side dish, perfect for dipping into soups, pairing with grilled meats, or enjoying as a snack.
Notes
- Use lukewarm water and milk to activate yeast effectively.
- Kneading is key—smooth, elastic dough gives fluffy bread.
- Always allow enough rising time for a light texture.
- Herb butter adds depth—use homemade or store-bought.
- Cheese is optional but creates a richer, indulgent finish.
- A springform pan or pizza tray works well for baking.
- Serve warm for the best pull-apart texture.
Chef’s Secrets for Perfect Bread
The secret to fluffy pull-apart bread lies in proper dough handling.
Kneading for at least 8–10 minutes helps build gluten, which traps air and makes the bread rise beautifully.
Don’t rush the proofing process—letting the dough double in size ensures softness and prevents dense bread.
For extra flavor, infuse your herb butter with garlic, parsley, or rosemary before spreading.
If you’re adding cheese, choose varieties that melt well, like mozzarella, cheddar, or gouda, to create a gooey layer of indulgence.
Always preheat the oven thoroughly—placing dough in a cold oven can affect its rise and texture.
Serving Suggestions and Pairing Ideas
This bread is incredibly versatile and works with almost any meal.
Serve it as a side for pasta dishes, grilled meats, or barbecue spreads, where the buttery garlic flavor complements rich main courses.
It also pairs wonderfully with soups like tomato basil, creamy mushroom, or chicken noodle, acting as the perfect dipper.
For gatherings, present it as an appetizer with marinara, garlic aioli, or olive oil dipping sauce.
If you enjoy cheese boards, place this bread at the center alongside olives, cured meats, and fresh vegetables for a stunning party spread.
Storage Tips for Freshness
Pull-apart bread is best enjoyed warm from the oven, but leftovers store well if handled properly.
Once cooled completely, wrap the bread tightly in foil or place it in an airtight container.
It will stay fresh at room temperature for 1–2 days or in the refrigerator for up to 4 days.
To reheat, place in a warm oven for 8–10 minutes to restore its softness—avoid microwaving, as it can make the bread chewy.
For longer storage, freeze the bread wrapped in foil and a freezer-safe bag for up to 2 months.
Thaw overnight in the fridge and warm in the oven before serving.
Frequently Asked Questions
1. Can I make this bread ahead of time?
Yes! You can prepare the dough, shape it into balls, and refrigerate overnight before baking.
Simply allow it to come back to room temperature and rise for 20–30 minutes before baking.
2. What herbs work best for this recipe?
Parsley, chives, dill, rosemary, and thyme all work well. For a bolder flavor, mix in fresh garlic or oregano.
You can adjust based on what’s in season or your personal taste.
3. Can I make this bread without cheese?
Absolutely! The bread is delicious on its own with just garlic and herb butter.
The cheese is optional but adds a gooey, savory finish if you want something richer.
4. How do I know the bread is fully baked?
The bread should be golden brown on top and sound hollow when tapped lightly.
You can also use a thermometer—the internal temperature should reach about 190°F (88°C).
5. Can I use whole wheat flour instead of all-purpose?
Yes, but the texture will be denser. For the best balance, substitute half the flour with whole wheat and keep the other half all-purpose.
This way, you get the nutty flavor of whole wheat without sacrificing fluffiness.
