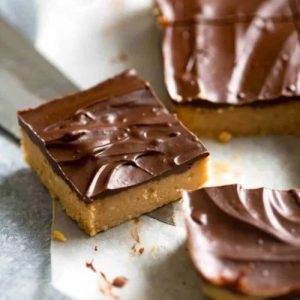
These no-bake chocolate peanut butter bars are a simple yet indulgent treat, ready in just 15 minutes with minimal effort.
Packed with plant-based protein from peanut butter, fiber from crushed biscuits, and healthy fats, they’re a satisfying snack or dessert.
With low prep time, no baking required, and easy portioning, these bars are perfect for quick treats, meal prep, or a sweet pick-me-up anytime.
Chocolate Peanut Butter Bars
Equipment
- 1 × 8-inch (20 cm) square pan
- 1 × Mixing bowl
- 1 x Spatula
- 1 × microwave-safe bowl
- Baking paper / parchment paper
- Rolling pin or food processor (for crushing biscuits)
Ingredients
Base:
- 115 g ½ cup / 1 US stick salted or unsalted butter
- 1 cup crushed Marie biscuits graham crackers, or similar plain biscuits
- 1 cup powdered sugar
- ¾ cup smooth peanut butter
Topping:
- 1 cup chocolate chips melting chocolate, dark or semi-sweet
- 2 tbsp smooth peanut butter
Instructions
- Prepare Your Pan: Line an 8-inch (20 cm) square baking pan with parchment paper, making sure to leave an extra 1–2 inches of paper hanging over the edges. This will make it much easier to lift the bars out after they’re set. Lightly butter the parchment to prevent sticking and ensure smooth removal. Having your pan ready before starting the base mixture is key to a clean, professional finish.
- Melt the Butter: Measure 115 g (½ cup / 1 US stick) of butter and melt it slowly in a small saucepan over low heat or in a microwave-safe bowl in 20–30 second bursts, stirring between each burst. Melting the butter evenly ensures that it will blend seamlessly with the other base ingredients, creating a smooth, cohesive mixture.
- Crush the Biscuits: Take 1 cup of Marie biscuits, graham crackers, or any plain, crisp biscuits of your choice. Crush them finely using a food processor for uniform crumbs. If you don’t have a processor, place the biscuits in a ziplock bag and crush them with a rolling pin, applying even pressure to avoid large chunks. Fine crumbs are important—they allow the base to bind evenly and create a smooth, stable layer.
- Combine Base Ingredients: In a medium mixing bowl, add the melted butter, crushed biscuits, 1 cup powdered sugar, and ¾ cup smooth peanut butter. Stir everything together using a spatula or wooden spoon until a uniform mixture forms. Make sure there are no pockets of butter or peanut butter—everything should be evenly distributed. The mixture should be thick, sticky, and moldable, perfect for pressing into the pan.
- Press the Base Into the Pan: Transfer the base mixture into your prepared baking pan. Using the back of a spatula or your hands (lightly greased), press the mixture firmly and evenly across the bottom of the pan. Aim for a smooth, compact layer with even thickness. A firm press ensures that the bars hold together well and cut cleanly later.
- Prepare the Chocolate-Peanut Topping: Measure 1 cup of chocolate chips and 2 tablespoons of smooth peanut butter. Combine them in a microwave-safe bowl. Melt the mixture in 30-second bursts in the microwave, stirring thoroughly between each interval, until smooth and glossy. Alternatively, melt gently over a double boiler on the stove. The topping should be silky and pourable, but not too runny.
- Spread the Topping: Pour the melted chocolate-peanut mixture evenly over the prepared base. Use a spatula to smooth the surface, or create decorative swirls for a fun, bakery-style appearance. The layer should be uniform in thickness, covering the entire base. Take your time to make it look neat, as presentation matters even for homemade treats.
- Chill to Set: Place the pan in the refrigerator and allow the bars to set for at least 1.5 hours. This chilling time is essential—it lets the base firm up and the topping solidify so the bars hold their shape when cut. Patience is key here; trying to cut too soon will result in messy squares.
- Slice the Bars: Once the bars are fully set, remove the pan from the fridge. Lift the entire block out using the parchment paper overhang. Place it on a cutting board and allow it to sit at room temperature for 5–10 minutes—this slightly softens the chocolate and ensures clean, neat slices. Using a sharp knife, cut into 16 even squares, or any shape you prefer. Wipe the knife clean between cuts for the best results.
- Serve and Enjoy: Serve the bars at room temperature for the best texture and flavor. They’re perfect as a quick snack, a dessert after meals, or a treat to pack for school or work. Store any leftovers in an airtight container at room temperature for up to 5 days, or refrigerate in warmer climates to maintain their structure.
Notes
- Extremely versatile and forgiving, ideal for beginners and experienced bakers alike.
- Biscuits can be swapped to suit taste or dietary preferences.
- Peanut butter acts as a natural binder, keeping the base intact even with varying crumbs.
- Melt chocolate carefully, stirring frequently for a smooth, glossy finish.
- Cut bars after slightly softening at room temperature for clean, neat edges.
Chef’s Secrets for Perfect Bars
To elevate these bars to bakery-level quality, focus on even layers and smooth textures.
When pressing the base, apply firm, consistent pressure to avoid cracks and ensure the bars hold together well.
For a visually striking topping, try swirling extra peanut butter into the melted chocolate before it sets, creating a marbled effect.
Always use melting chocolate rather than standard eating chocolate, as it produces a shiny, smooth top that hardens properly.
Finally, allow the bars to chill long enough—the texture improves dramatically with proper setting time.
Serving Suggestions for Maximum Enjoyment
These bars are incredibly versatile and can be enjoyed in many ways.
Serve them as an afternoon snack with a glass of cold milk or pair with coffee or tea for a delightful dessert.
For a fun twist, top each square with a sprinkle of sea salt, chopped nuts, or mini chocolate chips for extra texture and flavor.
They’re also perfect for lunchboxes, potlucks, or casual gatherings, offering a sweet, protein-rich treat that everyone will love.
Storage Tips for Freshness and Texture
Store these bars in an airtight container at room temperature for up to 5 days.
If your environment is warm or humid, refrigeration is recommended to prevent the chocolate from softening.
When refrigerated, allow the bars to sit at room temperature for 5–10 minutes before serving to restore a slightly softer, melt-in-your-mouth texture.
You can also freeze the bars in individual squares, wrapped in parchment or plastic wrap, for up to one month—simply thaw at room temperature before enjoying.
Frequently Asked Questions
1. Can I use crunchy peanut butter instead?
Yes! Crunchy peanut butter adds texture to the base and topping.
Just keep in mind that it may slightly change the smoothness of the chocolate-peanut layer, giving a more rustic bite.
2. What if I don’t have graham crackers or Marie biscuits?
No problem—plain sweet biscuits, digestive biscuits, or even gluten-free alternatives work well.
The base relies on peanut butter as a binder, so it’s quite adaptable.
3. Can I use milk chocolate instead of dark chocolate?
Absolutely! Milk chocolate will give a sweeter, creamier topping, while dark chocolate provides a richer, slightly less sweet flavor.
Both melt well if you use chocolate chips designed for baking.
4. How can I make these bars nut-free?
You can substitute peanut butter with sunflower seed butter or another safe nut/seed butter.
The texture will remain similar, though the flavor will naturally differ. Ensure all other ingredients are free from cross-contamination.
5. What’s the best way to cut neat squares?
For clean slices, let the bars set completely and then allow them to sit at room temperature for 5–10 minutes before cutting.
Use a sharp knife and wipe it between each cut to avoid smearing the chocolate topping.
