This chocolate oat mug cake is the perfect single-serve treat that balances indulgence with wholesome nutrition.
Made with oat flour, cocoa powder, and plant-based milk, it’s rich in fiber, naturally dairy-free, and filled with good fats from nut butter and coconut oil.
Packed with plant-based protein and lower in saturated fat, this quick 2-minute recipe is not only satisfying but also a smart choice for everyday dessert cravings.
Chocolate Oat Flour Mug Cake
Equipment
- 1 tall microwave-safe mug (preferably glazed)
- 1 fork (for mixing)
- 1 tablespoon (for measuring)
- 1 teaspoon (for measuring)
Ingredients
- 3 tablespoons oat flour or rolled oats blended into flour
- 2 tablespoons unsweetened cocoa powder or cacao powder
- ¼ teaspoon baking powder
- ⅛ teaspoon fine sea salt
- 3 tablespoons plant-based milk
- 1 tablespoon pure maple syrup
- 1 tablespoon melted coconut oil or avocado/olive oil
- 1 tablespoon natural peanut butter
- ¼ teaspoon pure vanilla extract
- 1 tablespoon dark chocolate chips or chopped chocolate
Instructions
- Prepare Your Mug and Tools: Begin by selecting a tall, microwave-safe mug—preferably one with a smooth glazed surface, as it helps prevent sticking and makes cleaning up a breeze. Place the mug on a flat counter so it’s stable while you mix. Keep a fork or small whisk nearby for stirring, and measure out all your ingredients before starting. Having everything ready ensures the process is smooth and mess-free.
- Mix the Dry Ingredients: Add 3 tablespoons oat flour, 2 tablespoons cocoa powder, ¼ teaspoon baking powder, and ⅛ teaspoon sea salt directly into the mug. Use your fork to stir them together until the mixture looks uniform in color and texture. This step is important because evenly mixing the dry ingredients prevents clumps of cocoa or baking powder, which could affect the cake’s rise and overall flavor. Think of this as creating a balanced foundation for your mug cake.
- Blend in the Wet Ingredients: Now, pour in 3 tablespoons of plant-based milk, followed by 1 tablespoon maple syrup, 1 tablespoon melted coconut oil (or your chosen oil), 1 tablespoon natural peanut butter, and ¼ teaspoon vanilla extract. Stir slowly at first, then mix more thoroughly, scraping the sides and bottom of the mug to ensure no dry flour is left behind. The batter should be smooth, thick, and glossy. Take your time with this step—it’s key to achieving a uniform cake texture without dry pockets.
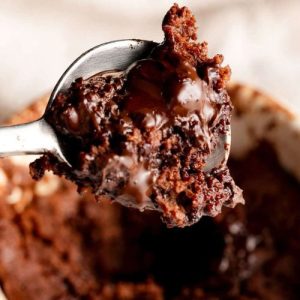
- Add the Chocolate for Gooey Goodness: Sprinkle 1 tablespoon of dark chocolate chips (or chopped chocolate) over the top of the batter. Gently press them down with your fork so they sink slightly into the mixture but don’t disappear completely. This ensures the chocolate melts into the cake as it cooks, creating little gooey pockets of indulgence with every bite. If you love chocolate, feel free to add a few extra chips on top as a finishing touch.
- Microwave and Monitor Carefully: Place the mug in the center of your microwave. Start cooking on high power for 50 seconds. Open the microwave and check the cake—the top should look slightly firm but soft in the middle. If it’s still wet, continue cooking in 10-second intervals until the cake has risen and the center is just set. Avoid overcooking, as this can make the cake dry. Each microwave is different, so treat this step as a “watch closely” moment.
- Allow the Cake to Rest: Once the mug cake is cooked, carefully remove it from the microwave using oven mitts or a towel—the mug will be very hot. Let the cake sit on the counter for at least one minute. This short resting time helps the heat distribute evenly, allowing the texture to firm up slightly while remaining fudgy inside. Skipping this step may result in a cake that’s too soft to enjoy right away.
- Garnish and Enjoy Immediately: Your mug cake is now ready to devour! For a simple finish, enjoy it straight from the mug with a spoon. To make it extra special, add a drizzle of peanut butter, a few more chocolate chips, or even fresh berries for a refreshing contrast. Mug cakes are best eaten warm and fresh, as their soft and gooey texture begins to firm up as they cool. For the ultimate experience, savor it within 5–10 minutes of cooking.
Notes
- Use the Right Mug: A taller, microwave-safe mug helps prevent overflow and ensures even cooking. Smooth, glazed mugs are best for easy cleanup. Avoid mugs that are too shallow or wide, as the cake may spread too thin and cook unevenly.
- Measure Ingredients Accurately: Spoon and level your oat flour and cocoa powder for precise measurements. Too much flour or cocoa can make the cake dry or dense.
- Mix Thoroughly: Ensure all dry ingredients are evenly combined before adding the wet ingredients. Stir gently but completely to form a smooth, lump-free batter.
- Monitor Microwave Closely: Microwave wattages vary, so check the cake carefully, especially if cooking for the first time. Cooking in short bursts helps prevent overcooking and keeps the texture soft and fudgy.
- Eat Fresh: Mug cakes are at their best immediately after cooking, while warm and gooey. Waiting too long may result in a firmer, less tender texture.
Chef’s Secrets: Achieving Perfect Texture
The key to a perfectly fudgy chocolate oat mug cake lies in technique.
First, always sift or thoroughly mix the cocoa powder with the oat flour to prevent clumping.
When adding wet ingredients, stir slowly at first, then combine fully to maintain an airy, light batter.
Don’t overfill the mug—leave space for the cake to rise. Pressing chocolate chips lightly into the batter ensures pockets of gooey richness.
Finally, resist the urge to microwave too long; a slightly undercooked center keeps the cake soft and moist.
Serving Suggestions: Delicious Ways To Enjoy
This mug cake shines when served warm, straight from the mug, but there are many ways to elevate it.
Top with a dollop of dairy-free yogurt, a drizzle of maple syrup, or a spoonful of nut butter for added richness.
Fresh berries, sliced bananas, or a sprinkle of crushed nuts add texture and natural sweetness.
For a decadent twist, serve alongside a scoop of plant-based ice cream or a splash of cold almond milk for a cozy dessert experience.
Storage Tips: Keep Cake Fresh Longer
While mug cakes are meant to be enjoyed immediately, you can store leftovers for short-term use.
Allow the cake to cool completely, then cover it tightly with plastic wrap or transfer to an airtight container.
Store in the refrigerator for up to 2 days. Reheat in the microwave for 15–20 seconds before serving to restore warmth.
Avoid freezing, as the texture may become crumbly or dry once thawed. For best results, always cook fresh when possible.
Frequently Asked Questions
1. Can I use regular flour instead of oat flour?
Yes, you can substitute all-purpose or whole wheat flour, but the texture will be slightly different.
Oat flour gives a naturally tender, moist crumb and adds fiber, while regular flour produces a more traditional cake texture.
2. Can I make this cake vegan?
Absolutely! This recipe is already dairy-free and can easily be vegan by using plant-based milk and ensuring chocolate chips are vegan-friendly.
Maple syrup or agave adds natural sweetness.
3. Why is my mug cake dense or dry?
Dense or dry mug cakes usually result from overcooking or incorrect measurements.
Check microwave wattage and cook in short bursts, making sure to mix ingredients thoroughly for even texture.
Too much flour or cocoa powder can also cause dryness.
4. Can I add other flavors or mix-ins?
Yes! Add a pinch of cinnamon, espresso powder, or a few chopped nuts to customize your mug cake.
Swirling in almond butter or a few frozen berries before microwaving can create fun flavor variations.
5. How can I prevent the cake from overflowing?
Use a tall mug and avoid filling it more than halfway. Leave room for the cake to expand, and cook in short bursts to monitor rising.
This simple step ensures a clean, evenly cooked mug cake.
