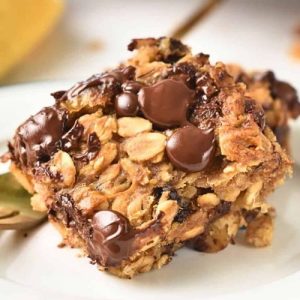
These Banana Oat Bars are a simple, wholesome treat perfect for busy mornings or a quick snack.
Packed with fiber from oats, plant-based protein from peanut butter and optional hemp seeds, and naturally sweetened with ripe bananas, they provide sustained energy with minimal added sugar.
Soft yet hearty, they’re ideal for meal prep or on-the-go breakfasts.
Banana Oat Bars
Equipment
- 1 large mixing bowl
- 1 Wooden spoon or spatula
- 1 9-inch square baking pan
- Parchment paper (to line pan)
- Cooking spray (optional, to grease pan)
- Measuring Cups and Spoons
- Cooling Rack
Ingredients
- 2 cups mashed ripe bananas about 4 large
- ¾ cup natural peanut butter or nut/seed butter alternative
- 2 ¾ cups old-fashioned rolled oats
- ½ cup dark chocolate chips or chopped nuts/seeds
- Optional flavor boost: 1 tsp vanilla extract
- Optional crunch: ½ cup chopped nuts
- Protein boost options: ½ cup hemp seeds ¼ cup vanilla protein powder
Instructions
- Preheat and Prepare Pan: Start by preheating your oven to 350°F (180°C). While the oven is warming, line a 9-inch square baking pan with parchment paper, allowing the edges to hang over the sides for easy removal later. Lightly spray or brush the pan with a little oil to prevent sticking. This step ensures your bars lift out cleanly without breaking.
- Mash the Bananas Perfectly: Peel your ripe bananas and place them in a large mixing bowl. Using a fork or potato masher, mash them thoroughly until smooth. Make sure to pack the mashed banana into your measuring cups to get exactly 2 cups, as this ensures the right texture for the bars—soft, moist, and naturally sweet.
- Combine Peanut Butter and Mashed Banana: Add ¾ cup of natural peanut butter to the mashed bananas. Stir gently but thoroughly until the mixture becomes uniform. The peanut butter binds the oats and bananas together and adds creamy texture, healthy fats, and plant-based protein. For extra flavor, you can also mix in 1 teaspoon of vanilla extract at this stage.
- Mix in the Oats: Gradually add 2 ¾ cups of old-fashioned rolled oats to the banana-peanut butter mixture. Use a wooden spoon or spatula to fold everything together until all oats are coated and the batter looks thick and consistent. Be careful not to overmix; you want a slightly dense, chewy texture once baked.
- Add Chocolate Chips or Optional Ingredients: Stir in ½ cup of dark chocolate chips, or choose alternative mix-ins like chopped nuts, shredded coconut, dried cranberries, or hemp seeds for a protein boost. Make sure the mix-ins are evenly distributed throughout the batter for every bite to have a balanced flavor and texture.
- Transfer and Spread Batter into Pan: Spoon the prepared mixture into your lined baking pan. Using a spatula or the back of a spoon, gently press the batter down evenly into the corners and edges. Flatten the surface as much as possible for uniform baking. If desired, sprinkle a few extra chocolate chips or nuts on top for a decorative touch.
- Bake Until Golden and Set: Place the pan in your preheated oven and bake for 30–40 minutes. The bars are done when the top is lightly golden and the edges pull slightly away from the sides of the pan. They should feel firm to the touch but still soft in the center. Avoid overbaking to maintain chewiness.
- Initial Cooling in Pan: Remove the pan from the oven and let it cool at room temperature for about 15 minutes. This allows the bars to firm up slightly and makes it easier to lift them from the pan. Carefully use the overhanging parchment paper to lift the bars onto a cooling rack.
- Complete Cooling for Perfect Slices: Allow the bars to cool completely for 2–3 hours before cutting. This step is crucial because slicing too early may cause the bars to crumble. The bars will firm up as they cool, maintaining their chewy texture while holding all mix-ins together.
- Slice and Serve: Once fully cooled, use a sharp knife to slice the bars into 12 equal squares. Serve them as a wholesome breakfast with fruit, yogurt, or enjoy as a satisfying snack anytime during the day. For meal prep, store the bars in an airtight container in the fridge or freeze them for longer storage.
Notes
- Always use very ripe bananas for natural sweetness and moisture—they also help bind the oats without needing extra sugar.
- Natural peanut butter works best; avoid varieties with added sugar or oils. For nut-free alternatives, sunflower seed butter or tahini are excellent substitutes.
- Rolled oats provide the ideal texture for chewy bars; quick oats will make them softer and more crumbly, while steel-cut oats are not recommended.
- Chocolate chips, nuts, or seeds can be swapped or combined depending on your preference. Hemp seeds or protein powder are perfect for a protein boost.
- For softer bars, slightly underbake and allow cooling; for firmer bars, bake a few minutes longer.
Chef’s Secrets: Insider Tips For Success
To get perfectly chewy bars every time, ensure the bananas are well-mashed and fully ripe.
Mixing in the oats gradually helps maintain a consistent texture without clumping.
If you’re adding protein powder, mix in a splash of almond milk to prevent dryness.
Press the batter evenly into the pan to avoid uneven baking, and always cool completely before slicing—this ensures clean cuts and a stable, chewy texture.
For flavor variations, try adding cinnamon, nutmeg, or shredded coconut into the batter for a subtle twist.
Serving Suggestions: Enjoy Every Bite Deliciously
These bars are incredibly versatile. Serve them warm with a dollop of yogurt and fresh fruit for a satisfying breakfast.
They also make an excellent snack paired with a smoothie or a cup of tea.
For lunchboxes or on-the-go meals, wrap individual bars in parchment or reusable containers.
You can even crumble them over oatmeal or smoothie bowls for added texture and flavor.
Their natural sweetness means they pair beautifully with slightly tart fruits like berries or a spoonful of Greek yogurt.
Storage Tips: Keep Bars Fresh Longer
Store your Banana Oat Bars in an airtight container in the refrigerator for up to five days.
To maintain optimal freshness and texture, separate layers with parchment paper.
For longer-term storage, freeze individual bars in Ziploc bags; they can be thawed overnight in the fridge for convenient ready-to-eat snacks.
Reheating slightly in the microwave or oven for 15–20 seconds will bring back their soft, chewy texture if stored cold.
Avoid leaving them at room temperature for extended periods, as bananas can soften too much and affect the structure.
Frequently Asked Questions
1. Can I make these bars vegan or dairy-free?
Yes! This recipe is naturally vegan if you choose dairy-free chocolate chips and use a nut or seed butter without added dairy.
No additional changes are needed for plant-based eating.
2. Can I substitute the oats with gluten-free options?
Absolutely. Use certified gluten-free rolled oats to make these bars gluten-free.
Avoid quick oats, as they may change the chewy texture of the bars.
3. How can I make the bars higher in protein?
Add ½ cup of hemp seeds, ¼ cup of plant-based protein powder, or a combination.
If adding protein powder, stir in a few tablespoons of almond milk to prevent the bars from becoming too dry or firm.
4. Can I freeze these bars for later?
Yes, the bars freeze beautifully. Wrap each bar individually or store layers in a freezer-safe bag with parchment paper in between.
Thaw overnight in the fridge, or reheat slightly for a soft texture.
5. Why are my bars too dry or crumbly?
Dry bars usually result from using underripe bananas, too much protein powder, or overbaking.
Ensure bananas are very ripe and evenly mash them.
If using protein powder, add a splash of milk or yogurt to retain moisture. Adjust baking time based on your oven.
