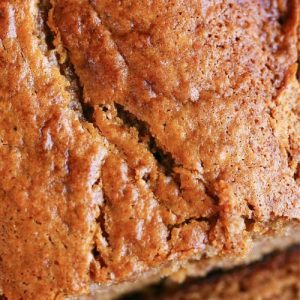
This Apple Butter Bread is a cozy, fall-inspired loaf that combines warm cinnamon spice with the rich sweetness of apple butter.
Beyond its comforting flavor, it offers a dose of protein from eggs, dietary fiber from apples, and heart-healthy fats from the oil.
With low saturated fat and wholesome ingredients, it’s both nourishing and satisfying.
Easy to prepare and perfect for meal prep, this bread makes a delightful breakfast, snack, or afternoon treat.
Apple Butter Bread
Equipment
- 2 standard loaf pans (8×4-inch)
- 2 Large Mixing Bowls
- 1 medium whisk
- 1 Mixing spoon or spatula
- 1 measuring cup set
- 1 measuring spoon set
- 1 Wire cooling rack
- Non-stick baking spray or shortening for greasing
Ingredients
- 4 cups all-purpose flour
- 2 teaspoons ground cinnamon
- 2 teaspoons baking soda
- 1 teaspoon baking powder
- 1 teaspoon salt
- 2 cups granulated sugar
- 4 large eggs
- 1 cup neutral cooking oil such as canola or vegetable
- 2 cups apple butter homemade or store-bought
- ½ cup milk
Instructions
- Preheat the oven: Set your oven to 350°F (175°C) and allow it to fully preheat. This ensures even baking and a golden, tender loaf.
- Prepare the pans: Lightly grease two standard 8×4-inch loaf pans using non-stick spray, butter, or shortening. Make sure all corners and sides are coated to prevent sticking.
- Mix the dry ingredients: In a large mixing bowl, combine the flour, cinnamon, baking soda, baking powder, and salt. Whisk together until the mixture is evenly blended and lump-free. Set aside.
- Combine the wet ingredients: In another large bowl, whisk the sugar, eggs, and oil until smooth and well combined. Stir in the apple butter and milk, mixing until the batter has an even consistency.
- Bring the batter together: Gradually fold the dry ingredient mixture into the wet ingredients. Stir gently with a spatula or spoon, mixing only until everything is just incorporated. Avoid over-mixing to keep the bread tender.
- Fill the pans: Divide the batter evenly between the two greased loaf pans, smoothing the tops with a spatula for even baking.
- Bake the bread: Place the pans in the preheated oven and bake for 50–60 minutes. The bread is ready when a toothpick inserted in the center comes out clean, or when the top springs back gently when pressed.
- Cool the loaves: Remove the pans from the oven and let the bread cool completely in the pans on a wire rack. This helps the loaves firm up and release easily.
- Store properly: Once cooled, wrap each loaf tightly in plastic wrap, then place in a zip-top bag. Store at room temperature for up to 3 days, or refrigerate if your kitchen is warm or if keeping longer.
Notes
- Use room-temperature eggs for better mixing and even texture.
- Homemade apple butter gives a fresher, spiced flavor, but store-bought works well too.
- Do not over-mix the batter—this ensures a soft, tender crumb.
- Greasing pans thoroughly prevents the loaves from sticking.
- A toothpick test or gentle spring-back touch is the best way to check doneness.
- Bread tastes even better the next day as flavors develop.
- Wrap tightly for freshness; the loaves stay moist for several days at room temperature.
Chef’s Secrets for Perfect Texture
The key to achieving tender, moist Apple Butter Bread lies in balance and restraint.
Over-mixing the batter can lead to dense, tough loaves, so stir only until the dry ingredients disappear into the wet mixture.
Using neutral oil instead of butter keeps the bread extra moist without overpowering the warm apple flavor.
For an even richer taste, try substituting part of the milk with buttermilk—it adds subtle tang and helps the bread rise slightly higher.
Lastly, let the bread rest completely before slicing; this patience rewards you with clean cuts and full-bodied flavor.
Serving Suggestions for Any Occasion
This bread shines as a breakfast treat, afternoon snack, or simple dessert.
Serve warm slices with a smear of cream cheese, honey butter, or almond butter for added indulgence.
Pair with hot tea, coffee, or spiced cider for the ultimate fall comfort.
For a festive touch, drizzle with a light glaze made from powdered sugar and apple cider, or serve alongside vanilla ice cream for dessert.
It also makes a thoughtful homemade gift—wrap a loaf in parchment paper and twine for a rustic, charming presentation.
Storage Tips to Keep Freshness
Proper storage is the secret to enjoying this bread for days.
Once completely cooled, wrap each loaf tightly in plastic wrap, then place in an airtight bag or container to lock in moisture.
At room temperature, it stays fresh for up to 3 days.
For longer storage, refrigerate for up to 1 week or freeze for up to 3 months.
If freezing, slice the loaf first and separate slices with parchment paper—this way, you can thaw only what you need.
To revive frozen bread, warm a slice briefly in the toaster oven for that freshly baked taste.
Frequently Asked Questions
1. Can I use homemade apple butter?
Yes! Homemade apple butter adds a fresher, spiced flavor that makes the bread even more special.
Store-bought works perfectly, but if you have time, making your own lets you adjust sweetness and spice levels.
2. Can I replace the oil with butter?
You can, but the texture will be slightly different.
Oil provides a moist, tender crumb, while butter adds richness and flavor but may result in a denser loaf. A half-and-half combination works beautifully.
3. How do I know the bread is done baking?
The easiest way is the toothpick test—insert one into the center, and if it comes out clean, the bread is ready.
You can also press the top gently; if it springs back, it’s done.
4. Can I add nuts or mix-ins?
Absolutely! Chopped pecans, walnuts, or even raisins complement the apple and cinnamon flavors beautifully.
Just fold them into the batter gently before baking.
5. How should I store leftovers?
Wrap tightly in plastic wrap, then place in a zip-top bag or airtight container.
Store at room temperature for up to 3 days, refrigerate for a week, or freeze for several months.
Always cool completely before storing to avoid sogginess.
