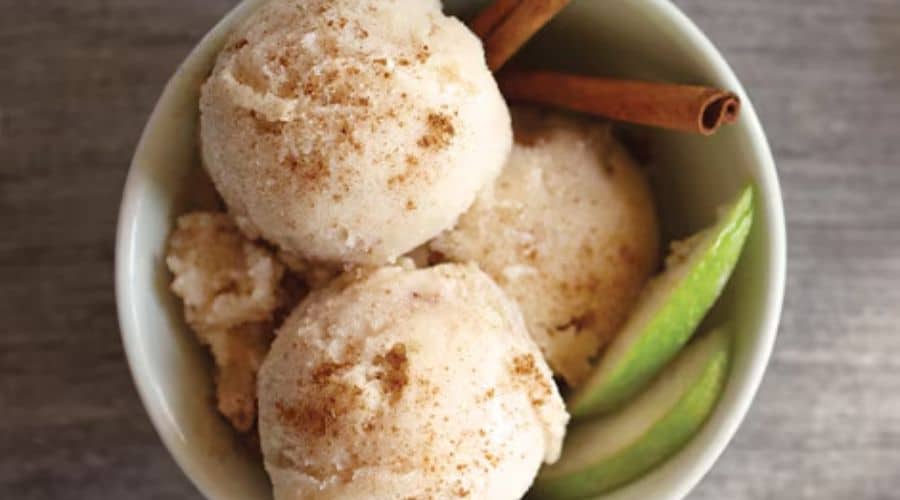
Making ice cream at home is one of life’s simple joys, especially when you can enjoy a creamy, rich dessert without any of the store-bought additives.
If you’re looking for a quick, easy, and foolproof way to create your own frozen treat, the Vitamix Vanilla Ice Cream Recipe is the perfect place to start.
With just a few ingredients and the power of a Vitamix blender, you’ll be able to whip up a batch of smooth, velvety vanilla ice cream that rivals any store-bought option.
Not only does this recipe promise to satisfy your sweet tooth, but it also offers the flexibility to experiment with flavors, toppings, and mix-ins, allowing you to customize your treat exactly how you like it.
Whether you’re making ice cream for a special occasion or simply indulging in a midweek treat, this Vitamix vanilla ice cream recipe is a must-try.

Why Choose Vitamix for Homemade Ice Cream?
The Vitamix blender is more than just a kitchen tool – it’s an absolute game changer when it comes to making ice cream.
When it comes to achieving the perfect texture, flavor, and consistency, the Vitamix stands out for several reasons.
1. Powerful Motor for Smooth Results
Vitamix blenders are equipped with incredibly powerful motors that can blend ingredients to a creamy, silky consistency in just minutes.
This is especially crucial for making ice cream, where you need a smooth, frozen dessert that’s free from icy chunks.
The high-speed blades effortlessly break down ice and mix the ingredients, creating a velvety texture without the need for any pre-chilling or additional steps.
2. Frozen Dessert Functionality
Many Vitamix models come with preset functions, including a “frozen dessert” option. This setting is specifically designed to help you achieve the perfect ice cream-like texture.
By adjusting the blending time and speed, it ensures that your ingredients are well-combined without overprocessing, resulting in the ideal smooth, scoopable ice cream.
3. Convenience and Speed
Making homemade ice cream often involves several time-consuming steps – from manually churning the mixture to waiting hours for it to freeze.
With Vitamix, however, the process is streamlined and much faster. You’ll only need a few minutes to blend all your ingredients together and achieve the desired texture.
The Vitamix is a true time-saver, making it the go-to choice for busy dessert lovers who want quick results without compromising on quality.
4. Versatility and Customization
With a Vitamix blender, you can not only make vanilla ice cream but also experiment with endless flavor combinations. Add in fruits, nuts, chocolate chips, or even cookies to create custom ice cream blends that cater to your taste.
The Vitamix handles all of this with ease, giving you the freedom to get creative in the kitchen while ensuring your ice cream turns out perfect every time.
In short, using a Vitamix blender for homemade ice cream elevates the entire process. It’s faster, easier, and more efficient than traditional methods, while still producing the rich, creamy texture we all crave in our ice cream. Whether you’re new to homemade desserts or an experienced cook, the Vitamix is the ideal tool to bring your ice cream-making dreams to life.
Key Ingredients for Your Vitamix Vanilla Ice Cream
Creating the perfect vanilla ice cream starts with the right ingredients. When making Vitamix Vanilla Ice Cream, it’s essential to use fresh, high-quality components that come together to create that rich, creamy texture and authentic vanilla flavor.
Below is a breakdown of the ingredients you’ll need:
Heavy Cream
Heavy cream is the foundation of any great ice cream. It provides the rich, smooth texture and creamy mouthfeel that ice cream lovers crave.
The high-fat content in heavy cream helps create that luxurious texture, turning your ice cream into a velvety frozen treat.
Whole Milk
Whole milk balances out the richness of the heavy cream and helps to achieve the perfect consistency. Using whole milk (rather than low-fat or skim) ensures your ice cream stays creamy and doesn’t become too icy or too hard after freezing.
Sugar
Sugar sweetens the ice cream without overpowering the delicate vanilla flavor. The amount of sugar can be adjusted to suit your sweetness preference, but a moderate amount is ideal for bringing out the best in your vanilla base.
Vanilla Extract
The star of this recipe is pure vanilla extract. It’s what gives your ice cream that signature vanilla flavor. Be sure to use pure vanilla extract for the most robust and authentic taste – imitation vanilla extract simply doesn’t compare when it comes to flavor depth.
Ice Cubes
While it might seem unusual to add ice, the ice cubes help achieve the perfect texture. The Vitamix blender’s powerful motor will break the ice down into tiny, smooth particles, helping the ice cream maintain a soft-serve texture while still being cold and creamy.
Optional Add-ins
While vanilla ice cream is already delicious on its own, you can customize your recipe by adding in your favorite mix-ins. Consider adding chocolate chips, crushed cookies, sprinkles, or even a swirl of caramel or fruit puree to create your personalized treat.
Step-by-Step Guide to Making Vitamix Vanilla Ice Cream

Making Vitamix Vanilla Ice Cream is quick, simple, and requires only a few easy steps. The Vitamix blender will do all the hard work for you, blending the ingredients to a silky smooth consistency.
Follow these steps for the perfect batch of ice cream.
1. Prepare Your Ingredients
Before you start, measure out all your ingredients. You’ll need:
- 1 cup of heavy cream
- 1 cup of whole milk
- 1/2 cup of sugar (adjust to taste)
- 1 tablespoon of pure vanilla extract
- 2 cups of ice cubes
Make sure all the ingredients are cold for the smoothest result.
2. Add the Base Ingredients to the Vitamix
Start by adding the heavy cream, whole milk, sugar, and vanilla extract to your Vitamix container. This combination will form the rich, flavorful base of your vanilla ice cream.
3. Add Ice Cubes
Next, add the 2 cups of ice cubes into the Vitamix blender. The ice is crucial for achieving that classic ice cream texture without needing to wait hours for it to freeze. The ice will create that signature cold, creamy feel we love in ice cream.
4. Blend to Perfection
Secure the lid and set your Vitamix to the frozen dessert setting if your model has one. If not, start on low speed and gradually increase the speed to high.
Blend the mixture for about 30 seconds to 1 minute, or until the texture is smooth, creamy, and thick. The Vitamix should be able to handle this easily, breaking down the ice cubes into tiny, soft particles while blending the other ingredients to perfection.
5. Taste and Adjust
Before you stop blending, taste the ice cream to see if it’s as sweet or vanilla-flavored as you like. If needed, you can add a little more sugar or vanilla extract to suit your preferences. Blend again for a few seconds to incorporate any adjustments.
6. Freeze for Extra Firmness (Optional)
While the Vitamix can blend your ice cream to a soft-serve consistency, some people prefer their ice cream a little firmer. If that’s the case for you, transfer the ice cream into a container and place it in the freezer for 1-2 hours to harden further. The ice cream will set into the perfect scoopable consistency, ready to serve.
7. Serve and Enjoy
Once your ice cream is ready, scoop it into bowls, cones, or dishes. You can also top it with your favorite toppings like fresh berries, chocolate sauce, or whipped cream for an extra indulgence.
Tips for the Perfect Vitamix Vanilla Ice Cream
While the Vitamix Vanilla Ice Cream recipe is simple and straightforward, there are a few tips and tricks that can elevate your homemade ice cream and make sure it turns out perfect every time.
1. Use Cold Ingredients
For the smoothest texture, it’s essential to start with cold ingredients. Refrigerate your heavy cream, whole milk, and vanilla extract before using them in the recipe.
The colder the ingredients, the better your Vitamix will be able to blend them into a creamy, smooth consistency.
2. Blend in Small Batches
If you’re making a larger batch, it’s often better to blend in smaller batches to avoid overloading the Vitamix blender. This ensures the ice cream blends more evenly, resulting in a smoother texture.
3. Don’t Overblend
While Vitamix blenders are powerful, it’s important not to overblend the ice cream. Blend just until the mixture is smooth and creamy—usually around 30 seconds to 1 minute.
Overblending can cause the ice cream to melt, making it harder to achieve the desired frozen consistency.
4. Experiment with Sweeteners
If you prefer a healthier alternative to regular sugar, feel free to experiment with different sweeteners like honey, agave nectar, or maple syrup. Just keep in mind that different sweeteners might affect the flavor or texture slightly, so taste as you go!
5. Freeze for Firmer Ice Cream
If you want your ice cream to have a firmer texture, transfer it to a container and freeze it for 1-2 hours after blending. This will give it a classic, scoopable consistency, ideal for serving. If you prefer a soft-serve style, you can serve it immediately after blending.
6. Add-Ins and Flavor Variations
Feel free to get creative! You can add your favorite mix-ins like chocolate chips, crushed cookies, or fruit after blending.
Just pulse them gently into the ice cream with the Vitamix at a low speed to incorporate them without disrupting the smooth texture.
You can also try different flavor variations, such as adding a splash of almond extract for a twist, or incorporating coffee or cocoa powder for a different taste.
How to Serve and Enjoy Your Vitamix Vanilla Ice Cream
After all the effort you put into making your Vitamix Vanilla Ice Cream, it’s time to serve and enjoy this delicious treat! There are plenty of ways to serve your ice cream, depending on your preference or the occasion.
Here are some ideas to inspire you:
1. Classic Ice Cream Cone
For a nostalgic treat, serve your vanilla ice cream in a classic waffle or sugar cone. This is the ultimate summer indulgence and perfect for kids and adults alike.
You can even roll the edges of the cone in sprinkles, crushed nuts, or mini chocolate chips for an added touch.
2. Ice Cream Bowls
If you’re looking for a more indulgent experience, serve your ice cream in a bowl and top it with your favorite add-ins. Fresh fruit like berries or sliced bananas pair wonderfully with vanilla ice cream.
Or, go for something decadent like hot fudge, caramel syrup, or whipped cream. The possibilities are endless!
3. Ice Cream Sundae
Take it to the next level with a sundae! Start with a scoop of your Vitamix vanilla ice cream and layer on all your favorite toppings.
Chocolate or butterscotch syrup, crushed cookies, chopped nuts, cherries, and a dollop of whipped cream make for a classic sundae. You could also add a sprinkle of sprinkles or even a drizzle of peanut butter for extra flavor.
4. As a Topping for Other Desserts
Vanilla ice cream is incredibly versatile and can be paired with other desserts. Try serving it alongside warm apple pie, brownies, or cake for a perfect contrast of temperatures and textures.
The creamy coldness of the ice cream pairs beautifully with a warm, freshly baked dessert.
5. Make Ice Cream Sandwiches
For a fun and unique way to enjoy your vanilla ice cream, make ice cream sandwiches! Take two soft cookies (chocolate chip, oatmeal, or even shortbread) and scoop a generous amount of your Vitamix vanilla ice cream in between.
Press the cookies together, then roll the edges of the ice cream in sprinkles, mini chocolate chips, or crushed candy for a delightful treat.
6. Store Leftovers Properly
If you happen to have any leftover ice cream (which, let’s face it, is unlikely), store it in an airtight container in the freezer. It should last for up to a week. Make sure to let it sit out for a few minutes before serving so that it softens slightly, making it easier to scoop.
Whether you prefer your ice cream in a cone, bowl, or as part of a decadent sundae, Vitamix Vanilla Ice Cream can be enjoyed in so many ways. No matter how you choose to serve it, this homemade treat will always be the star of the show!
Conclusion
There’s no denying that making Vitamix Vanilla Ice Cream at home is one of the most satisfying and delicious ways to enjoy a creamy, indulgent treat.
With the help of your Vitamix blender, you can create a smooth and velvety ice cream in just minutes, perfect for satisfying your sweet cravings or impressing guests.
The simplicity of the recipe, along with the ability to customize flavors and add-ins, ensures that you’ll never want to go back to store-bought ice cream again.
Whether you’re enjoying it on its own, adding toppings, or pairing it with other desserts, this homemade vanilla ice cream is always a crowd-pleaser.
So next time you’re in the mood for something sweet, reach for your Vitamix and enjoy the joy of homemade ice cream—fresh, flavorful, and completely customizable!
Frequently Asked Questions
1. Can I make this without a Vitamix blender?
While Vitamix blenders are ideal for making smooth and creamy ice cream, you can still make vanilla ice cream without one.
A regular blender or food processor can work, but it may require more time and effort to break down the ice. Alternatively, you can use an ice cream maker, which is designed specifically for making ice cream and will give you a similar texture.
2. Can I substitute the sugar for a healthier alternative?
Yes! You can substitute the sugar in this recipe with a variety of healthier alternatives, such as honey, maple syrup, agave nectar, or stevia.
Keep in mind that some alternatives might affect the texture or sweetness, so you may need to adjust the quantities to suit your taste.
3. Can I make this recipe dairy-free or vegan?
Absolutely! To make a dairy-free or vegan version, simply substitute the heavy cream and whole milk with plant-based alternatives.
Coconut milk or almond milk are popular choices for a creamy texture. For the creaminess, you might also want to try coconut cream or cashew cream for an extra indulgent option. Make sure to use a plant-based vanilla extract as well.
4. How can I prevent my homemade ice cream from becoming too icy or hard after freezing?
To prevent icy or hard ice cream, ensure that your ingredients are properly blended and well incorporated, and consider adding a bit of cornstarch or alcohol (like vodka) to the mixture to improve the texture.
The higher fat content from the cream also helps keep the ice cream soft. If freezing for a longer period, let the ice cream sit out for a few minutes to soften before scooping.
5. How can I store my homemade Vitamix Vanilla Ice Cream?
Store your homemade vanilla ice cream in an airtight container in the freezer. It should last for up to a week. If the ice cream becomes too firm after freezing, let it sit at room temperature for a few minutes to soften before scooping. This will make it easier to serve and maintain its creamy texture.

Vitamix Vanilla Ice Cream
Equipment
- 1 Vitamix Blender (or other high-powered blender)
- Measuring Cups (for liquid ingredients)
- Measuring Spoons (for vanilla extract)
- Container (for storing ice cream in the freezer, optional)
Ingredients
- 1 cup 240 ml Heavy Cream
- 1 cup 240 ml Whole Milk
- 1/2 cup 100 g Granulated Sugar
- 1 tablespoon 15 ml Pure Vanilla Extract
- 2 cups about 300 g Ice Cubes
Instructions
Prepare the Ingredients
- Measure out your heavy cream, whole milk, sugar, vanilla extract, and ice cubes. Ensure all ingredients are cold for the best consistency.
Blend the Base
- Add the heavy cream, whole milk, sugar, and vanilla extract to your Vitamix blender. Secure the lid tightly.
Add Ice
- Add 2 cups of ice cubes into the Vitamix. This will help the mixture achieve the desired creamy texture.
Blend to Smoothness
- Start blending at low speed and gradually increase to high. Blend for 30 seconds to 1 minute until the mixture is smooth and creamy, with no large chunks of ice remaining.
Taste and Adjust
- Taste the ice cream mixture and add extra sugar or vanilla extract if needed. Blend again for a few seconds to incorporate any adjustments.
Freeze (Optional)
- If you want firmer ice cream, transfer the mixture to an airtight container and place it in the freezer for 1-2 hours.
Serve and Enjoy
- Scoop the homemade ice cream into bowls, cones, or sundae dishes. Add your favorite toppings or mix-ins like chocolate chips or fresh fruit.
Notes
- Storage: Keep any leftover ice cream in an airtight container in the freezer. It will last for about 1 week. Let it sit out for a few minutes before scooping if it becomes too firm.
- Dairy-Free Option: Replace the heavy cream and milk with coconut milk or almond milk for a dairy-free version.
- Sweetener Alternatives: You can use honey, maple syrup, or agave as substitutes for granulated sugar.
- Mix-Ins: Customize your ice cream by adding crushed cookies, chocolate chips, or fruit after blending.


