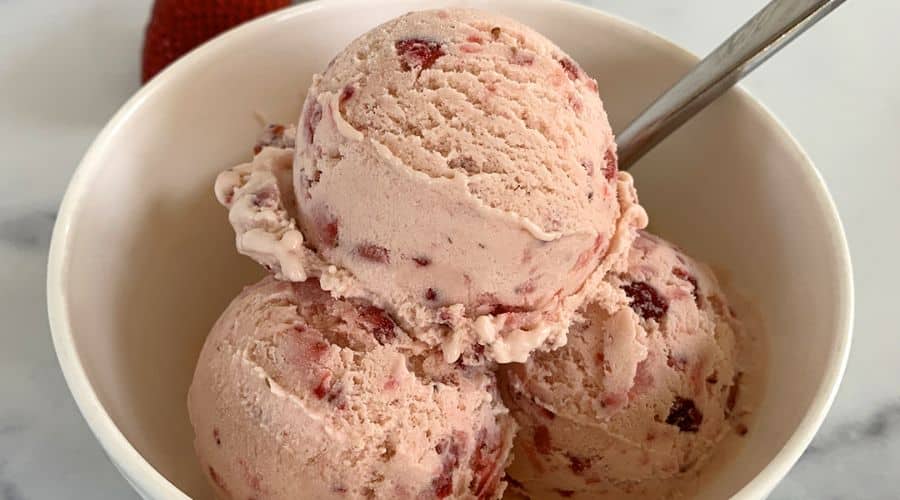
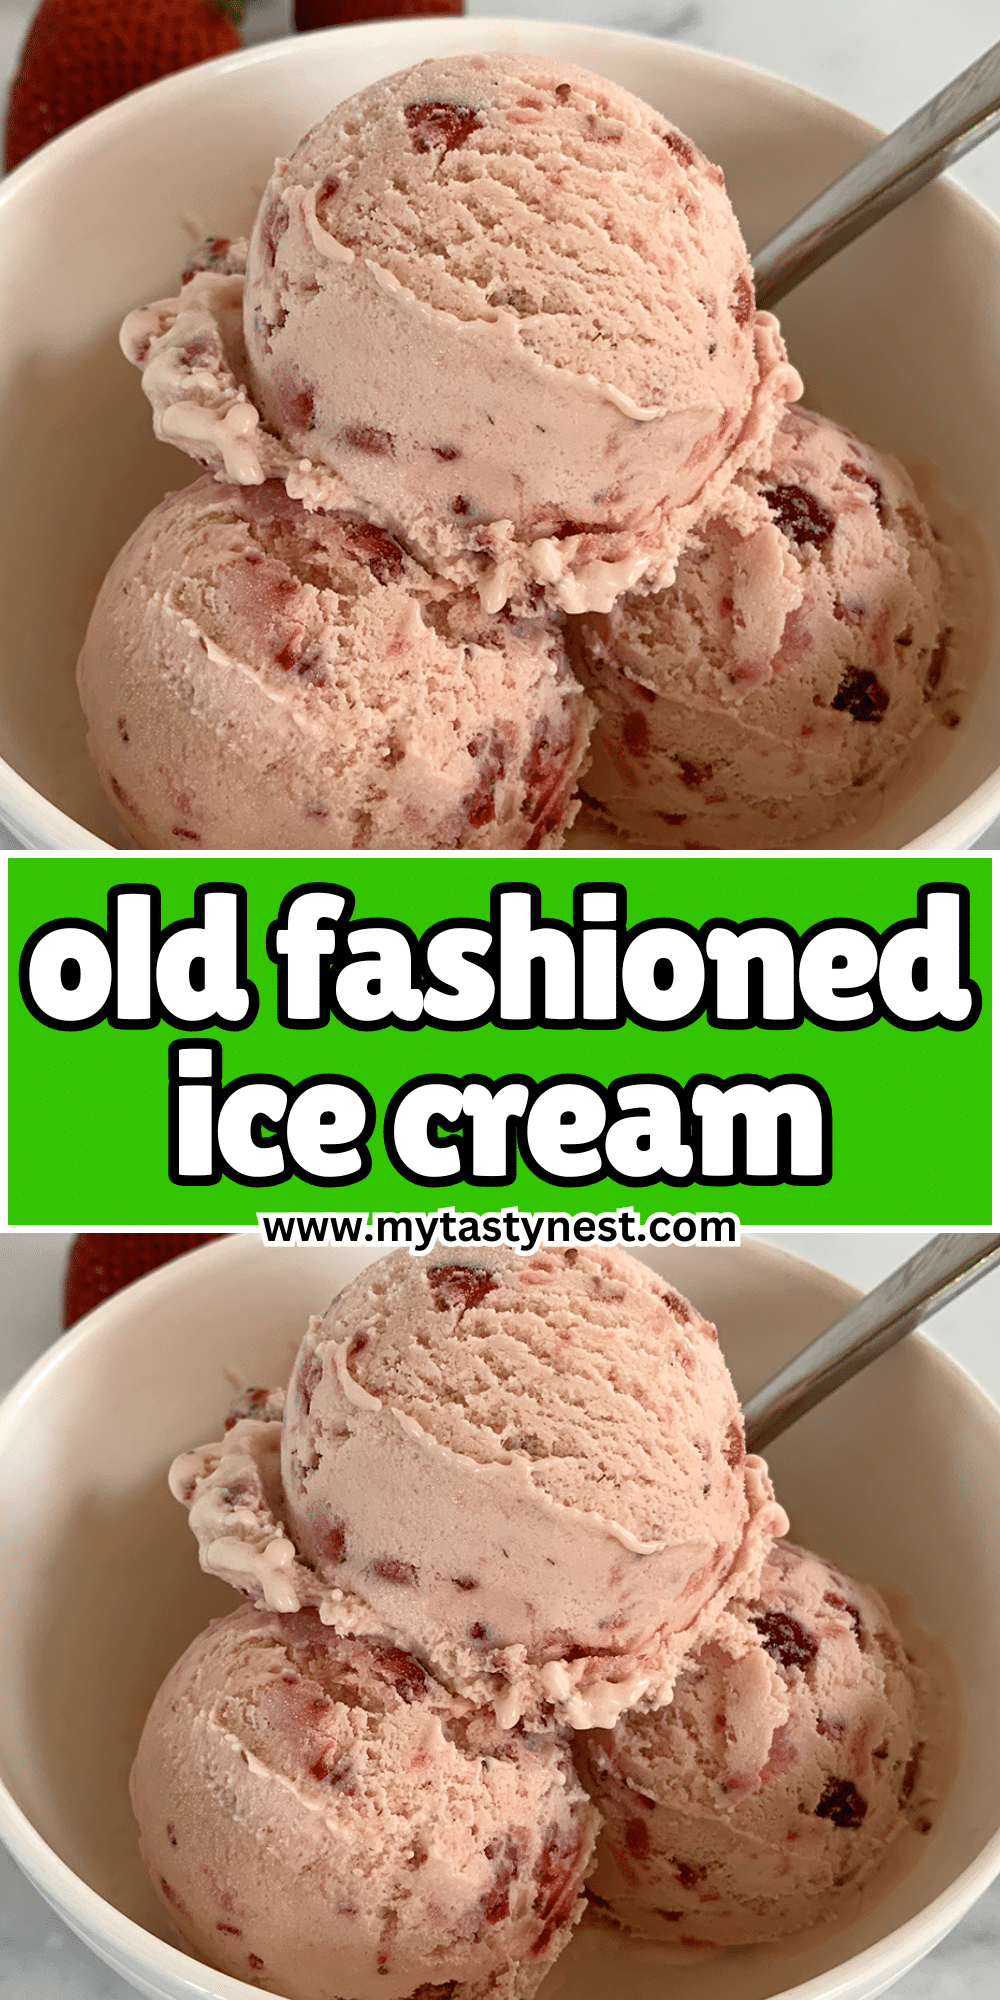
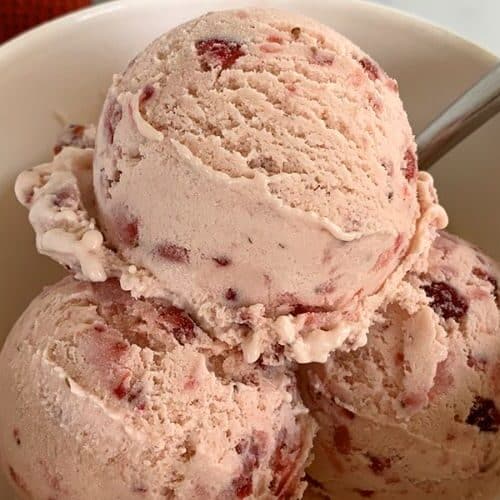
There’s something undeniably nostalgic about the creamy, smooth texture and the rich flavor of homemade ice cream. While modern ice cream makers and store-bought varieties have their place, there’s nothing quite like the old-fashioned way of making ice cream.
This method, often involving hand-cranked ice cream makers or traditional churners, has stood the test of time for a reason. It’s not just about making a treat—it’s about crafting something special with care, patience, and the finest ingredients.
In this post, we’ll take you through the joy of making old-fashioned ice cream from scratch, why it’s a treat worth savoring, and how you can bring this delightful experience into your own kitchen.
From selecting the best ingredients to churning the custard into a velvety masterpiece, let’s dive into this classic dessert that never goes out of style.
What Makes Old Fashioned Ice Cream Special?
Old-fashioned ice cream is more than just a frozen dessert—it’s a return to simpler times when quality ingredients and homemade processes were the foundation of every delicious bite.
What sets it apart from the modern versions we find in grocery stores is the process itself: handmade, slow-churned, and infused with rich flavors that come from real, whole ingredients.
At the heart of the old-fashioned method is the custard base—a mixture of milk, cream, sugar, and eggs that’s carefully cooked and chilled before being churned into ice cream.
Unlike many commercial ice creams that use stabilizers, artificial flavorings, or air-pumping techniques to create volume, old-fashioned ice cream relies on pure ingredients and slower methods to achieve its smooth, rich texture.
The churning process is key, as it introduces just the right amount of air to create that luscious mouthfeel without over-processing the mixture.
This traditional approach also means fewer shortcuts, allowing the true flavors of natural ingredients like vanilla beans, fresh fruit, or chocolate to shine. When you take the time to make old-fashioned ice cream, you’re not just treating yourself to a dessert—you’re savoring an experience that harks back to earlier days when homemade ice cream was a family tradition and a summertime ritual.
You have not enough Humanizer words left. Upgrade your Surfer plan.
Ingredients You’ll Need for Old Fashioned Ice Cream
Making old-fashioned ice cream requires a simple but carefully selected set of ingredients. While you won’t need any fancy or hard-to-find items, the quality of each ingredient plays a crucial role in achieving that creamy, rich texture and authentic flavor.
Here’s a breakdown of the key ingredients you’ll need:
- Whole Milk – Whole milk forms the base of your ice cream. It contributes to the creamy texture without being overly rich. The higher fat content in whole milk ensures that the ice cream has the smooth, indulgent feel that’s characteristic of homemade ice cream.
- Heavy Cream – Heavy cream is essential for creating the luxurious texture that’s synonymous with old-fashioned ice cream. The fat content in heavy cream makes the ice cream extra creamy and helps it freeze to a scoopable consistency.
- Granulated Sugar – Sugar adds sweetness and enhances the flavor of the ice cream. The balance between sugar and creaminess is key, so be mindful of how much you add to suit your taste.
- Egg Yolks – Egg yolks are the magic behind the rich custard base of old-fashioned ice cream. They help to thicken the mixture and give it a silky, smooth consistency. They also play a role in stabilizing the ice cream, preventing it from turning icy or grainy.
- Vanilla Extract – Pure vanilla extract (or even better, vanilla beans) is the classic flavor that defines many old-fashioned ice cream recipes. The sweet, aromatic flavor of vanilla pairs perfectly with the creamy base, though you can experiment with other flavorings as well.
- Pinch of Salt – A small amount of salt balances the sweetness and enhances all the flavors in the ice cream. It’s a crucial, often overlooked, ingredient that helps bring the richness to life.
- Optional Add-ins – If you’re feeling adventurous, you can add fruits, nuts, chocolate chips, or even swirls of caramel to give your ice cream a personal touch. Just be sure to add them during the last few minutes of churning to avoid breaking them down too much.
The beauty of old-fashioned ice cream is its versatility; you can create a range of flavors, from simple vanilla to chocolate, strawberry, or more complex combinations. Using fresh, high-quality ingredients will elevate your homemade ice cream to a level that’s far beyond store-bought varieties.
Tools You Need for a Traditional Ice Cream Making Experience
While the ingredients are essential, the tools you use to make old-fashioned ice cream also play a key role in bringing the recipe to life. Whether you’re using a hand-cranked machine or a modern electric ice cream maker, having the right tools will ensure your ice cream is smooth, creamy, and perfectly churned.
- Ice Cream Maker (Hand-Cranked or Electric) – The centerpiece of the process is the ice cream maker itself. While electric models are more convenient and can churn the mixture quickly, using a traditional hand-cranked machine can be a fun and nostalgic experience, especially if you’re looking to replicate the old-fashioned method.
- Hand-Cranked Ice Cream Maker: These machines require more manual labor but give you a closer connection to the process. You’ll need to pack the outer chamber with ice and rock salt, and then turn the crank to churn the custard inside until it thickens into ice cream.
- Electric Ice Cream Maker: For those who want to skip the manual labor, an electric version is a faster and easier way to churn the ice cream. Just pour the chilled custard into the machine, set it to churn, and let it work its magic. It’s a great option for those short on time but still want the homemade flavor.
- Mixing Bowls – A few large mixing bowls are necessary for preparing the custard base and for mixing ingredients. Stainless steel or glass bowls work best, as they are easy to clean and don’t retain odors or flavors.
- Whisk or Electric Mixer – A whisk is ideal for beating the egg yolks and sugar together, ensuring they are smooth and well-combined before adding them to the cream and milk mixture. Alternatively, an electric mixer can speed up this process, especially if you’re making large batches.
- Strainer – Once your custard has been cooked, it’s crucial to strain it to remove any curdled bits or impurities. A fine-mesh strainer will ensure that your custard is silky smooth and free of any undesirable texture.
- Ice and Rock Salt (for Hand-Cranked Machines) – If you’re using a hand-cranked ice cream maker, you’ll need to pack ice and rock salt around the barrel of the machine. The rock salt lowers the freezing point of the ice, which helps to create the cold temperature necessary for churning the mixture.
- Freezer-Safe Container – After churning the ice cream, you’ll need a container to store it while it firms up in the freezer. Look for a shallow, wide container, which allows the ice cream to freeze evenly. Plastic or metal containers work well, but be sure they have an airtight seal to prevent freezer burn.
- Thermometer – A cooking thermometer is helpful when making the custard base. It ensures that the mixture reaches the right temperature, typically around 170°F (77°C), to cook the eggs without scrambling them.
These tools may vary slightly depending on the method you choose, but with these essentials, you’re well on your way to making old-fashioned ice cream that’s rich, smooth, and utterly irresistible. Whether you’re gathering around the table with loved ones or indulging in a quiet treat, these simple tools help create a dessert that brings joy to any occasion.
Step-by-Step Guide to Making Old Fashioned Ice Cream

Making old-fashioned ice cream is a rewarding, hands-on process that allows you to craft a truly special dessert. While it may take some time, the steps are straightforward and offer plenty of opportunities to customize the flavor to your liking.
Here’s a step-by-step guide to creating the perfect batch of homemade ice cream:
Step 1: Prepare the Custard Base
The first step in making old-fashioned ice cream is to prepare the custard base. Start by combining the milk and heavy cream in a large saucepan over medium heat. Stir the mixture occasionally to prevent it from scorching.
While the milk and cream are warming, whisk together the egg yolks and granulated sugar in a separate mixing bowl until they form a smooth and pale mixture. Once the milk and cream have reached a gentle simmer (but not boiling), carefully ladle a small amount of the warm milk mixture into the egg yolks to temper them. Slowly whisk the egg yolks with the milk, gradually adding more milk until you have fully incorporated the two.
Pour the tempered egg mixture back into the saucepan with the rest of the milk and cream. Continue to cook over low heat while stirring constantly. You want the custard to thicken enough to coat the back of a spoon, reaching about 170°F (77°C). Be patient and keep stirring to avoid curdling the eggs.
Step 2: Cool and Chill the Custard
Once the custard has thickened, remove it from the heat and strain it through a fine-mesh sieve to remove any curdled bits. Then, let it cool for a few minutes before adding in your vanilla extract or other flavorings. It’s important to let the custard cool down to room temperature before refrigerating it.
Place the custard in a covered container and chill in the refrigerator for at least 4 hours or overnight. The colder the mixture, the better it will churn, so take your time here to ensure the custard is thoroughly chilled.
Step 3: Churn the Ice Cream
After the custard is chilled, it’s time to churn the mixture into ice cream. If you’re using a hand-cranked ice cream maker, pack the outer chamber with ice and rock salt. Pour the chilled custard into the inner bowl of the machine, then start cranking! As you turn the handle, the custard will freeze and thicken. Keep cranking until the ice cream has reached a soft-serve consistency.
If you’re using an electric ice cream maker, simply pour the custard into the machine’s bowl, set it to churn, and let the machine do the work. This usually takes about 20-30 minutes, depending on your model. The ice cream will be thick, creamy, and ready to enjoy at this point, but if you prefer a firmer texture, you can transfer it to a freezer-safe container and freeze it for a few hours to set.
Flavor Variations to Try with Your Old Fashioned Ice Cream
One of the best things about making old-fashioned ice cream is the ability to experiment with flavors. While vanilla is the classic, here are some fun and delicious variations to try.
Add your favorite mix-ins or flavorings at the end of the churning process to create endless combinations.
Classic Vanilla Ice Cream
Vanilla is the gold standard of ice cream flavors. To make a pure, rich vanilla ice cream, use a high-quality vanilla extract or fresh vanilla beans. If using vanilla beans, scrape the seeds into the milk and cream mixture before heating. The tiny specks of vanilla in the finished ice cream give it a beautiful, speckled appearance and a deep, natural flavor.
Chocolate Ice Cream
For a rich, chocolatey twist, add cocoa powder or melted chocolate to the custard base. You can dissolve unsweetened cocoa powder in the milk and cream mixture for a smooth chocolate flavor or melt dark chocolate and whisk it in when the custard is still warm. For an even richer taste, you can combine both methods for a double-chocolate indulgence.
Strawberry Ice Cream
Fresh strawberries can take your ice cream to the next level. To make strawberry ice cream, purée fresh strawberries and strain out the seeds, then stir the purée into the custard mixture after it’s been chilled. You can also chop strawberries and fold them into the ice cream during the last few minutes of churning for a more textured fruit flavor. Adding a little lemon juice or zest can brighten the flavor even more.
Mint Chocolate Chip Ice Cream
Mint ice cream is a refreshing, fragrant treat. Add mint leaves to the milk and cream mixture and heat it gently until fragrant, then strain the leaves out before tempering the eggs. Once you’ve churned the ice cream, fold in chocolate chips or small chunks of chocolate. The mint and chocolate are a classic combination that never goes out of style.
Peach Ice Cream
Peach ice cream is a summer favorite. For a peach-flavored version, purée ripe peaches and mix them into the custard. You can also chop the peaches and add them in during the churning stage for a chunky, fruity bite. If you want a tangier flavor, mix in a spoonful of lemon juice.
Coffee Ice Cream
For coffee lovers, coffee ice cream delivers an indulgent, bold flavor. Brew strong coffee or espresso, then cool it down and stir it into the custard mixture for a rich coffee flavor. For extra decadence, add a swirl of chocolate or caramel in the final moments of churning.
Nutty Ice Cream
For a crunchy contrast, add crushed nuts such as pistachios, almonds, or pecans to the ice cream during the last few minutes of churning. These nuts add texture and a delightful flavor that pairs beautifully with vanilla or chocolate ice cream. You can also caramelize the nuts before adding them for an extra layer of sweetness and flavor.
Caramel Swirl Ice Cream
Caramel and vanilla are a match made in heaven. To create caramel swirl ice cream, make a homemade caramel sauce by melting sugar until golden, then adding butter and cream to create a smooth, rich sauce. Once your ice cream is churned, gently swirl the caramel into the mix for a decadent treat.
How to Serve Old Fashioned Ice Cream Like a Pro
Once you’ve made your delicious batch of old-fashioned ice cream, it’s time to serve it up in style! Presentation can elevate your homemade treat to a new level, making it just as visually appealing as it is tasty.
Here are a few tips to serve your ice cream like a pro:
1. Use the Right Serving Dish
- Waffle Cones: Waffle cones are the classic way to serve ice cream. They not only provide a crisp and sweet crunch but also make for a nostalgic presentation. If you’re feeling extra creative, dip the top of the cone in melted chocolate or roll it in crushed nuts before adding your ice cream for an extra treat.
- Sundae Glasses or Bowls: For a more indulgent presentation, use glass sundae dishes or small bowls. Layer the ice cream with toppings like whipped cream, sprinkles, or fresh fruit to create a dessert that’s both visually striking and delicious.
- Ice Cream Sandwiches: For a fun twist, turn your ice cream into an ice cream sandwich. Use cookies (chocolate chip, oatmeal, or shortbread) to make a handheld dessert that’s perfect for a party or casual snack.
2. Add Creative Toppings
Toppings are your opportunity to get creative and enhance the flavor and texture of your ice cream. Here are some great ideas:
- Classic toppings: Whipped cream, maraschino cherries, sprinkles, chocolate chips, and caramel or chocolate sauce are timeless options that never fail.
- Fruity Additions: Fresh berries, sliced bananas, or fruit compotes can add a refreshing contrast to the rich creaminess of the ice cream.
- Crushed Nuts: Chopped pistachios, almonds, or hazelnuts add a satisfying crunch and nutty flavor that complements almost any flavor of ice cream.
- Swirls and Sauces: Consider drizzling homemade caramel, hot fudge, or raspberry sauce over the ice cream to add richness and a hint of sweetness.
3. Sculpt the Ice Cream for Perfect Scoops
To serve perfectly rounded scoops of ice cream, dip your ice cream scoop into warm water between each scoop. This helps the ice cream glide off the scoop smoothly and prevents it from sticking. Aim for generous, well-formed scoops that show off the rich texture of your homemade creation. If you’re serving the ice cream in a bowl, you can use a melon baller for smaller, bite-sized portions.
4. Create a Sundae Bar for Parties
If you’re hosting a gathering, consider creating an ice cream sundae bar. Set out your homemade ice cream along with an assortment of toppings, sauces, and garnishes, allowing guests to customize their sundaes. This interactive dessert experience will add a fun element to your party, and everyone can enjoy their ice cream just the way they like it.
Storing and Freezing Your Homemade Ice Cream
Now that you’ve made and served your ice cream, you’ll likely have some leftovers. Don’t worry—homemade ice cream can be stored and enjoyed for weeks if properly stored.
Here are some tips to keep your ice cream fresh and creamy:
1. Use an Airtight Container
Once your ice cream has finished churning, transfer it to a shallow, airtight container for storage. A shallow container ensures that the ice cream freezes evenly and makes scooping easier. Be sure to press a layer of plastic wrap or wax paper directly onto the surface of the ice cream to minimize air exposure, which can lead to freezer burn.
2. Freeze for Firmness
After transferring the ice cream to the container, place it in the freezer to firm up. It may take a few hours to reach the perfect scoopable consistency, especially if you’ve made a larger batch. If you prefer a harder texture, let it freeze for 4-6 hours before serving. If the ice cream becomes too hard to scoop, simply let it sit at room temperature for a few minutes to soften slightly.
3. Avoid Freezer Burn
To avoid freezer burn and maintain the best texture, store the ice cream in a container that is both airtight and freezer-safe. The goal is to minimize air contact and prevent ice crystals from forming on the surface. If you plan to store the ice cream for an extended period, be sure to consume it within 2-3 weeks for the best taste and texture.
4. How to Refreeze Ice Cream
If you’ve made a batch of ice cream and it begins to melt slightly (for example, if you’ve been scooping it too often or if it’s been out for a while), you can refreeze it. However, keep in mind that refrozen ice cream may become a bit icier in texture since it has already started to crystallize. To avoid this, only take out small portions of ice cream at a time, keeping the rest in the freezer to preserve its creamy texture.
5. Storing Flavor Add-ins
If your ice cream has any delicate mix-ins, such as fruit or chocolate chips, make sure to fold them in gently towards the end of the churning process. If you add them too early, they may break down or become mushy while freezing. When storing, keep in mind that larger pieces of mix-ins may freeze solid, so be prepared for a firmer bite when you scoop.
Conclusion
Old-fashioned ice cream is a timeless treat that brings joy and nostalgia with every scoop. The process of making it from scratch, using high-quality ingredients and traditional techniques, allows you to experience a dessert that’s far beyond what store-bought options can offer. Whether you’re enjoying a classic vanilla flavor or experimenting with unique combinations, the rich, creamy texture of homemade ice cream makes each bite special.
Making ice cream the old-fashioned way isn’t just about creating a dessert—it’s about crafting an experience. From churning the custard to serving it up with your favorite toppings, it’s a chance to slow down, savor the moment, and share something delicious with friends and family.
So, gather your ingredients, get your ice cream maker ready, and indulge in the simple pleasure of homemade ice cream.
Frequently Asked Questions (5)
1. How long does homemade ice cream last in the freezer?
Homemade ice cream is best enjoyed within 2-3 weeks of making it. However, it can last up to a month if stored in an airtight container, as long as it’s kept properly frozen. To preserve its creamy texture, avoid taking it in and out of the freezer frequently, as this can cause ice crystals to form.
2. Can I make old-fashioned ice cream without an ice cream maker?
Yes, you can make old-fashioned ice cream without an ice cream maker! After preparing your custard and chilling it, pour the mixture into a shallow dish and place it in the freezer. Every 30-45 minutes, take the mixture out and stir it with a fork to break up any ice crystals. Repeat this process for about 3-4 hours until the ice cream reaches the desired texture.
3. Can I make a dairy-free version of old-fashioned ice cream?
Yes, you can! Substitute the heavy cream and milk with dairy-free alternatives such as coconut milk, almond milk, or cashew cream. You’ll also want to ensure your egg-based custard is properly adjusted to maintain the creamy consistency. There are plenty of dairy-free recipes out there, so you can still enjoy the indulgence of homemade ice cream!
4. How do I know when my custard is ready?
The custard is ready when it thickens enough to coat the back of a spoon. To test this, dip a spoon into the mixture and run your finger through the custard. If it leaves a clear trail and doesn’t immediately run back together, it’s done. You can also check the temperature, which should be around 170°F (77°C) to ensure the eggs are properly cooked.
5. Can I add alcohol to my homemade ice cream?
Yes, you can add a small amount of alcohol to your homemade ice cream for extra flavor. A tablespoon or two of liqueurs like bourbon, rum, or amaretto can enhance the taste without affecting the freezing process too much. Just be cautious with the amount you add, as too much alcohol can prevent the ice cream from freezing properly.
Old Fashioned Ice Cream
Equipment
- 1 medium saucepan
- (1) Mixing bowl (large)
- (1) Whisk
- 1 Fine-Mesh Strainer
- 1 Ice cream maker (hand-cranked or electric)
- 1 Thermometer (optional)
- 1 Freezer-safe container (for storage)
Ingredients
- 2 cups Whole milk
- 1 cup Heavy cream
- 3/4 cup Granulated sugar
- 5 Large egg yolks
- 1 tsp Pure vanilla extract
- **Pinch of salt
Instructions
Prepare the Custard:
- In a medium saucepan, combine the whole milk and heavy cream. Heat over medium heat, stirring occasionally until it begins to steam but not boil.
Whisk Egg Yolks and Sugar:
- While the milk mixture heats up, whisk the egg yolks and sugar in a mixing bowl until smooth and pale.
Temper the Eggs:
- Gradually pour about 1/2 cup of the warm milk mixture into the egg yolks to temper them. Whisk constantly to combine. Slowly add the rest of the milk to the egg mixture, stirring constantly.
Cook the Custard:
- Pour the egg and milk mixture back into the saucepan. Cook over low heat, stirring constantly until the custard thickens to coat the back of a spoon (170°F or 77°C). Be careful not to let it boil.
Strain and Cool:
- Remove the custard from the heat and strain it through a fine-mesh sieve to remove any curdled bits. Let the custard cool slightly, then stir in the vanilla extract and a pinch of salt.
Chill the Custard:
- Transfer the custard to a container, cover it, and refrigerate for at least 4 hours or overnight until fully chilled.
Churn the Ice Cream:
- Pour the chilled custard into your ice cream maker and churn according to the manufacturer’s instructions (about 20-30 minutes for electric models or longer for hand-cranked machines).
Freeze and Serve:
- Once the ice cream has reached a soft-serve consistency, transfer it to a freezer-safe container and freeze for a few hours to firm up. Serve and enjoy!
Notes
- Flavor Variations: You can easily add fruit, chocolate, or nuts to your ice cream during the last few minutes of churning for a custom flavor.
- Dairy-Free Option: Substitute the heavy cream and milk with coconut milk or almond milk for a dairy-free version. The custard will still be creamy and delicious with the right non-dairy products.
- Storage: Store leftover ice cream in an airtight container in the freezer. It will stay fresh for up to 2-3 weeks.
- Make Ahead: You can make the custard a day or two in advance and chill it overnight for best results.
- Ice Cream Consistency: Homemade ice cream tends to be softer than store-bought. If you prefer a firmer texture, freeze it for a few extra hours.
