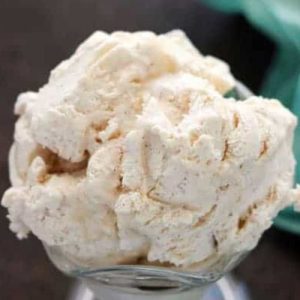
Honey Cinnamon Ice Cream
A quick and creamy no-churn ice cream infused with warm cinnamon and natural honey sweetness. Perfect for satisfying your dessert cravings with minimal effort and just five simple ingredients.
Equipment
- 1 large mixing bowl
- 1 whisk or spatula
- 1 ice cream or loaf pan
- 1 Ice Cream Scoop
Ingredients
- 2 cups heavy whipping cream whipped to stiff peaks
- 1 can 14 oz sweetened condensed milk
- 1 teaspoon vanilla extract
- 1 teaspoon ground cinnamon
- 1/4 cup honey
Instructions
- Prepare the Whipped Cream: Begin by pouring 2 cups of heavy whipping cream into a large, chilled mixing bowl. Using an electric mixer or a hand whisk, beat the cream on medium-high speed until it forms stiff peaks. You’ll know it’s ready when you lift the whisk and the peaks hold their shape without collapsing. Whipped cream is the foundation for your ice cream’s creamy, airy texture, so don’t rush this step. Set it aside while you prepare the flavor base.
- Mix the Sweetened Condensed Milk Base: In a separate large mixing bowl, pour in one can of sweetened condensed milk. Add 1 teaspoon of vanilla extract, 1 teaspoon of ground cinnamon, and 1/4 cup of honey. Using a whisk, stir the mixture until it is smooth, fully incorporated, and free of any streaks. The cinnamon should be evenly distributed, and the honey should blend completely to give the base a uniform golden hue. This step ensures that every bite of ice cream is flavorful and perfectly spiced.
- Combine Whipped Cream with the Base: Once your whipped cream and condensed milk mixture are ready, it’s time to gently fold them together. Using a rubber spatula, add one-third of the whipped cream into the condensed milk mixture. Carefully fold it in using a gentle, sweeping motion from the bottom of the bowl to the top. Repeat with the remaining whipped cream in two additions. Folding instead of stirring helps maintain the airy texture of the whipped cream, resulting in light, creamy ice cream rather than a dense mixture.
- Transfer to Freezing Container: After the whipped cream and condensed milk are fully combined, pour the mixture into a loaf pan or any freezer-safe container of your choice. Use the spatula to spread it evenly, smoothing the top so it freezes uniformly. A smooth surface will make scooping easier once the ice cream is frozen.
- Freeze Until Firm: Cover the pan with a lid or plastic wrap to prevent ice crystals from forming on the surface. Place the pan in the freezer and allow the ice cream to set for at least 4 hours. For best results, let it freeze overnight. The mixture will firm up to a creamy, scoopable texture without the need for an ice cream maker.
- Serve the Ice Cream: Once frozen, remove the ice cream from the freezer about 5–10 minutes before serving to make scooping easier. Using an ice cream scoop, serve generous portions into bowls or cones. Optionally, drizzle a little extra honey or sprinkle a pinch of cinnamon on top for added flavor and presentation. Enjoy immediately for the perfect sweet, spiced, and creamy treat.
- Storage and Reuse: If you have leftovers, cover the ice cream tightly with plastic wrap or a lid and store it in the freezer for up to 2 weeks. Always scoop with a cold utensil to prevent melting and refreezing, which can affect texture. The ice cream will maintain its creamy consistency and delicious honey-cinnamon flavor for multiple servings.
Notes
- For the fluffiest texture, make sure the heavy cream is cold before whipping, and the bowl is slightly chilled.
- Use raw or mild honey for the best natural sweetness; stronger, darker honey can overpower the cinnamon.
- Ground cinnamon can be adjusted according to taste; add a little more for a spicier kick.
- Folding the whipped cream gently into the condensed milk base is crucial for keeping the ice cream light and airy.
- This recipe does not require an ice cream maker, making it perfect for a quick, fuss-free dessert.