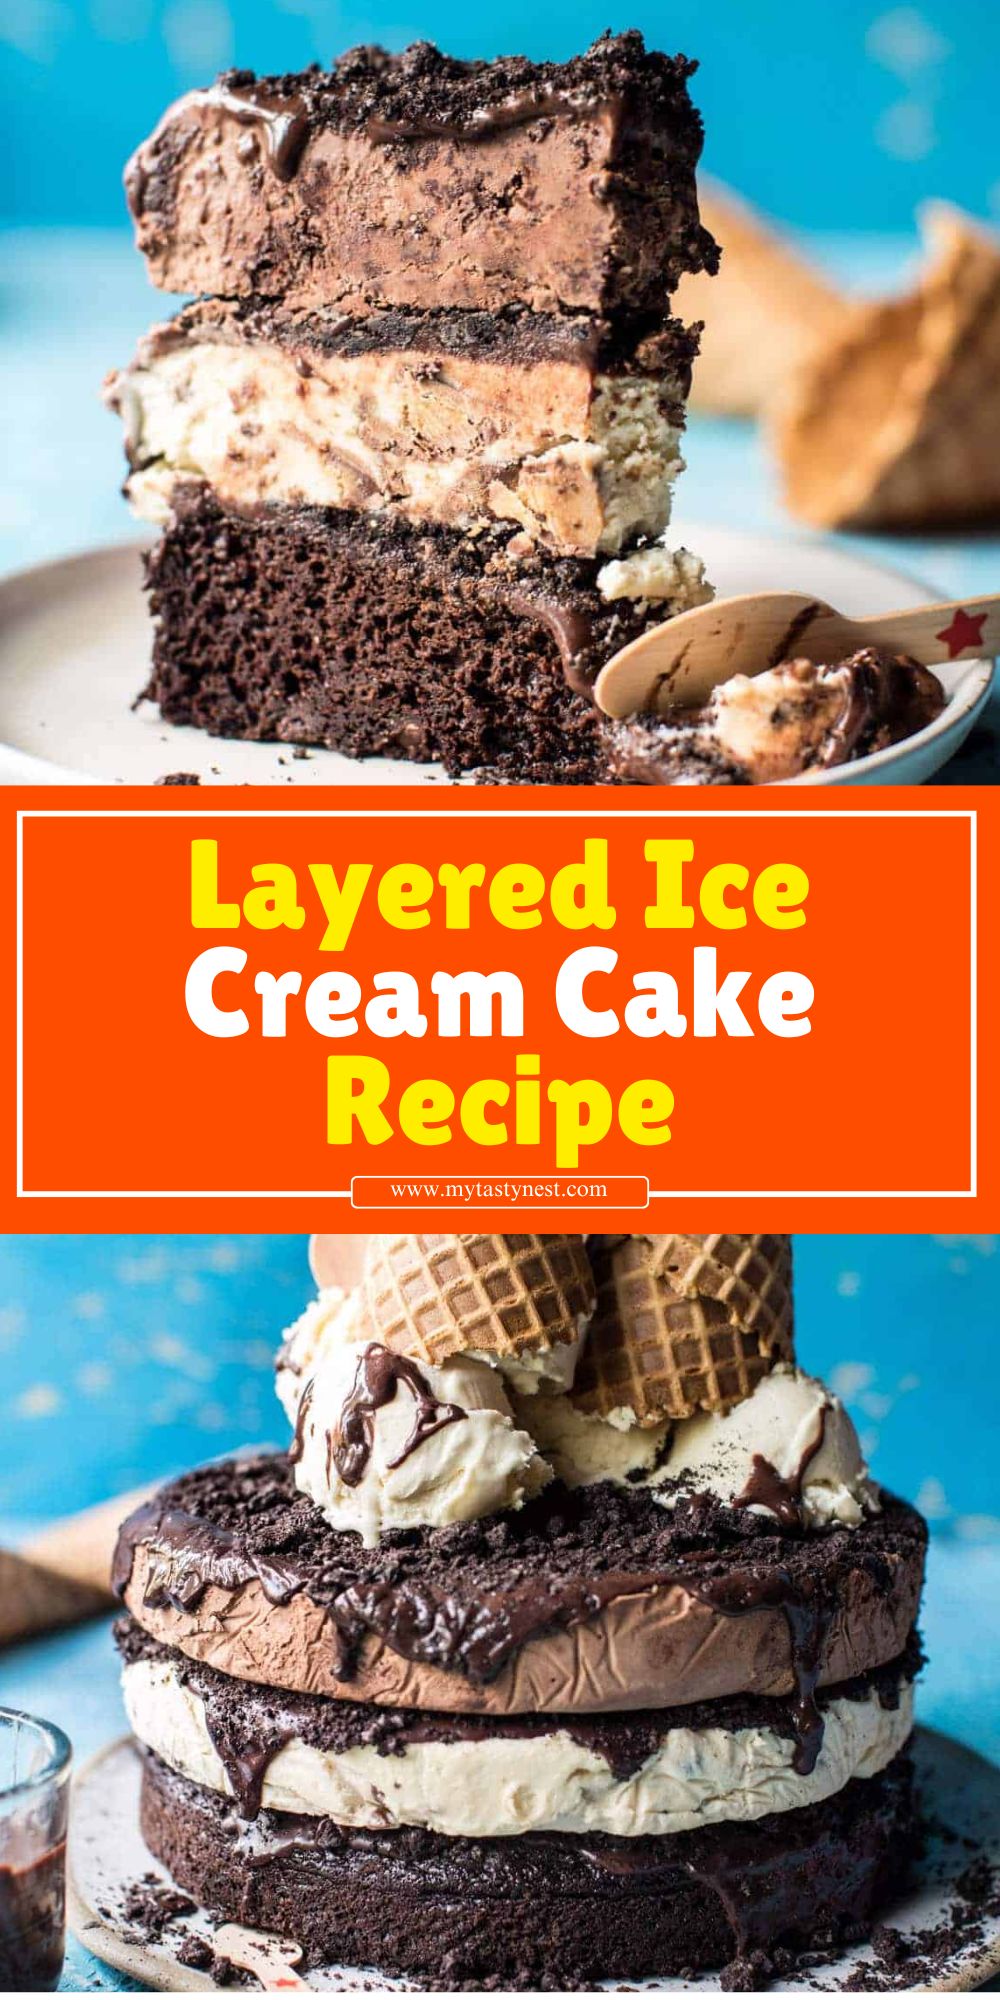
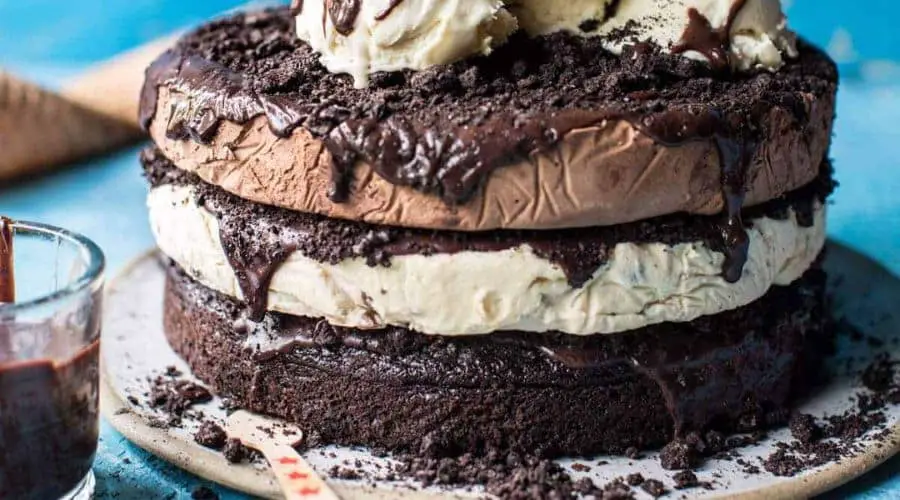
There’s something truly magical about a layered ice cream cake—a dessert that combines rich, creamy layers of your favorite ice cream flavors with delicious textures like cookies, cake, or brownies.
Whether you’re celebrating a birthday, hosting a summer party, or just indulging in a sweet treat, this homemade layered ice cream cake is guaranteed to impress.
Unlike store-bought versions, this recipe allows you to customize every layer, ensuring the perfect balance of flavors and textures.
Plus, it’s incredibly easy to make—no baking required! Follow along as we walk you through the simple steps to create a stunning, mouthwatering ice cream cake that will be the star of any occasion.

Why You’ll Love This Layered Ice Cream Cake
If you’ve never made an ice cream cake before, you’re in for a treat. This dessert is not only visually impressive but also incredibly simple to put together.
Here’s why you’ll love it:
1. It’s Perfect for Any Occasion
From birthdays and anniversaries to summer BBQs, this cake is a crowd-pleaser. Its vibrant layers and cool, creamy texture make it the ultimate warm-weather dessert, but it’s just as enjoyable year-round.
2. Customizable with Your Favorite Flavors
Chocolate, vanilla, strawberry, cookies and cream—the choices are endless! You can mix and match ice cream flavors, add crunchy layers, or drizzle on your favorite toppings.
3. No Baking Required
Forget about preheating the oven! This ice cream cake is completely no-bake, making it an easy dessert to prepare without any fuss.
4. Make-Ahead Convenience
Planning a party? This cake needs time to freeze between layers, which means you can make it ahead of time and have one less thing to worry about on the big day.
5. A Beautiful and Impressive Presentation
The layered effect of different colors and textures makes this cake a stunning centerpiece for any dessert table. Add whipped cream, chocolate ganache, or sprinkles for an extra wow factor.
Essential Ingredients for a Perfect Ice Cream Cake
Creating the perfect layered ice cream cake starts with selecting the right ingredients. Each layer plays a key role in the overall texture, flavor, and stability of the cake.
Here’s everything you’ll need:
1. Ice Cream – The Star of the Cake
Choose two to three flavors that complement each other. Some classic combinations include:
- Chocolate + Vanilla + Strawberry (Neapolitan style)
- Cookies and Cream + Chocolate Fudge
- Mint Chocolate Chip + Brownie Batter
- Peanut Butter + Caramel + Chocolate
Make sure to use high-quality ice cream, as it affects both the taste and texture of your cake.
2. The Cake or Crunchy Base
A solid base helps support the layers and adds texture. Some great options include:
- Crushed cookies (Oreo, graham crackers, or shortbread)
- Brownies (for a fudgy, chewy base)
- Sponge cake (light and fluffy, great for balancing rich ice cream)
3. A Layer of Extra Flavor and Crunch
To add texture between the ice cream layers, consider mixing in:
- Chocolate ganache or caramel sauce
- Crushed nuts (almonds, peanuts, pecans)
- Candy pieces (chocolate chips, M&Ms, toffee bits)
- Crushed cookies or brownies
4. Whipped Cream or Frosting for the Outer Layer
A smooth and creamy outer layer gives your cake a finished look. You can use:
- Whipped cream (light and fluffy)
- Chocolate ganache (rich and glossy)
- Buttercream frosting (for a more structured finish)
5. Toppings for the Final Touch
Make your cake visually appealing and even more delicious with:
- Sprinkles or edible glitter
- Drizzles of chocolate, caramel, or fruit sauce
- Fresh fruit (strawberries, raspberries, bananas)
- Crushed cookies, nuts, or candy pieces
Once you have all your ingredients, it’s time to start assembling your masterpiece!
Step-by-Step Guide to Making a Layered Ice Cream Cake

Creating a layered ice cream cake may seem complex, but it’s surprisingly simple when broken down into steps.
Follow this guide for a perfectly layered, beautifully set cake every time.
Step 1: Prepare the Cake Base
- If using cookies or graham crackers, crush them into fine crumbs and mix with melted butter to form a solid crust. Press the mixture firmly into the bottom of a springform pan.
- If using brownies or sponge cake, bake and let it cool completely before placing it at the bottom of the pan.
Place the base in the freezer for 15-20 minutes to firm up before adding ice cream.
Step 2: Soften and Layer the First Ice Cream Flavor
- Take the first flavor of ice cream out of the freezer and let it soften for about 10 minutes. It should be spreadable but not melted.
- Spread the ice cream evenly over the chilled base using a spatula.
- Freeze for at least 30 minutes before adding the next layer.
Step 3: Add a Crunchy Layer (Optional but Recommended!)
- Sprinkle crushed cookies, chopped nuts, or drizzle chocolate/caramel sauce over the first ice cream layer.
- This adds texture and extra flavor between layers.
Step 4: Repeat with Additional Ice Cream Layers
- Soften the next ice cream flavor and spread it evenly over the first layer.
- If adding another crunchy layer, do so before the final ice cream layer.
- Once all layers are added, freeze for at least 4-6 hours (or overnight) to set completely.
Step 5: Frost the Cake
- Remove the cake from the pan by running a warm knife along the edges and carefully releasing it from the springform.
- Spread whipped cream or chocolate ganache over the entire cake for a smooth finish.
Step 6: Decorate and Serve!
- Drizzle with chocolate sauce, sprinkle with toppings, or add fresh fruit for a stunning presentation.
- Let the cake sit at room temperature for 5-10 minutes before slicing to make it easier to cut.
Pro Tips for the Best Layered Ice Cream Cake
Making a layered ice cream cake is simple, but a few expert tricks can take it from good to incredible.
Follow these tips to ensure your cake is beautifully layered, easy to slice, and bursting with flavor.
1. Soften Ice Cream Properly for Smooth Layers
- Ice cream should be soft enough to spread but not melted. Let it sit at room temperature for 10-15 minutes or microwave in 10-second intervals until spreadable.
- If it’s too melted, it will create uneven layers and take longer to set in the freezer.
2. Freeze Between Layers for a Firm Structure
- Each ice cream layer should be frozen for at least 30 minutes before adding the next layer.
- This prevents layers from mixing and keeps the cake looking clean and defined.
3. Use a Springform Pan for Easy Removal
- A 9-inch springform pan is ideal because it allows you to release the cake without ruining the layers.
- If you don’t have one, line a regular cake pan with plastic wrap or parchment paper for easy lifting.
4. Prevent Ice Crystals with Plastic Wrap
- Cover the cake with plastic wrap or aluminum foil before freezing to prevent ice crystals from forming.
- This keeps the cake fresh and creamy instead of icy.
5. Warm Your Knife for Clean Slices
- Run a sharp knife under hot water and wipe it dry before slicing the cake.
- Repeat between cuts for neat, smooth slices.
6. Add a Crunchy Layer for Extra Texture
- To prevent a soggy cake, add cookie crumbs, brownie pieces, or crushed nuts between ice cream layers.
- This not only improves texture but also enhances flavor.
7. Plan Ahead for the Perfect Ice Cream Cake
- Ice cream cake needs at least 6 hours (or overnight) to fully set before serving.
- If making it for a party, prepare it a day in advance so it’s completely frozen and ready to go.
With these tips in mind, let’s explore some fun variations to customize your ice cream cake!
Easy Variations & Flavor Ideas
One of the best things about making a layered ice cream cake is that it’s endlessly customizable. Whether you’re a chocolate lover, a fan of fruity flavors, or craving something unique, there’s a combination for everyone!
1. Classic Chocolate Lover’s Ice Cream Cake
- Layers: Chocolate ice cream, cookies & cream ice cream, chocolate brownie base
- Crunchy Layer: Crushed Oreos or chocolate chips
- Toppings: Chocolate ganache, whipped cream, chocolate shavings
2. Fruity Summer Delight
- Layers: Strawberry ice cream, mango sorbet, vanilla ice cream
- Crunchy Layer: Crushed graham crackers or shortbread cookies
- Toppings: Fresh berries, white chocolate drizzle
3. Peanut Butter & Caramel Indulgence
- Layers: Peanut butter ice cream, caramel ice cream, chocolate cake base
- Crunchy Layer: Chopped peanuts and caramel drizzle
- Toppings: Reese’s cups, whipped cream, extra caramel drizzle
4. Cookies & Cream Dream
- Layers: Cookies & cream ice cream, vanilla ice cream, chocolate cookie crust
- Crunchy Layer: Crushed Oreos
- Toppings: Whipped cream, crushed cookies, chocolate drizzle
5. Mint Chocolate Chip Bliss
- Layers: Mint chocolate chip ice cream, vanilla ice cream, brownie base
- Crunchy Layer: Crushed Andes mints or chocolate chips
- Toppings: Whipped cream, mint leaves, chocolate drizzle
6. Coffee Lover’s Delight
- Layers: Coffee ice cream, mocha ice cream, chocolate cake base
- Crunchy Layer: Crushed biscotti or espresso powder
- Toppings: Chocolate-covered espresso beans, caramel drizzle
7. Birthday Party Funfetti Cake
- Layers: Birthday cake ice cream, strawberry ice cream, vanilla wafer crust
- Crunchy Layer: Rainbow sprinkles and crushed sugar cookies
- Toppings: Whipped cream, sprinkles, mini marshmallows
Final Thoughts – Time to Indulge!
A layered ice cream cake is the perfect way to impress your guests without spending hours in the kitchen.
With its creamy layers, crunchy textures, and endless flavor possibilities, this no-bake dessert is a guaranteed crowd-pleaser.
Whether you’re celebrating a birthday, hosting a summer gathering, or just craving something sweet, this homemade ice cream cake will always be a hit.
Now that you have all the tips, tricks, and variations, it’s time to create your own masterpiece! Try out different flavor combinations, get creative with toppings, and enjoy the process of making a dessert that looks as amazing as it tastes.
If you make this layered ice cream cake, be sure to share your experience! Leave a comment, post a photo, or tag us on social media—we’d love to see your delicious creations! 🍰🍦✨
Frequently Asked Questions (FAQs)
1. Can I make this ice cream cake ahead of time?
Yes! In fact, it’s best to make this cake at least a day in advance to give it enough time to set properly. You can store it in the freezer for up to one week if covered tightly with plastic wrap or aluminum foil to prevent freezer burn.
2. How do I cut an ice cream cake without it melting too quickly?
To get clean slices, run a sharp knife under hot water for a few seconds, then wipe it dry before cutting. Repeat this step between slices. Also, let the cake sit at room temperature for 5-10 minutes before serving to make slicing easier.
3. What’s the best way to store leftover ice cream cake?
Wrap any leftovers tightly in plastic wrap or store them in an airtight container to prevent freezer burn. If possible, place the cake in a deep container to protect it from absorbing odors from the freezer.
4. Can I use dairy-free or vegan alternatives?
Absolutely! You can substitute traditional ice cream with dairy-free options like coconut, almond, or oat milk ice cream. Use a vegan whipped topping and opt for a cookie or nut-based crust instead of traditional cake layers.
5. How can I transport an ice cream cake without it melting?
Keep the cake frozen until the last possible moment before transporting it. Place it in a cooler with ice packs or dry ice to maintain its firmness. If driving long distances, consider pre-slicing and storing individual pieces in a sealed container for easier serving.

Layered Ice Cream Cake
Equipment
- 1 (9-inch) Springform Pan
- 1 mixing bowl
- 1 spatula
- 1 Offset spatula (for spreading ice cream layers)
- 1 Saucepan (if making ganache)
- 1 Sharp knife (for slicing)
- 1 Rolling pin or food processor (for crushing cookies)
Ingredients
For the Base:
- 2 cups crushed chocolate cookies Oreos or graham crackers
- 4 tbsp melted butter
For the Ice Cream Layers:
- 1.5 quarts chocolate ice cream softened
- 1.5 quarts vanilla ice cream softened
- 1.5 quarts cookies & cream ice cream softened
For the Crunchy Layer (Optional but Recommended):
- ½ cup crushed cookies or brownie bits
- ½ cup chopped nuts almonds, peanuts, or pecans
- ¼ cup caramel or fudge sauce
For the Topping & Decoration:
- 1 cup heavy whipping cream or store-bought whipped cream
- ¼ cup powdered sugar
- 1 cup chocolate ganache melted chocolate + warm heavy cream
- Sprinkles chopped nuts, or chocolate shavings (for garnish)
Instructions
Step 1: Prepare the Base
- Line a 9-inch springform pan with parchment paper for easy removal.
- In a bowl, mix crushed cookies with melted butter until combined.
- Press the mixture firmly into the bottom of the pan to form a solid base.
- Freeze for 15-20 minutes while preparing the ice cream layers.
Step 2: Layer the Ice Cream
- Remove chocolate ice cream from the freezer and let it soften for 10-15 minutes until spreadable.
- Spread an even layer over the cookie base using an offset spatula.
- Freeze for 30 minutes before adding the next layer.
- Repeat the process with vanilla ice cream, followed by cookies & cream ice cream, freezing 30 minutes between each layer.
Step 3: Add the Crunchy Layer (Optional)
- Before adding the last ice cream layer, sprinkle a mix of crushed cookies, nuts, and caramel/fudge sauce for extra texture.
Step 4: Freeze the Cake
- Once all layers are added, cover the pan with plastic wrap and freeze for at least 6 hours or overnight.
Step 5: Decorate the Cake
- In a mixing bowl, beat heavy whipping cream with powdered sugar until stiff peaks form.
- Remove the cake from the pan by running a warm knife around the edges before releasing the springform.
- Spread whipped cream evenly over the cake and drizzle with chocolate ganache.
- Garnish with sprinkles, chocolate shavings, or nuts for a beautiful finish.
Step 6: Serve & Enjoy!
- Let the cake sit at room temperature for 5-10 minutes before slicing.
- Serve immediately and enjoy this delicious layered ice cream cake! 🍰🍦
Notes
- Softening the Ice Cream: Allow each layer to soften naturally at room temperature rather than microwaving, which can cause uneven melting.
- Using a Regular Cake Pan? Line it with plastic wrap or parchment paper for easy lifting.
- Make-Ahead Tip: This cake can be made up to a week in advance if stored properly in the freezer.
- Flavor Variations: Try different ice cream flavors like strawberry, mint chocolate chip, or peanut butter caramel for a unique twist.
- Serving Tip: Run a knife under hot water before slicing for smooth, clean cuts.


