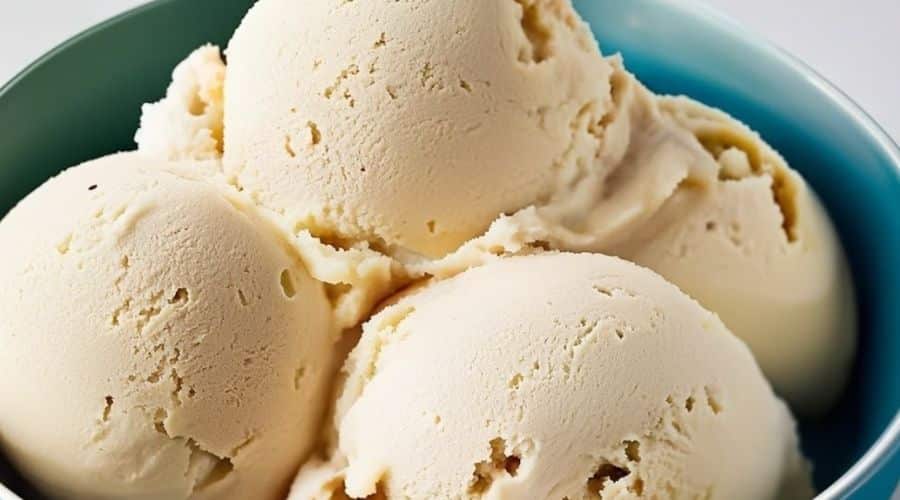
There’s nothing quite like the smooth, creamy taste of homemade vanilla ice cream. With the KitchenAid Vanilla Ice Cream Recipe, you can easily create a rich and flavorful dessert right in your own kitchen.
Using a KitchenAid stand mixer with an ice cream maker attachment, this method simplifies the process, delivering a perfect frozen treat with minimal effort.
This classic vanilla ice cream is pure, simple, and incredibly versatile—a dessert that stands beautifully on its own or pairs wonderfully with your favorite toppings, from warm brownies to fresh fruit.
Whether you’re making it for a family gathering, a summer treat, or just because you love ice cream, this recipe is sure to impress.

Why You’ll Love This Recipe
This KitchenAid Vanilla Ice Cream Recipe is a game-changer for homemade dessert lovers.
Here’s why:
1. Creamy and Smooth Texture
The KitchenAid ice cream maker churns the mixture to perfection, creating a velvety, melt-in-your-mouth consistency.
2. Simple, High-Quality Ingredients
With just a handful of wholesome ingredients—heavy cream, milk, sugar, vanilla, and a pinch of salt—you can enjoy ice cream without any artificial additives or preservatives.
3. Customizable to Your Taste
This base recipe is incredibly flexible. Add chocolate chips, swirl in caramel, or mix in fresh fruit for endless variations.
4. Easy to Make with KitchenAid
Using the KitchenAid stand mixer means no hand churning—just pour, mix, and let the machine do the work. It’s an effortless way to make homemade ice cream whenever you crave it.
5. The Perfect Make-Ahead Dessert
Prepare it in advance and store it in the freezer for up to two weeks, so you always have a delicious treat on hand.
If you love rich, homemade ice cream with a restaurant-quality taste, this KitchenAid vanilla ice cream recipe will become a staple in your kitchen. Let’s dive in!
Essential Equipment and Ingredients
Before diving into the recipe, it’s important to gather all the necessary tools and ingredients.
Using the KitchenAid ice cream maker attachment ensures a smooth and effortless process, resulting in a creamy and perfectly churned vanilla ice cream.
Kitchen Tools You’ll Need
To make this ice cream, you’ll need the following:
- KitchenAid Stand Mixer – The powerhouse that does all the mixing for you.
- Ice Cream Maker Attachment – The key tool that churns the ice cream to perfection.
- Mixing Bowls – For whisking the ingredients together.
- Whisk or Hand Mixer – Helps dissolve the sugar into the liquid.
- Measuring Cups and Spoons – Ensures accurate ingredient portions.
- Spatula – To scrape the mixture cleanly into the bowl.
- Airtight Container – For freezing and storing your homemade ice cream.
Ingredients You’ll Need
This recipe requires only a few simple, high-quality ingredients for the perfect balance of richness and flavor:
- 2 cups heavy cream – Provides a creamy, smooth texture.
- 1 cup whole milk – Adds a lightness to balance the richness.
- ¾ cup granulated sugar – Sweetens the ice cream just right.
- 2 teaspoons pure vanilla extract – The star ingredient for deep, aromatic vanilla flavor.
- 1/8 teaspoon salt – Enhances the flavors and balances the sweetness.
- 4 large egg yolks (optional) – For a custard-based version, adding extra richness and silkiness.
Now that you have everything ready, let’s move on to the step-by-step process of making this delicious homemade vanilla ice cream!
Step-by-Step Instructions

Making ice cream at home is easy when you break it down into simple, manageable steps.
Follow this method to achieve a creamy, dreamy vanilla ice cream with your KitchenAid Ice Cream Maker Attachment.
Step 1: Prepare the Ice Cream Maker Attachment
- Place the KitchenAid ice cream bowl in the freezer for at least 15 hours (preferably overnight). The bowl needs to be completely frozen for the best results.
- Make sure your KitchenAid stand mixer and all tools are clean and dry.
Step 2: Make the Vanilla Ice Cream Base
- Combine Ingredients – In a mixing bowl, whisk together the heavy cream, whole milk, sugar, vanilla extract, and salt until the sugar is fully dissolved.
- For a Custard Base (Optional) –
- In a separate bowl, whisk the egg yolks.
- Heat the milk, cream, sugar, and salt in a saucepan over medium heat until it’s warm but not boiling.
- Slowly pour a small amount of the warm mixture into the egg yolks, whisking continuously (this prevents scrambling).
- Return the mixture to the saucepan and cook over low heat, stirring constantly, until it thickens enough to coat the back of a spoon.
- Remove from heat and strain through a fine-mesh sieve to remove any cooked egg bits.
Step 3: Chill the Mixture
- Transfer the ice cream base to a clean bowl and cover it with plastic wrap, pressing it directly onto the surface to prevent a skin from forming.
- Refrigerate for at least 2–4 hours (or overnight for best results). The colder the mixture, the creamier the final ice cream.
Step 4: Churn the Ice Cream
- Attach the frozen ice cream bowl to the KitchenAid stand mixer and set it up according to the manufacturer’s instructions.
- Turn the mixer to the lowest speed (Stir setting) and slowly pour in the chilled ice cream mixture.
- Let it churn for 20–30 minutes until it thickens to a soft-serve consistency.
Step 5: Freeze for a Firmer Texture
- Transfer the freshly churned ice cream into an airtight container.
- Smooth the top with a spatula, then cover and freeze for at least 2 hours for a firmer texture.
Once fully set, scoop and serve your homemade KitchenAid vanilla ice cream—pure, creamy, and absolutely delicious!
Serving and Storage Tips
How to Serve Your Homemade Vanilla Ice Cream
Once your KitchenAid Vanilla Ice Cream has set in the freezer, it’s time to enjoy it! Here are a few tips to get the best texture and flavor when serving:
- Let it Sit for a Few Minutes – If the ice cream is too firm, let it sit at room temperature for 5 minutes before scooping. This softens it slightly, making it easier to serve.
- Use a Warm Ice Cream Scoop – Dip your ice cream scoop in hot water, then dry it before scooping to get perfectly rounded servings.
- Pair with Desserts – This vanilla ice cream is perfect with warm brownies, apple pie, waffles, or a drizzle of caramel sauce.
- Top it Off – Add fresh berries, chocolate chips, crushed cookies, or whipped cream for extra flavor and texture.
How to Store Homemade Ice Cream
Proper storage is key to maintaining the smooth and creamy texture of your ice cream. Here’s how to keep it fresh:
- Use an Airtight Container – Store your ice cream in a freezer-safe airtight container to prevent ice crystals from forming.
- Press Plastic Wrap on the Surface – Before sealing the lid, press a piece of plastic wrap directly onto the ice cream’s surface. This minimizes freezer burn.
- Keep It in the Coldest Part of the Freezer – Store your container at the back of the freezer where the temperature is most stable.
- Enjoy Within Two Weeks – While homemade ice cream can last up to a month, it’s best enjoyed within two weeks for optimal flavor and texture.
Variations and Mix-In Ideas
One of the best things about this KitchenAid Vanilla Ice Cream Recipe is that it serves as a perfect base for other flavors.
Here are some fun variations and mix-ins to customize your ice cream:
Flavor Variations
- French Vanilla Ice Cream – Use egg yolks to create a custard-based version for a richer, more luxurious flavor.
- Honey Vanilla Ice Cream – Swap ¼ cup of sugar for honey to add a floral sweetness.
- Vanilla Bean Ice Cream – Use a vanilla bean pod instead of extract for an extra bold vanilla taste. Scrape the seeds into the mixture before heating.
Delicious Mix-Ins (Add these in the last few minutes of churning!)
- Chocolate Chips or Chunks – For a classic vanilla-chocolate combo.
- Crushed Cookies – Oreos, shortbread, or graham crackers add a fun texture.
- Caramel or Fudge Swirls – Drizzle in warm caramel or fudge sauce just before freezing.
- Nuts – Toasted almonds, pecans, or walnuts add a crunchy contrast.
- Fresh Fruit – Stir in chopped strawberries, mango, or blueberries for a refreshing twist.
Creative Combination Ideas
- Cookies & Cream: Add crushed chocolate sandwich cookies.
- Strawberry Shortcake: Mix in strawberry chunks and crumbled pound cake.
- Salted Caramel Pretzel: Swirl in caramel sauce and crushed pretzels for a salty-sweet treat.
- Mint Chocolate Chip: Stir in peppermint extract and chocolate shavings.
With so many ways to customize this KitchenAid Vanilla Ice Cream, you can make a new version every time!
Common Mistakes and Troubleshooting
Making homemade ice cream can sometimes have a few bumps along the way.
Here are some common mistakes and troubleshooting tips to ensure your KitchenAid Vanilla Ice Cream turns out perfect every time:
1. Ice Cream Too Soft or Doesn’t Firm Up
- Cause: The ice cream base may not have been chilled enough before churning, or the ice cream maker bowl wasn’t frozen thoroughly.
- Solution: Make sure to refrigerate the mixture for 2–4 hours (overnight if possible). Also, freeze the ice cream bowl for at least 15 hours before use.
2. Ice Cream Becomes Icy or Granular
- Cause: Over-churning or not enough fat in the mixture can cause ice crystals to form.
- Solution: Avoid over-churning the ice cream. Once it reaches soft-serve consistency, stop the mixer. For creamier results, use full-fat ingredients and ensure the base is well-chilled.
3. Ice Cream is Too Hard After Freezing
- Cause: It’s been in the freezer for too long or stored in an airtight container without a layer of plastic wrap.
- Solution: Let it sit at room temperature for 5–10 minutes before scooping. Also, press plastic wrap on the surface of the ice cream before sealing to prevent freezer burn.
4. Ice Cream is Too Sweet
- Cause: The recipe calls for ¾ cup sugar, but individual tastes vary.
- Solution: If you prefer a less sweet version, reduce the amount of sugar to ½ cup and taste the base before chilling to adjust sweetness to your liking.
5. Egg Yolks Scramble or Curdle (for Custard-Based Ice Cream)
- Cause: Tempering the egg yolks too quickly with hot milk can cause them to scramble.
- Solution: Gradually pour the warm milk mixture into the egg yolks while whisking constantly, and be sure to cook over low heat to prevent overheating.
Final Thoughts
This KitchenAid Vanilla Ice Cream Recipe is the perfect starting point for both beginners and seasoned ice cream enthusiasts. With just a few simple ingredients and the power of the KitchenAid Ice Cream Maker Attachment, you can create a creamy, indulgent treat that’s far better than store-bought options.
Whether you stick to the classic vanilla flavor or get creative with mix-ins, this recipe is easy to customize and make your own. The best part is that you can enjoy homemade ice cream year-round, without the hassle of complicated techniques.
Don’t forget to experiment with different flavor combinations, toppings, and variations. Ice cream is all about creativity and fun—so enjoy every scoop, and share it with friends and family for a delightful homemade dessert experience!
Frequently Asked Questions
1. Can I make this recipe without the KitchenAid ice cream maker attachment?
Yes, you can! If you don’t have the attachment, you can still make homemade ice cream by using a regular ice cream maker or by following the no-churn method, which involves freezing the ice cream base and stirring every 30 minutes to prevent ice crystals from forming.
2. Can I make this recipe without using egg yolks?
Absolutely! The egg yolks are optional. Without them, the ice cream will still be creamy, but the texture might be a bit lighter. Skipping the egg yolks means you’re making a simple ice cream base rather than a custard-based one.
3. How long does the ice cream take to churn in the KitchenAid ice cream maker?
It typically takes about 20–30 minutes of churning on the lowest setting. Keep an eye on the ice cream’s consistency; it’s done when it reaches a soft-serve texture.
4. Can I use low-fat milk or non-dairy milk in this recipe?
Yes, you can substitute low-fat milk, almond milk, or other non-dairy alternatives. However, keep in mind that the texture may be a bit different, as full-fat dairy contributes to the rich creaminess of the ice cream.
5. How do I store homemade ice cream properly?
To keep your ice cream at its best, store it in an airtight container. For extra freshness, press plastic wrap directly onto the surface of the ice cream before sealing the lid. It will stay fresh for up to two weeks in the freezer.

Kitchenaid Vanilla Ice Cream
Equipment
- KitchenAid Stand Mixer
- KitchenAid Ice Cream Maker Attachment
- Mixing bowl
- Whisk or Hand Mixer
- Measuring cups & spoons
- Spatula
- Airtight container
Ingredients
- 2 cups Heavy Cream
- 1 cup Whole Milk
- ¾ cup Granulated Sugar
- 2 teaspoons Pure Vanilla Extract
- ⅛ teaspoon Salt
- 4 large Egg Yolks optional
Instructions
Prepare the Ice Cream Maker Attachment
- Freeze the KitchenAid ice cream bowl for at least 15 hours before using.
- Clean and dry all tools and equipment.
Make the Ice Cream Base
- In a mixing bowl, combine heavy cream, whole milk, sugar, vanilla extract, and salt. Whisk until the sugar dissolves.
- (Optional for a custard base): Heat the mixture in a saucepan, then gradually temper and cook the egg yolks with the warm milk mixture. Strain the custard through a fine sieve.
Chill the Mixture
- Cover the bowl with plastic wrap, pressing it onto the surface of the mixture to prevent a skin.
- Refrigerate for 2–4 hours (or overnight).
Churn the Ice Cream
- Attach the frozen ice cream bowl to the KitchenAid stand mixer.
- Turn the mixer to lowest speed and slowly pour the chilled mixture into the bowl.
- Churn for 20–30 minutes until the ice cream reaches a soft-serve consistency.
Freeze for a Firmer Texture
- Transfer the ice cream to an airtight container and smooth the top with a spatula.
- Freeze for at least 2 hours or until firm.
Serve
- Let the ice cream sit at room temperature for 5 minutes to soften slightly before serving.
Notes
- Egg Yolks: The egg yolks in the custard base create a creamier texture. If you prefer a lighter, simpler version, skip the yolks.
- Chilling Time: The mixture needs to be chilled thoroughly before churning for the best consistency. Aim for overnight chilling for the smoothest results.
- Mix-Ins: Feel free to add chocolate chips, crushed cookies, or fresh fruit during the last 5 minutes of churning.
- Storage: Store ice cream in an airtight container in the freezer for up to 2 weeks. Press plastic wrap against the surface before sealing to prevent freezer burn.


