Every product is independently reviewed and selected by our editors. If you buy something through our links, we may earn an affiliate commission at no extra cost to you.
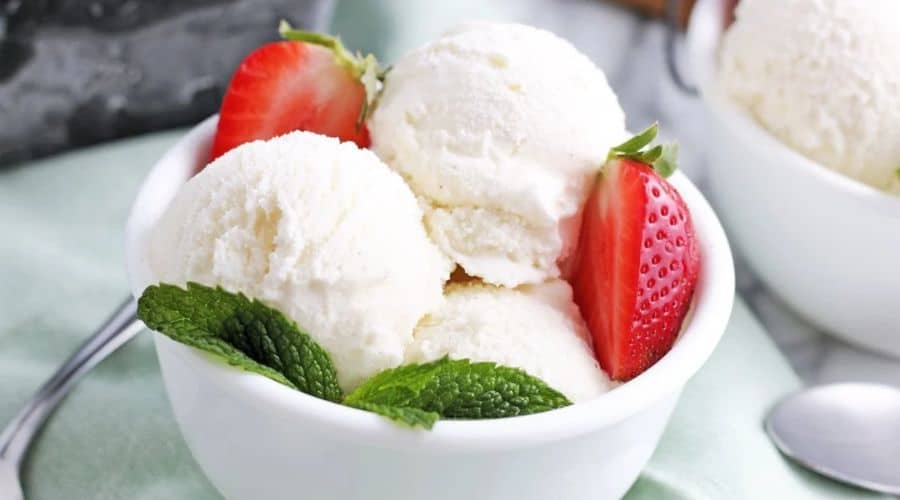
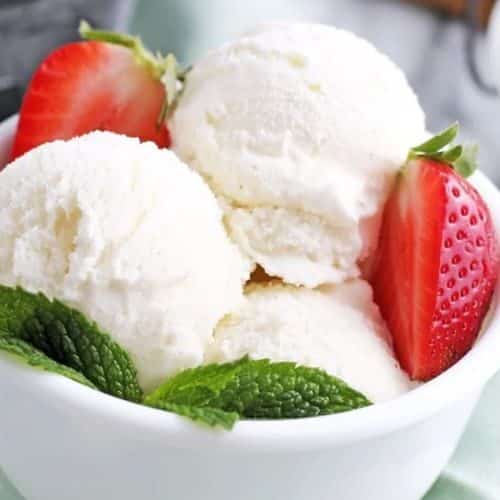
French vanilla ice cream is the epitome of indulgence—a creamy, rich dessert that’s beloved by many.
Unlike traditional vanilla, French vanilla incorporates egg yolks, which give it a velvety texture and a custard-like flavor that’s simply irresistible.
While you can find French vanilla ice cream in almost every grocery store, making it at home elevates the experience.
The beauty of homemade ice cream lies in its freshness and the ability to control the quality of ingredients.
In this recipe, we’ll guide you through the steps to create a luscious French vanilla ice cream that’s perfect for any occasion.
Whether you’re a seasoned home cook or a beginner, this recipe will walk you through making a creamy, smooth ice cream that’s sure to be a crowd-pleaser.
From the rich custard base to the velvety finish, you’ll be amazed at how easy it is to make this classic treat right in your own kitchen.
Ingredients for Homemade French Vanilla Ice Cream
Creating the perfect French vanilla ice cream begins with selecting the right ingredients.
This recipe calls for a few essential components, each contributing to the final product’s texture and flavor.
Below are the key ingredients needed to make this creamy delight.
Dairy: Whole Milk and Heavy Cream
The foundation of any ice cream is the combination of whole milk and heavy cream.
Whole milk offers just the right amount of creaminess without being too rich, while the heavy cream adds the luxurious texture that makes French vanilla ice cream so smooth.
Together, these two provide the base that ensures a silky, satisfying result.
Eggs: Egg Yolks for a Custard Base
What makes French vanilla ice cream stand out from other vanilla varieties is the use of egg yolks.
They create a custard base, giving the ice cream a dense, creamy consistency.
The egg yolks also contribute to the ice cream’s beautiful pale yellow color and rich flavor.
Be sure to separate the eggs carefully and only use the yolks for this recipe.
Sugar: Sweetening the Mix
Granulated sugar is essential for balancing the flavors and adding sweetness to the custard base.
Sugar not only sweetens the ice cream but also helps to prevent the mixture from freezing too hard.
The right amount of sugar ensures the ice cream has the perfect level of sweetness and texture.
Vanilla: Vanilla Bean or Extract
The star ingredient in French vanilla ice cream is, of course, vanilla.
While you can use vanilla extract, opting for a real vanilla bean makes a significant difference in the flavor.
The tiny black seeds from the vanilla bean infuse the ice cream with an intense, natural vanilla flavor that no extract can replicate.
Scraping the seeds from the bean and adding them to the mixture creates that signature French vanilla taste.
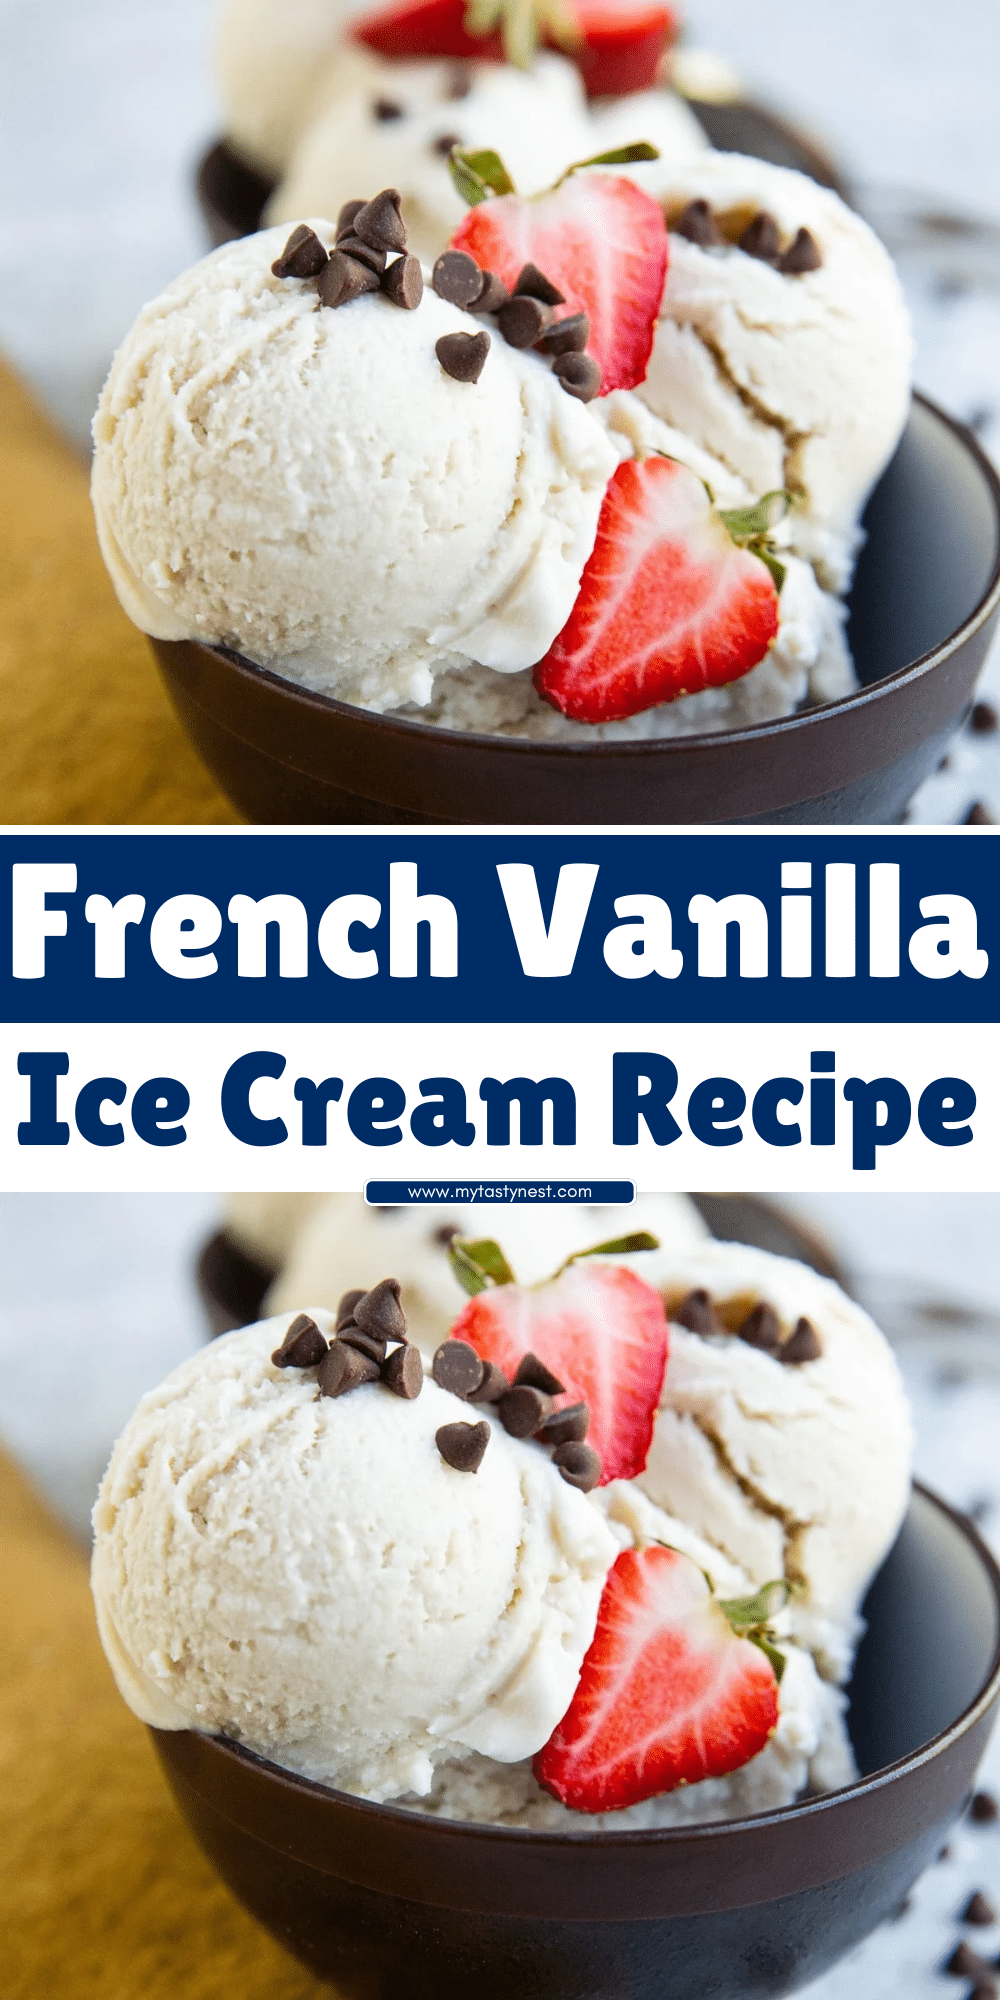
Optional Mix-ins and Variations
While the classic French vanilla ice cream is delicious on its own, there are plenty of ways to personalize the recipe.
If you’re feeling adventurous, try adding chocolate chips, crushed nuts, or swirls of caramel.
These optional add-ins can take your ice cream to the next level and give it your own twist.
However, if you prefer to keep it traditional, simply stick with the base ingredients for an authentic French vanilla experience.
How to Make French Vanilla Ice Cream from Scratch

Making French vanilla ice cream from scratch may seem like a daunting task, but with a little patience and the right technique, it’s surprisingly simple.
The process begins with creating a custard base and ends with a smooth, creamy ice cream that will rival any store-bought version.
Here’s a step-by-step guide to walk you through the process:
Step 1: Prepare the Custard Base
The first step in making French vanilla ice cream is to prepare the custard base, which will give the ice cream its smooth and creamy texture.
Start by combining the egg yolks and sugar in a large bowl.
Whisk them together until the mixture becomes pale and slightly thickened.
This step is important as it helps incorporate the sugar evenly into the eggs and sets the foundation for the custard.
Next, in a medium saucepan, heat the whole milk and heavy cream over medium heat, stirring occasionally.
You want the mixture to warm up, but be careful not to bring it to a boil.
Once it’s hot (but not boiling), gradually pour a small amount of the warm milk mixture into the egg yolk mixture while whisking constantly.
This step is called “tempering” the eggs, and it’s crucial to avoid scrambling the yolks.
After you’ve slowly added about half of the milk mixture to the eggs, you can then pour the egg mixture back into the saucepan with the remaining milk and cream.
Stir continuously as you cook the custard over medium-low heat, ensuring that the mixture thickens to the consistency of heavy cream.
To test if the custard is ready, dip a spoon into the mixture and run your finger along the back of it—if the line stays, the custard is thick enough.
Step 2: Infuse the Vanilla Flavor
Once your custard has thickened, it’s time to infuse the vanilla flavor.
Split the vanilla bean lengthwise and scrape out the tiny black seeds using the back of a knife.
Add both the seeds and the empty pod to the custard mixture.
If you’re using vanilla extract instead of a bean, simply add about one to two teaspoons of extract at this stage.
Stir to incorporate the vanilla, allowing the flavors to meld together.
Step 3: Strain and Cool the Custard
Now that your custard has reached the perfect consistency and is infused with vanilla, it’s time to strain it.
Pour the custard through a fine-mesh sieve into a clean bowl to remove any cooked egg bits or vanilla pod remnants.
This step ensures a smooth texture for your final ice cream.
Let the custard cool to room temperature, then cover it with plastic wrap. Place the bowl in the refrigerator and chill for at least 4 hours, or preferably overnight.
Chilling the mixture thoroughly is essential because it allows the custard to cool completely, which helps it churn better in the ice cream machine and improves the final texture.
Churning the Ice Cream
Once your custard is properly chilled, it’s time to churn it into creamy ice cream.
If you have an ice cream maker, this part will be a breeze.
Step 1: Prepare the Ice Cream Machine
Before you begin, make sure your ice cream maker’s bowl is properly chilled.
Most ice cream makers require the bowl to be frozen for several hours (or overnight), so plan ahead if you need to.
Follow the manufacturer’s instructions for your specific machine.
Step 2: Churn the Custard
Pour the chilled custard into the ice cream maker’s bowl.
Turn the machine on and let it churn the mixture according to the manufacturer’s instructions.
The ice cream will begin to thicken as it churns, and it should take about 20-25 minutes to reach a soft-serve consistency.
The ice cream should be smooth, thick, and slightly airy.
During the churning process, the ice cream maker incorporates air into the mixture, which is what gives the ice cream its light and creamy texture.
Keep an eye on it and stop the machine once the ice cream has thickened to the consistency you prefer.
Step 3: Freeze the Ice Cream
After churning, your ice cream will be at a soft-serve stage, but it needs to be frozen for a few hours to fully set.
Transfer the ice cream into an airtight container, pressing a piece of plastic wrap or parchment paper directly onto the surface to prevent ice crystals from forming.
Place the container in the freezer and let the ice cream harden for at least 4 hours, or overnight if you have the time.
After the ice cream has frozen, it’s ready to serve! Scoop it into bowls or cones and enjoy the smooth, rich, and creamy texture of your homemade French vanilla ice cream.
Freezing and Storing Homemade Ice Cream
After churning your homemade French vanilla ice cream to a soft-serve consistency, it’s time to let it set and freeze to the perfect scoopable texture.
The freezing and storing process is critical to achieving the best quality and texture, ensuring that your ice cream stays creamy and smooth.
Step 1: Transfer to an Airtight Container
Once your ice cream has reached the desired consistency from the ice cream maker, carefully transfer it into an airtight container.
Make sure to pack the ice cream tightly into the container to remove any air pockets that could lead to ice crystals.
For an extra layer of protection, press a piece of plastic wrap or parchment paper directly onto the surface of the ice cream before sealing the container with its lid. This helps to prevent air exposure, which can cause freezer burn.
Step 2: Freezing the Ice Cream
Place the container of ice cream in the coldest part of your freezer. Ideally, let the ice cream freeze for at least 4 hours, or overnight, to allow it to firm up to a scoopable consistency.
While it’s freezing, avoid opening the freezer frequently, as fluctuating temperatures can cause the ice cream to soften and refreeze, leading to undesirable ice crystals.
Step 3: Storing the Ice Cream
Homemade ice cream can be stored for up to 1-2 weeks in the freezer, although it’s best enjoyed within the first week for optimal freshness and flavor.
After this period, the ice cream may begin to lose its smooth texture due to the formation of ice crystals.
For long-term storage, keep the ice cream tightly sealed and avoid repeated thawing and refreezing, as this can affect its texture.
How to Serve After Freezing
When you’re ready to serve your homemade French vanilla ice cream, let it sit out at room temperature for a few minutes to soften slightly. This will make it easier to scoop while still maintaining the creamy texture. Use a warm ice cream scoop to create perfectly shaped scoops with ease.
Tips for the Best French Vanilla Ice Cream
While the basic process of making French vanilla ice cream is straightforward, there are a few key tips and techniques to ensure your homemade ice cream is as creamy and delicious as possible.
Here’s how you can elevate your ice cream-making game.
1. Use High-Quality Ingredients
The quality of the ingredients you use directly affects the flavor and texture of your ice cream. Opt for whole milk and heavy cream with a higher fat content for the creamiest results.
Additionally, if possible, use a high-quality vanilla bean or pure vanilla extract. The natural flavor of vanilla bean seeds creates a depth of flavor that no imitation vanilla can match.
2. Don’t Skimp on the Egg Yolks
The egg yolks are the star ingredient in French vanilla ice cream. They create the custard base, adding richness, creaminess, and a smooth texture.
While it may be tempting to use fewer eggs, sticking to the recommended amount will ensure your ice cream has the signature velvety mouthfeel and depth of flavor.
3. Strain Your Custard
After cooking your custard, make sure to strain it through a fine-mesh sieve before chilling. This removes any tiny bits of cooked egg that could ruin the smooth texture of your ice cream. The straining step is crucial for achieving that perfectly creamy consistency.
4. Chill the Custard Thoroughly
Allowing your custard to chill for at least 4 hours, or overnight, is key to getting the best results. Chilled custard churns better and freezes more evenly. Don’t rush this step—it’s tempting to skip it, but the difference in texture and flavor is worth the wait.
5. Prevent Ice Crystals by Churning Properly
Churning the ice cream in an ice cream maker incorporates air into the mixture, making it light and creamy. Don’t over-churn, but also don’t under-churn.
The ice cream should reach a soft-serve consistency, which is the perfect texture for the freezing process.
If you don’t have an ice cream maker, you can still make the ice cream by stirring it every 30 minutes during the freezing process to break up ice crystals and ensure a smoother texture.
6. Avoid Freezer Burn
For the creamiest, freshest homemade ice cream, store it properly to prevent freezer burn. Use airtight containers and press plastic wrap or parchment paper onto the surface of the ice cream before sealing. This minimizes air exposure and preserves the texture and flavor.
7. Customize Your Ice Cream
While French vanilla is perfect on its own, it’s also a great base for other flavors and add-ins.
Consider adding chocolate chips, crushed nuts, or caramel swirls for added texture and taste.
You can also try adding fruit purees or a touch of coffee for a fun twist.
Just be sure to fold in the add-ins after churning, so they’re evenly distributed without disrupting the texture.
By following these tips, you’ll create the creamiest, most delicious homemade French vanilla ice cream that’s sure to impress your friends and family.
Enjoy experimenting with flavors and textures, and most importantly—enjoy the treat!
Troubleshooting Common Issues
Making homemade ice cream is a fun and rewarding process, but sometimes things don’t go exactly as planned.
If you run into any issues while making or freezing your French vanilla ice cream, don’t worry!
Here are some common problems and how to solve them.
1. Ice Cream Too Hard or Too Soft
Issue: After freezing, your ice cream is either too hard to scoop or too soft to hold its shape.
Solution:
- Too Hard: If the ice cream is too hard, it could be due to over-churning or a high sugar content. Try letting it sit out at room temperature for 5-10 minutes before scooping. This will help soften it to a more scoopable consistency.
- Too Soft: If the ice cream is too soft, it may not have been chilled long enough. Make sure you allow it to freeze for at least 4 hours, or preferably overnight, before serving. If you’re not using an ice cream maker, you might need to stir the ice cream every 30 minutes while freezing to break up ice crystals and ensure it freezes evenly.
2. Ice Crystals in the Ice Cream
Issue: After freezing, the ice cream has large, noticeable ice crystals that affect its texture.
Solution:
Ice crystals can form if the mixture isn’t churned enough or if the ice cream is not stored properly.
Here’s how to fix this issue:
- Ensure you churn the ice cream for the right amount of time to incorporate air and prevent large crystals from forming.
If you don’t have an ice cream maker, make sure to stir the mixture every 30 minutes while freezing to break up any ice crystals that form. - When storing the ice cream, make sure to press plastic wrap or parchment paper against the surface of the ice cream before sealing it in an airtight container.
This reduces air exposure and prevents the formation of large ice crystals.
3. Ice Cream Freezing Too Hard After Storage
Issue: When you try to serve the ice cream after storing it in the freezer for a while, it’s too solid to scoop.
Solution:
Ice cream can freeze very hard if it’s stored for an extended period. Let it sit out at room temperature for 5-10 minutes to soften.
You can also scoop the ice cream with a warm scoop (dip it in hot water before scooping) to make it easier.
4. Custard Overheating or Scrambling
Issue: While preparing the custard base, the eggs scramble, leaving you with a lumpy mixture.
Solution:
To avoid scrambling the eggs, always temper them by slowly adding a little warm milk mixture into the beaten egg yolks while whisking constantly.
Once the egg yolks are warmed, you can add them back into the saucepan without worry. If your custard does end up with lumps, you can strain it through a fine mesh sieve to remove any solid bits.
Flavor Variations and Add-ins
While French vanilla ice cream is absolutely delicious on its own, it’s also a fantastic base for a variety of fun and creative flavor variations.
If you’re in the mood to mix things up, here are some ideas for adding new flavors or textures to your homemade ice cream.
1. Chocolate Chip French Vanilla Ice Cream
How to Add:
Once the ice cream has finished churning and is at a soft-serve consistency, gently fold in ½ to 1 cup of mini chocolate chips or chopped chocolate.
You can also use chocolate chunks for a more decadent texture.
2. Caramel Swirl
How to Add:
After churning, drizzle ribbons of caramel sauce into the ice cream.
Use a spoon or knife to gently swirl the caramel throughout the mixture.
For extra richness, try adding a pinch of sea salt to the caramel for a salted caramel twist.
3. Strawberry French Vanilla Ice Cream
How to Add:
Puree fresh or frozen strawberries and strain out the seeds.
Once the custard is fully chilled, fold the strawberry puree into the mixture before churning.
You can also add diced strawberries after churning to give the ice cream a fruity texture.
4. Nuts and Crunchy Add-ins
How to Add:
For a crunchy texture, try adding toasted nuts like almonds, pistachios, or pecans to your ice cream.
Churn the ice cream until it’s nearly finished, then fold in ½ cup of your choice of nuts.
You can also try adding crushed cookies, like Oreos or graham crackers, for a delightful crunch.
5. Coffee Flavor
How to Add:
To create a French vanilla coffee ice cream, dissolve 2 tablespoons of instant coffee or espresso powder in the milk and cream mixture before heating it.
This will infuse the ice cream with a delicious coffee flavor that pairs wonderfully with the creamy vanilla base.
6. Fruit Compote or Jam
How to Add:
For a fruity twist, you can swirl in a fruit compote or jam after churning.
Try raspberry, blueberry, or peach for a fresh and fruity addition.
You can warm the jam slightly to make it easier to swirl into the ice cream.
7. Chocolate Fudge or Nutella Swirl
How to Add:
Swirl in melted chocolate fudge or Nutella for a rich, decadent treat.
Gently fold the chocolate into the ice cream after churning for a marbled effect.
You can also add chocolate hazelnut spread for a richer, more indulgent flavor.
8. Cinnamon or Spice Flavors
How to Add:
For a spiced twist, consider adding 1-2 teaspoons of ground cinnamon or a pinch of nutmeg to the custard mixture.
These warming spices will add depth and complexity to your French vanilla ice cream, making it perfect for fall or winter.
These variations are simple to add, and they can transform your French vanilla ice cream into a completely new flavor profile.
Be creative with your mix-ins and enjoy customizing your homemade ice cream to suit your taste!
Conclusion
Making homemade French vanilla ice cream is a delightful and satisfying experience.
With just a few simple ingredients, you can create a rich, creamy treat that rivals anything you’d find at the store.
The combination of the custard base, pure vanilla extract, and the careful churning process results in a smooth and velvety texture that’s perfect for summer days or any occasion.
Plus, with endless possibilities for flavor variations and add-ins, you can make your ice cream uniquely your own.
By following the tips, tricks, and troubleshooting advice provided in this post, you’ll be able to create the perfect batch of French vanilla ice cream every time.
Whether you keep it classic or experiment with fun twists, homemade ice cream will always be a hit with family and friends.
Now that you have all the tools to make the best French vanilla ice cream, why not try a batch today? Enjoy!
Frequently Asked Questions
1. Can I make French vanilla ice cream without an ice cream maker?
Yes! While an ice cream maker helps achieve the smoothest texture, you can still make homemade French vanilla ice cream without one.
After chilling your custard base, pour it into a shallow container and freeze.
Every 30 minutes, stir the mixture with a fork to break up ice crystals until it reaches a soft-serve consistency.
This method requires more effort but still yields a delicious result.
2. How do I prevent my homemade ice cream from getting icy or hard?
To keep your ice cream creamy and free from ice crystals, make sure to properly churn it and store it in an airtight container.
Press plastic wrap or parchment paper onto the surface of the ice cream before sealing the container.
This helps prevent freezer burn and keeps the texture smooth.
Also, don’t skip the chilling step—allow the custard to cool thoroughly before churning.
3. Can I use vanilla extract instead of vanilla bean?
Yes, you can use vanilla extract in place of vanilla bean, though vanilla beans tend to offer a more complex, rich flavor.
If using vanilla extract, be sure to use pure vanilla extract for the best flavor, rather than imitation vanilla, which can be less aromatic.
4. How long does homemade French vanilla ice cream last in the freezer?
Homemade ice cream can last up to 1-2 weeks in the freezer, but for the best quality, it’s best to enjoy it within the first week.
Over time, the texture may change slightly due to the formation of ice crystals, so it’s best eaten fresh!
5. Can I add mix-ins like chocolate chips or fruit to my French vanilla ice cream?
Absolutely! Once your ice cream has finished churning and reached a soft-serve consistency, you can fold in various mix-ins, such as chocolate chips, nuts, fruit, or swirls of caramel or fudge.
Just be sure to do this gently to ensure an even distribution of add-ins without affecting the texture of the ice cream.
French Vanilla Ice Cream
Equipment
- 1 medium saucepan
- (1) Whisk
- 1 Wooden spoon or spatula
- 1 Fine mesh strainer (for straining the custard)
- 1 Ice cream maker (optional, if not using, follow freezing instructions)
- 1 Airtight container (for storing the ice cream)
Ingredients
- 2 cups 480 ml Heavy cream
- 1 cup 240 ml Whole milk
- 3/4 cup 150 g Granulated sugar
- 5 large Egg yolks
- 1 tablespoon 15 ml Vanilla extract
- 1/4 teaspoon 1 g Salt
Instructions
Prepare the Custard Base:
- In a medium saucepan, combine the heavy cream, whole milk, and granulated sugar. Heat over medium heat until the mixture is hot but not boiling, stirring occasionally.
Temper the Eggs:
- In a separate bowl, whisk the egg yolks. Slowly pour a small amount of the hot cream mixture into the egg yolks while whisking constantly to gradually raise the temperature of the eggs. This is called tempering. Once the egg yolks are warmed, add them to the saucepan with the rest of the cream mixture.
Cook the Custard:
- Return the saucepan to the stove and cook over low heat, stirring constantly with a wooden spoon or spatula, until the custard thickens enough to coat the back of the spoon (about 8-10 minutes). Be careful not to let the mixture boil, as it can cause the eggs to scramble.
Strain the Custard:
- Once the custard has thickened, remove the saucepan from the heat. Pour the custard through a fine mesh strainer into a clean bowl to remove any curdled bits and ensure a smooth texture.
Cool the Custard:
- Stir in the vanilla extract and salt. Allow the custard to cool at room temperature for about 30 minutes, then cover and refrigerate for at least 4 hours, or overnight, until thoroughly chilled.
Churn the Ice Cream:
- Once the custard is chilled, pour it into your ice cream maker and churn according to the manufacturer’s instructions, usually for 20-25 minutes, until the ice cream reaches a soft-serve consistency.
Freeze the Ice Cream:
- Transfer the churned ice cream to an airtight container and smooth the top. Place in the freezer for at least 4 hours, or until firm.
Serve and Enjoy:
- Scoop your homemade French vanilla ice cream into bowls or cones and enjoy!
Notes
- For a richer flavor, you can use half-and-half instead of whole milk, but this will increase the fat content.
- If you don’t have an ice cream maker, you can freeze the custard in a shallow pan, stirring every 30 minutes to break up ice crystals until it reaches a smooth consistency.
- You can customize this French vanilla ice cream with mix-ins such as chocolate chips, nuts, or fruit during the last few minutes of churning.
- For an extra vanilla flavor, consider using vanilla beans instead of extract. Split the vanilla bean and scrape the seeds into the milk and cream mixture during step 1.
