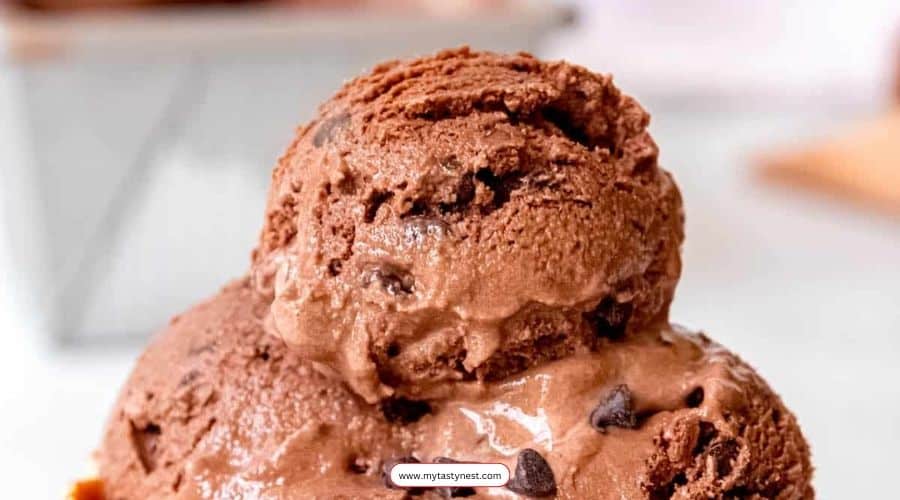
Few desserts capture the hearts of both kids and adults alike as much as chocolate chip ice cream.
This homemade version takes the classic treat to a whole new level, blending creamy vanilla sweetness with bursts of rich chocolatey goodness in every bite.
Whether you’re indulging on a hot summer day or treating yourself after dinner, this recipe is a surefire way to elevate any moment.
Crafted with simple ingredients and minimal effort, this recipe is perfect for beginners and seasoned home chefs alike. Plus, it’s entirely customizable, allowing you to add your unique flair with mix-ins or chocolate variations.
Keep reading to discover how to create this delightful frozen treat from scratch and impress your family and friends with your homemade ice cream skills!

Why You’ll Love This Chocolate Chip Ice Cream Recipe
There’s something magical about the combination of creamy vanilla and chunks of chocolate that melt in your mouth, and this recipe brings that magic right into your kitchen.
Here’s why you’re going to love it:
1. Unmatched Creaminess
This recipe uses a perfect balance of heavy cream and whole milk, resulting in a smooth and luxurious texture that rivals store-bought options.
2. Simple, Everyday Ingredients
No need for specialty items—you can make this recipe with pantry staples like sugar, cream, and chocolate chips.
3. Easy for Beginners
Whether you have an ice cream maker or prefer a no-churn method, this recipe ensures professional results with step-by-step guidance.
4. Customizable to Your Taste
Not a fan of semi-sweet chocolate chips? Swap them out for dark chocolate chunks, mini chips, or even crushed candy bars. You can also experiment with add-ins like nuts, caramel swirls, or cookie dough.
5. Perfect for Any Occasion
From birthday parties to lazy weekends, this chocolate chip ice cream fits right into any celebration or casual treat moment.
Embrace the joy of homemade desserts and create a batch of chocolate chip ice cream that everyone will rave about!
Ingredients for Chocolate Chip Ice Cream
To create this decadent and creamy chocolate chip ice cream, you’ll need the following simple and readily available ingredients:
For the Ice Cream Base
- 2 cups heavy cream – Provides the rich, velvety texture that makes the ice cream irresistibly creamy.
- 1 cup whole milk – Balances the creaminess with a lighter touch.
- 2/3 cup granulated sugar – Sweetens the base perfectly without being overpowering.
- 1 tsp pure vanilla extract – Adds a classic, warm vanilla flavor to complement the chocolate.
- 1/8 tsp salt – Enhances the flavors and balances the sweetness.
For the Chocolate Chips
- 1 cup semi-sweet chocolate chips – Adds bursts of chocolatey goodness in every bite. Feel free to substitute with dark chocolate chunks, mini chips, or white chocolate for variation.
Optional: You can customize the recipe with additional mix-ins like crushed nuts, cookie dough, or caramel swirls for added texture and flavor.
Equipment You’ll Need
While this recipe can be made with or without an ice cream maker, having the right tools on hand will make the process smooth and enjoyable.
- Mixing Bowls – Two large bowls for preparing and combining the ingredients.
- Whisk – To blend the ice cream base until smooth and sugar is fully dissolved.
- Ice Cream Maker (optional) – Ideal for churning and achieving a creamy, professional-grade texture.
- Freezer-Safe Container with Lid – A must for storing and freezing your ice cream securely. A 1.5-quart container works perfectly.
- Rubber Spatula – For folding in the chocolate chips and scraping the bowl clean.
- Measuring Cups and Spoons – Precise measurements are key to a balanced flavor and consistency.
Optional: If you’re using the no-churn method, a hand mixer can help aerate the mixture for a lighter texture.
Step-by-Step Instructions
Follow these detailed steps to create your homemade chocolate chip ice cream.
Whether using an ice cream maker or the no-churn method, this recipe is easy to master!
Step 1: Prepare the Ice Cream Base
Combine the Ingredients
- In a large mixing bowl, whisk together 2 cups of heavy cream, 1 cup of whole milk, 2/3 cup of granulated sugar, 1 teaspoon of vanilla extract, and 1/8 teaspoon of salt.
- Continue whisking until the sugar is completely dissolved. The mixture should be smooth and slightly thickened.
Chill the Mixture
- Cover the bowl with plastic wrap or a lid and refrigerate the mixture for at least 1–2 hours. Chilling ensures better texture and helps the ice cream freeze evenly.
Step 2: Add the Chocolate Chips
- Once the base is chilled, remove it from the refrigerator.
- Gently stir in 1 cup of semi-sweet chocolate chips using a rubber spatula, ensuring they’re evenly distributed throughout the mixture.
Step 3: Freeze the Ice Cream
With an Ice Cream Maker
- Pour the prepared mixture into your ice cream maker.
- Follow the manufacturer’s instructions for churning (usually 20–25 minutes).
- Once churned to a soft-serve consistency, transfer the ice cream into a freezer-safe container.
- Cover tightly with a lid and freeze for 2–4 hours, or until firm and scoopable.
No-Churn Method
- Pour the mixture into a freezer-safe container.
- Place it in the freezer and let it freeze for 1 hour.
- After 1 hour, remove the container and stir the mixture thoroughly with a spatula to break up any ice crystals.
- Repeat this process every 30 minutes for 3–4 hours until the ice cream is creamy and firm.
Step 4: Serve and Enjoy
- Once the ice cream has fully set, scoop it into bowls or cones.
- Garnish with extra chocolate chips, crushed nuts, or a drizzle of chocolate syrup for an extra indulgent touch.
Enjoy your homemade chocolate chip ice cream immediately, or store it in the freezer for up to 2 weeks!
Pro Tips for Perfect Chocolate Chip Ice Cream
Master the art of homemade ice cream with these expert tips:
1. Chill Your Ingredients
For the creamiest texture, make sure your heavy cream, milk, and even the mixing bowl are cold before you start. This helps the mixture whip and freeze evenly.
2. Use High-Quality Chocolate
The chocolate chips are the star of the recipe, so choose high-quality semi-sweet or dark chocolate. You can also finely chop a chocolate bar for a gourmet touch.
3. Avoid Ice Crystals
If using the no-churn method, stir the mixture every 30 minutes during freezing to prevent ice crystals from forming. This step is key for a creamy consistency.
4. Don’t Overfill the Ice Cream Maker
If using an ice cream maker, avoid overfilling it, as this can prevent proper churning. Most machines require leaving some space for the ice cream to expand.
5. Add Mix-Ins at the Right Time
Fold in chocolate chips or other mix-ins just before freezing to prevent them from sinking to the bottom or clumping together.
6. Customize the Texture
If you prefer softer ice cream, let it sit at room temperature for 5–10 minutes before serving. This will make it easier to scoop and enjoy.
Storing Your Homemade Chocolate Chip Ice Cream
Proper storage ensures your ice cream stays fresh and delicious for days. Here’s how to do it right:
1. Use an Airtight Container
Store the ice cream in a freezer-safe, airtight container to keep out air and prevent freezer burn.
2. Add a Protective Layer
Press a piece of plastic wrap or parchment paper directly onto the surface of the ice cream before sealing the container. This prevents ice crystals from forming on the top layer.
3. Label and Date
Mark the container with the date you made the ice cream. Homemade ice cream is best enjoyed within 1–2 weeks for optimal flavor and texture.
4. Avoid Frequent Thawing and Refreezing
Once you remove the ice cream from the freezer, avoid letting it sit out too long before refreezing. Frequent temperature changes can affect the texture and flavor.
By following these tips, you’ll enjoy creamy, flavorful chocolate chip ice cream every time!
Conclusion
Congratulations, you’ve just learned how to make a rich and creamy Chocolate Chip Ice Cream from scratch!
This recipe is a testament to how simple ingredients and a little effort can create a dessert that rivals the best store-bought versions.
Whether you serve it at a summer barbecue, enjoy it as a midnight treat, or pair it with your favorite dessert, this chocolate chip ice cream is sure to impress.
Don’t forget to customize it with mix-ins or toppings to make it your own!
Now it’s time to grab a scoop, savor the creamy vanilla base and bursts of chocolate, and relish the joy of homemade indulgence.
If you tried this recipe, let me know how it turned out in the comments below. Happy scooping!
Frequently Asked Questions (FAQ)
1. Can I make this recipe without an ice cream maker?
Absolutely! This recipe includes a no-churn method where you freeze the mixture in a container and stir every 30 minutes. This ensures a creamy texture without needing special equipment.
2. What type of chocolate chips work best?
Semi-sweet chocolate chips are ideal for a balanced flavor, but you can use dark chocolate, milk chocolate, or even mini chocolate chips for variety.
Finely chopped chocolate bars also work well for a gourmet touch.
3. How long does homemade ice cream last?
When stored properly in an airtight container with a protective layer (like plastic wrap), homemade ice cream stays fresh for up to 2 weeks.
Beyond that, it may develop freezer burn or lose its creamy texture.
4. Can I substitute heavy cream with something lighter?
For a lighter version, you can use half-and-half instead of heavy cream, but the texture may be less creamy.
Full-fat coconut milk is also a good substitute for a dairy-free option.
5. Why is my ice cream hard to scoop after freezing?
Homemade ice cream tends to freeze more solid than store-bought due to the lack of stabilizers.
Let it sit at room temperature for 5–10 minutes before scooping to soften it naturally.
These FAQs should cover the most common questions, ensuring your ice cream-making experience is smooth and enjoyable!

Chocolate Chip Ice Cream Recipe
Equipment
- Mixing bowls (2 large)
- Whisk (1)
- Ice cream maker (optional, 1)
- Freezer-safe container with lid (1, at least 1.5-quart capacity)
- Rubber spatula (1)
- Measuring cups and spoons (1 set)
Ingredients
- 2 cups (480 ml) heavy cream
- 1 cup (240 ml) whole milk
- 2/3 cup (135 g) granulated sugar
- 1 tsp (5 ml) pure vanilla extract
- 1/8 tsp (pinch) salt
- 1 cup (150 g) semi-sweet chocolate chips
Instructions
- In a large mixing bowl, whisk together the heavy cream, whole milk, sugar, vanilla extract, and salt until the sugar dissolves completely.
- If using an ice cream maker, chill the mixture in the refrigerator for 1–2 hours for optimal results.
- Once the base is ready, stir in the chocolate chips.
- If you want a smoother texture, use finely chopped chocolate or mini chocolate chips.
- With Ice Cream Maker: Pour the mixture into the ice cream maker and churn according to the manufacturer’s instructions (typically 20–25 minutes). Transfer to a freezer-safe container, cover tightly, and freeze for 2–4 hours until firm.
- No-Churn Method: Pour the mixture into a freezer-safe container, cover, and freeze for 1 hour. After 1 hour, stir the mixture to prevent ice crystals. Repeat this process every 30 minutes for 3–4 hours until creamy and firm.
- Scoop into bowls or cones, garnish with additional chocolate chips or toppings, and serve immediately.
Notes
- Chocolate Alternatives: For a twist, try using dark chocolate chunks or white chocolate chips.
- Storage Tips: Store in an airtight container for up to 2 weeks. Cover the surface of the ice cream with plastic wrap to prevent freezer burn.
- Variations: Add crushed cookies, toffee bits, or nuts for extra texture.


