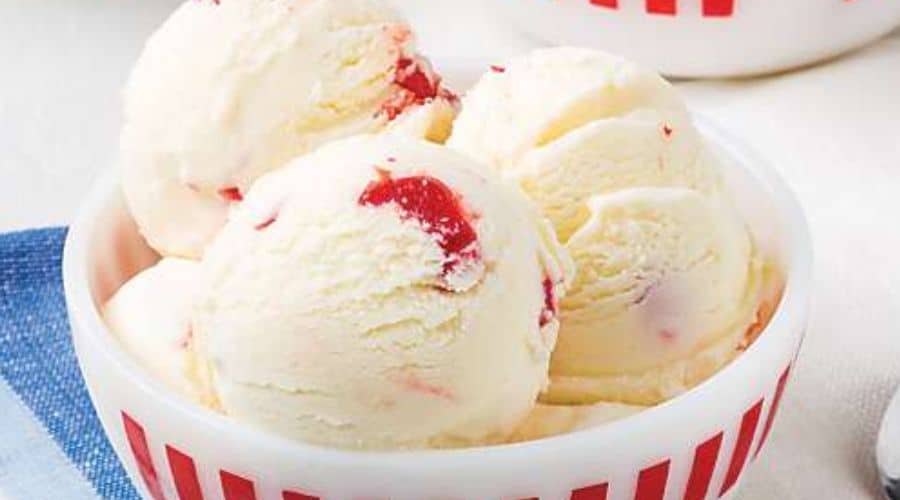
There’s something magical about the combination of cherries and vanilla in ice cream. The sweet, slightly tart flavor of cherries blends beautifully with the rich, creamy vanilla base, creating a dessert that’s both refreshing and indulgent.
Homemade cherry vanilla ice cream is far superior to store-bought versions. It’s fresher, bursting with real fruit flavor, and free from artificial additives.
Plus, making it yourself means you can control the sweetness and texture, ensuring a perfectly smooth and creamy result every time.
Whether you’re making it for a summer treat, a special occasion, or simply to satisfy your ice cream cravings, this recipe is easy to follow and incredibly rewarding. Get ready to scoop up pure bliss!
Ingredients You’ll Need
To create this luscious cherry vanilla ice cream, you’ll need a handful of high-quality ingredients. Each one plays an important role in bringing out the best flavors and texture.
For the Ice Cream Base
- Heavy Cream (2 cups) – Provides richness and a silky smooth texture.
- Whole Milk (1 cup) – Balances the cream and keeps the ice cream from being too heavy.
- Granulated Sugar (¾ cup) – Sweetens the base and helps with a soft, scoopable texture.
- Egg Yolks (4 large, optional) – Used in custard-based ice cream for extra creaminess.
- Vanilla Extract (2 teaspoons) or Vanilla Bean (1 whole, scraped) – Infuses deep vanilla flavor.
For the Cherry Mixture
- Fresh or Frozen Cherries (1 ½ cups, pitted and chopped) – The star ingredient, bringing vibrant color and natural sweetness.
- Lemon Juice (1 tablespoon) – Enhances the brightness of the cherries.
- Sugar (2 tablespoons, optional) – Helps macerate the cherries and intensify their natural juices.
Optional Add-Ins
- Dark Chocolate Chips or Shavings – For a cherry-chocolate twist.
- Almond Extract (¼ teaspoon) – Complements the cherries beautifully.
- Splash of Kirsch or Cherry Liqueur – Adds depth of flavor and keeps the ice cream soft.
Equipment You’ll Need
Before diving into the recipe, make sure you have the right tools to create a smooth and creamy cherry vanilla ice cream.
Having everything prepared in advance will make the process seamless.
Essential Equipment
- Ice Cream Maker – The easiest way to churn the mixture into a creamy texture. If you don’t have one, don’t worry—I’ll include a no-churn method.
- Medium Saucepan – Needed if you’re making a custard-based ice cream.
- Mixing Bowls – For whisking ingredients and combining the mixture.
- Whisk – Helps blend the egg yolks, sugar, and cream smoothly.
- Blender or Food Processor – Used to puree cherries for a smoother texture (optional).
- Fine Mesh Strainer – Helps remove any egg bits from the custard for an ultra-smooth base.
- Airtight Container – For freezing and storing the ice cream.
Now that you’re equipped with everything you need, let’s move on to the fun part—making the ice cream!
Step-by-Step Instructions

Follow these simple steps to create a perfectly creamy and flavorful cherry vanilla ice cream.
Step 1: Prepare the Cherries
- If using fresh cherries, rinse, pit, and chop them.
- In a small saucepan, combine the cherries, lemon juice, and 2 tablespoons of sugar.
- Cook over medium heat for about 5-7 minutes, stirring occasionally, until the cherries soften and release their juices.
- Remove from heat and let the mixture cool. If you prefer a smoother texture, blend the cherries into a puree. Otherwise, leave them chunky for a fruitier bite.
Step 2: Make the Ice Cream Base
Custard-Based Method (For Extra Creaminess)
- In a mixing bowl, whisk the egg yolks and sugar until the mixture becomes pale and slightly thick.
- In a medium saucepan, heat the heavy cream and milk over low heat until it’s warm but not boiling.
- Slowly pour a small amount of the warm cream into the egg mixture while whisking continuously (this prevents scrambling the eggs).
- Return the mixture to the saucepan and cook over low heat, stirring constantly, until it thickens slightly (it should coat the back of a spoon).
- Remove from heat and stir in the vanilla extract or vanilla bean.
- Strain through a fine mesh sieve to ensure a silky-smooth base.
No-Cook Method (Quick & Easy)
- Whisk together the heavy cream, whole milk, sugar, and vanilla extract until well combined.
- Stir in the cooled cherry mixture.
Step 3: Chill the Mixture
- Pour the ice cream base into a bowl and cover it with plastic wrap, pressing it directly onto the surface to prevent a skin from forming.
- Refrigerate for at least 4 hours, preferably overnight, for the flavors to meld.
Step 4: Churn the Ice Cream
- If using an ice cream maker, pour the chilled mixture into the machine and churn according to the manufacturer’s instructions (usually 20-25 minutes).
- If making a no-churn version, whip 2 cups of heavy cream until soft peaks form, then fold in the cherry mixture.
Step 5: Freeze and Serve
- Transfer the churned (or whipped) ice cream to an airtight container.
- Freeze for at least 4 hours until firm.
- Scoop and enjoy your creamy homemade cherry vanilla ice cream!
Tips for the Best Cherry Vanilla Ice Cream
Making homemade ice cream is simple, but a few expert tips will take it from good to outstanding.
Follow these tricks to ensure a creamy, flavorful, and perfectly textured cherry vanilla ice cream.
1. Use High-Quality Ingredients
Since this recipe relies on just a few key ingredients, the quality matters. Use fresh, ripe cherries and pure vanilla extract (or a real vanilla bean) for the best flavor.
2. Chill the Mixture Thoroughly
For the creamiest texture, refrigerate your ice cream base for at least 4 hours, preferably overnight. A well-chilled base helps the ice cream churn faster and reduces ice crystals.
3. Don’t Skip the Sugar
Sugar isn’t just for sweetness—it also helps keep the ice cream soft. Reducing sugar too much can lead to a harder, icier texture. If you need a sugar substitute, consider honey or maple syrup for a softer consistency.
4. Cook the Cherries for Extra Flavor
Simmering the cherries with a little sugar intensifies their natural sweetness and removes excess water, preventing ice crystals in the final product.
5. Add Alcohol for a Softer Texture
A small splash of kirsch (cherry liqueur) or vodka lowers the freezing point, keeping the ice cream smooth and easy to scoop. Use about 1 tablespoon per batch.
6. Use the Right Storage Method
- Store your ice cream in a shallow, airtight container to help it freeze evenly.
- Press a piece of parchment paper or plastic wrap against the surface before sealing to prevent ice crystals from forming.
Serving Suggestions and Pairings
Cherry vanilla ice cream is delicious on its own, but pairing it with the right flavors and textures can elevate the experience.
Classic Ways to Serve It
- In a Cone or Cup – A simple and satisfying way to enjoy its creamy goodness.
- Topped with Fresh Cherries – Enhances the fruity flavor and adds a touch of elegance.
- Drizzled with Chocolate Sauce – A match made in dessert heaven!
Perfect Pairings
- Warm Brownies – The fudgy richness complements the fruity, creamy ice cream.
- Buttery Shortbread Cookies – A delightful contrast of crisp and creamy textures.
- Almond Cake – The nutty flavor pairs beautifully with cherries.
- Crisp Waffles or Crepes – Serve a scoop on top for a decadent breakfast-style dessert.
Fun Variations
- Cherry Garcia-Style – Add chocolate chunks for a homemade version of the famous flavor.
- Cherry Almond Crunch – Stir in toasted almonds for extra texture.
- Boozy Cherry Ice Cream – Mix in a splash of bourbon or amaretto for a grown-up twist.
Final Thoughts – Enjoy Your Homemade Cherry Vanilla Ice Cream!
Making your own cherry vanilla ice cream is a rewarding experience that delivers rich, creamy, and naturally fruity flavors in every bite.
Whether you prefer it churned to perfection or whipped up using a no-churn method, this homemade treat is far superior to anything you’ll find in a store.
With its perfect balance of sweet cherries and fragrant vanilla, this ice cream is a timeless classic. Serve it in a cone, alongside a warm dessert, or just straight from the container—you really can’t go wrong!
Now that you have all the tips and tricks, it’s time to grab your ingredients and get started. Once you make this ice cream, you may never go back to store-bought again!
Frequently Asked Questions
1. Can I make this ice cream without an ice cream maker?
Yes! If you don’t have an ice cream maker, use the no-churn method by whipping 2 cups of heavy cream to soft peaks and folding it into the sweetened condensed milk and cherry mixture. Freeze in an airtight container for at least 4 hours before serving.
2. How do I prevent ice crystals from forming in my ice cream?
To keep your ice cream creamy and free of ice crystals:
- Ensure your base is chilled completely before churning.
- Store in an airtight container and press a layer of plastic wrap or parchment paper directly onto the surface before sealing.
- If using fruit, cook it down slightly to remove excess water that could cause iciness.
3. How long does homemade ice cream last?
Homemade ice cream is best enjoyed within 1-2 weeks for peak freshness. After that, it may start to develop ice crystals and lose its creamy texture.
4. Can I use frozen cherries instead of fresh ones?
Absolutely! Frozen cherries work just as well. If using them, let them thaw slightly before cooking or blending. Frozen cherries tend to release more juice, so you may need to cook them a bit longer to reduce excess liquid.
5. Can I make this dairy-free?
Yes! To make a dairy-free version, substitute:
- Coconut cream or full-fat coconut milk for the heavy cream.
- Almond, oat, or coconut milk for the whole milk.
- Use maple syrup or coconut sugar instead of granulated sugar for a natural sweetness.
Cherry Vanilla Ice Cream
Equipment
- 1 Ice Cream Maker (optional, for churning)
- 1 Medium Saucepan (for cooking cherries and making the custard)
- 2 Mixing Bowls
- (1) Whisk
- 1 Blender or Food Processor (optional, for smoother cherries)
- 1 Fine Mesh Strainer (for custard base, if using)
- 1 Airtight Container (for freezing and storing)
- 1 Rubber Spatula (for stirring and scraping)
Ingredients
For the Ice Cream Base
- 2 cups heavy cream
- 1 cup whole milk
- ¾ cup granulated sugar
- 4 large egg yolks optional, for custard-based ice cream
- 2 teaspoons vanilla extract or 1 whole vanilla bean scraped
For the Cherry Mixture
- 1 ½ cups fresh or frozen cherries pitted and chopped
- 1 tablespoon lemon juice
- 2 tablespoons sugar optional, for extra sweetness
Optional Add-Ins
- ½ cup dark chocolate chips or shavings
- ¼ teaspoon almond extract
- 1 tablespoon kirsch or cherry liqueur for softer texture
Instructions
Step 1: Prepare the Cherries
- If using fresh cherries, rinse, pit, and chop them.
- In a saucepan over medium heat, combine cherries, lemon juice, and 2 tablespoons of sugar.
- Cook for 5–7 minutes, stirring occasionally, until the cherries soften and release their juices.
- Remove from heat and let the mixture cool completely. For a smoother texture, blend it into a puree; otherwise, leave it chunky.
Step 2: Make the Ice Cream Base
- Custard-Based Method (For Extra Creaminess)
- In a mixing bowl, whisk the egg yolks and sugar until pale and slightly thickened.
- In a saucepan, heat heavy cream and milk over low heat until warm but not boiling.
- Slowly pour a small amount of the warm cream into the egg mixture while whisking continuously.
- Return the mixture to the saucepan and cook over low heat, stirring constantly, until it thickens slightly (it should coat the back of a spoon).
- Remove from heat, stir in vanilla extract (or vanilla bean), and strain through a fine mesh sieve.
- No-Cook Method (Quick & Easy)
- Whisk together the heavy cream, whole milk, sugar, and vanilla extract until well combined.
- Stir in the cooled cherry mixture.
Step 3: Chill the Mixture
- Pour the ice cream base into a bowl and cover with plastic wrap, pressing it directly onto the surface.
- Refrigerate for at least 4 hours, preferably overnight.
Step 4: Churn the Ice Cream
- Pour the chilled mixture into an ice cream maker and churn according to the manufacturer’s instructions (usually 20–25 minutes).
- If making a no-churn version, whip 2 cups of heavy cream to soft peaks, then fold in the cherry mixture.
Step 5: Freeze and Serve
- Transfer the churned (or whipped) ice cream to an airtight container.
- Freeze for at least 4 hours until firm.
- Let sit at room temperature for 5 minutes before scooping. Enjoy!
Notes
- For a deeper cherry flavor, cook the cherries longer and add a splash of kirsch or amaretto.
- If you prefer whole cherry pieces, only blend half of the cherry mixture and leave the rest chunky.
- To prevent ice crystals, press plastic wrap against the ice cream before sealing the container.
- For a dairy-free version, substitute coconut cream for heavy cream and almond milk for whole milk.
