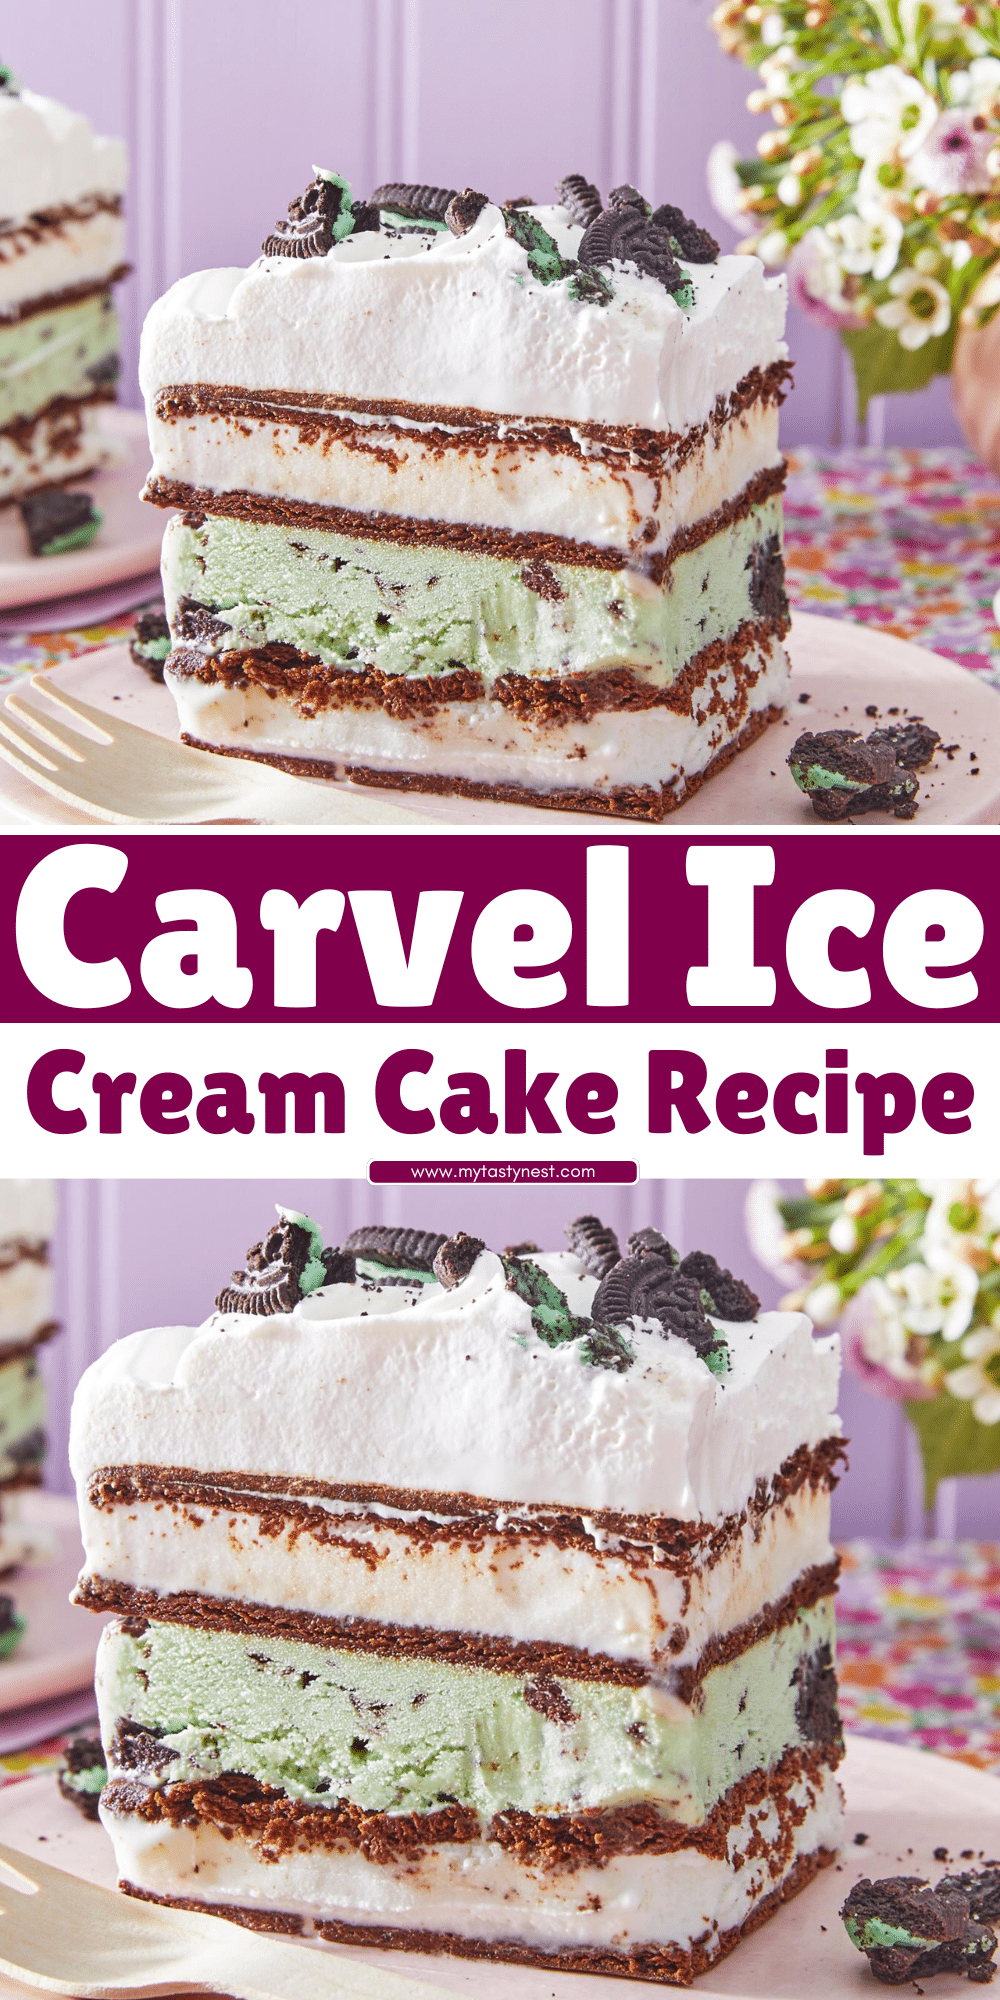
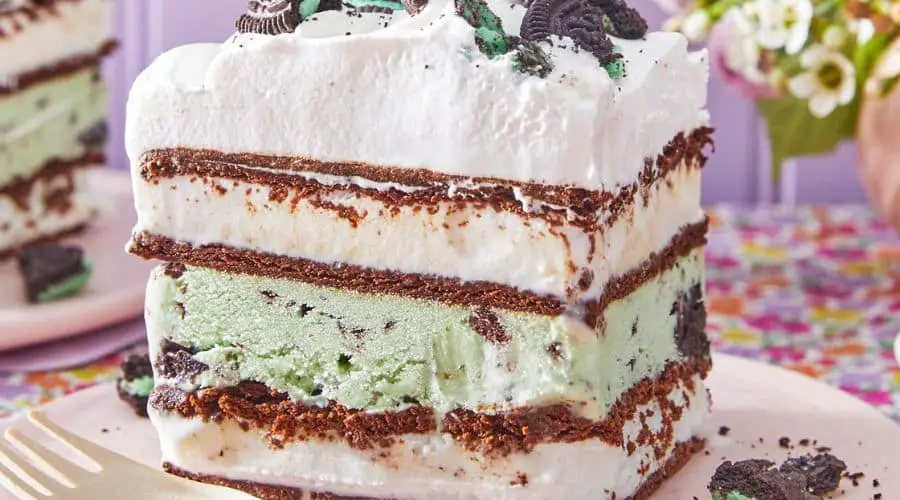
Carvel ice cream cake is more than just a dessert—it’s a nostalgic treat that brings back memories of birthdays, celebrations, and hot summer days.
With its signature layers of creamy ice cream, rich chocolate crunchies, and light, whipped frosting, this cake has been a favorite for generations.
While grabbing one from the store is convenient, making a Carvel-style ice cream cake at home is surprisingly easy and incredibly rewarding.
You get to control the flavors, customize the decorations, and, best of all, recreate that irresistible crunch layer that sets this cake apart.
In this guide, I’ll walk you through the step-by-step process to make a homemade Carvel ice cream cake that tastes just as good—if not better—than the original.
Get ready to impress your friends and family with this iconic frozen treat!

Why Everyone Loves Carvel Ice Cream Cake
There’s a reason Carvel ice cream cake has remained a beloved classic for decades.
It’s not just a cake; it’s a perfect combination of flavors and textures that keep people coming back for more.
The Perfect Blend of Creamy and Crunchy
One of the standout features of a Carvel ice cream cake is its famous crunchy chocolate layer.
This isn’t just crushed cookies—it’s a unique combination of chocolate crunchies and rich fudge that creates an irresistible contrast to the smooth ice cream.
Every bite delivers a satisfying mix of creamy and crispy textures that makes this cake so addicting.
A Nostalgic Favorite
For many, Carvel ice cream cake is tied to childhood memories—blowing out birthday candles, celebrating milestones, or simply enjoying a special treat with loved ones.
Its simple yet delicious recipe has made it a go-to for parties and gatherings for generations.
Light and Fluffy Whipped Frosting
Unlike traditional cake frosting, which can be heavy and overly sweet, Carvel’s signature whipped frosting is light, airy, and subtly sweet.
It complements the ice cream perfectly, adding a smooth finish without overpowering the other flavors.
Easy to Customize for Any Occasion
While the classic Carvel ice cream cake features vanilla and chocolate ice cream, it’s incredibly versatile.
You can swap in your favorite flavors, add different toppings, or decorate it to match any celebration theme.
Whether you keep it simple or go all out, this cake is always a showstopper.
Now that we’ve covered why this cake is so special, let’s dive into the ingredients you’ll need to recreate it at home!
Ingredients You’ll Need
To recreate the classic Carvel ice cream cake at home, you’ll need a few key ingredients.
These components come together to form the signature layers of creamy ice cream, crunchy chocolate, and light, whipped frosting.
For the Ice Cream Layers
- 1.5 quarts vanilla ice cream (softened)
- 1.5 quarts chocolate ice cream (softened)
For the Crunchy Chocolate Layer
- 1 cup chocolate wafer cookies (crushed) or chocolate sandwich cookies without filling
- ¼ cup melted butter
- ½ cup chocolate fudge sauce
For the Whipped Frosting
- 2 cups heavy whipping cream
- ½ cup powdered sugar
- 1 teaspoon vanilla extract
Optional Decorations
- Sprinkles
- Chocolate shavings
- Piped frosting designs
- Caramel or extra fudge drizzle
With these ingredients ready, let’s dive into the step-by-step process of assembling your homemade Carvel ice cream cake.
Step-by-Step Instructions for Homemade Carvel Ice Cream Cake

Creating your own Carvel-style ice cream cake at home is simpler than you might think.
Follow these steps to achieve the perfect texture and taste.
Step 1 – Prepare the Ice Cream Layers
- Line a 9-inch springform pan with plastic wrap to make it easier to remove the cake later.
- Allow the chocolate ice cream to soften at room temperature for about 10 minutes, but don’t let it melt completely.
- Spread the softened chocolate ice cream evenly into the bottom of the pan, smoothing it out with a spatula.
- Place the pan in the freezer for 30–45 minutes, or until the ice cream is firm.
Step 2 – Make the Crunchy Chocolate Layer
- In a bowl, mix the crushed chocolate wafer cookies with melted butter until the texture resembles wet sand.
- Stir in the chocolate fudge sauce, making sure the mixture is evenly coated.
- Sprinkle the chocolate crunchies evenly over the frozen chocolate ice cream layer, gently pressing them down.
- Return the pan to the freezer for another 15 minutes to set the crunch layer.
Step 3 – Add the Vanilla Ice Cream Layer
- Soften the vanilla ice cream as you did with the chocolate.
- Spread the softened vanilla ice cream over the crunchy chocolate layer, smoothing it out for an even surface.
- Freeze the cake for at least 3–4 hours, or until completely solid.
Step 4 – Make the Whipped Frosting
- In a large bowl, beat the heavy whipping cream, powdered sugar, and vanilla extract using a hand mixer or stand mixer.
- Whip until stiff peaks form, which should take about 3–4 minutes.
Step 5 – Frost and Decorate the Cake
- Remove the cake from the pan and peel off the plastic wrap.
- Use a spatula to spread the whipped frosting evenly over the top and sides of the cake.
- Smooth the frosting with an offset spatula or a cake scraper for a clean finish.
- Add sprinkles, chocolate shavings, or piped decorations as desired.
- Freeze the cake for another hour to allow the frosting to set.
Step 6 – Serve and Enjoy!
- Let the cake sit at room temperature for about 5–10 minutes before slicing.
- Use a warm knife to cut through the layers smoothly.
- Serve immediately and enjoy your homemade Carvel ice cream cake!
Now that your cake is ready, let’s go over some expert tips to ensure it turns out perfect every time.
Pro Tips for the Best Carvel-Style Ice Cream Cake
To ensure your homemade Carvel ice cream cake is as delicious and visually appealing as the ones from the store, here are some expert tips to perfect each layer and step.
1. Softening Ice Cream Properly
When working with ice cream, it’s essential not to let it melt completely, but soften just enough for easy spreading.
Leave it out for 10-15 minutes at room temperature.
If it’s too soft, it can become messy and difficult to layer, while too hard will make it tough to spread.
2. Freezing Between Layers
Freezing each layer of ice cream and crunchy chocolate is crucial for a sturdy cake.
Make sure to freeze the cake long enough between layers (about 30–45 minutes) to ensure each one sets properly.
This helps the layers hold their shape when you cut into the cake, giving you that clean, beautiful slice everyone loves.
3. Whipped Frosting Consistency
When making your whipped frosting, be sure to whip the cream to stiff peaks, but avoid overbeating, which can turn it into butter.
For a smooth, silky frosting that’s easy to spread, keep an eye on the texture.
4. Work with a Springform Pan
A springform pan is a game-changer for making ice cream cakes.
It allows you to easily release the cake without making a mess, ensuring it retains its shape and smooth edges.
If you don’t have one, you can use a regular cake pan but make sure to line it well with plastic wrap for easy removal.
5. Customize with Flavor Combinations
Carvel ice cream cakes are incredibly versatile.
Feel free to experiment with different ice cream flavors such as strawberry, mint chocolate chip, or cookies and cream.
You can also add layers of fruit, caramel, or other mix-ins to create a custom flavor profile.
Just remember to freeze each layer thoroughly before adding the next.
Final Thoughts
Making your own Carvel ice cream cake at home is not only easy, but it’s also a fun way to add a personal touch to a beloved classic.
Whether you’re celebrating a birthday, a special event, or just treating yourself to something sweet, this cake is sure to impress.
The rich layers of ice cream, chocolate crunch, and fluffy frosting create the perfect combination of textures and flavors, making it a crowd-pleaser every time.
So, the next time you’re craving a Carvel ice cream cake, skip the store and try making it from scratch—you might find it’s even better when it’s made with your own hands.
Don’t forget to share your results in the comments below or tag me on social media so I can see your delicious creations!
Frequently Asked Questions (FAQ)
1. Can I use different ice cream flavors?
Absolutely! While the classic Carvel cake uses vanilla and chocolate, feel free to get creative with flavors like mint chocolate chip, cookies and cream, or even coffee-flavored ice cream.
Just be sure to freeze each layer until firm before adding the next for best results.
2. How do I make the cake without a springform pan?
If you don’t have a springform pan, you can still make the cake using a regular cake pan.
Line the pan with plastic wrap or parchment paper, leaving extra hanging over the edges to help you remove the cake once it’s frozen.
You can also use a silicone cake mold for an easier release.
3. How do I prevent the frosting from melting too quickly?
To keep your frosting from melting too quickly, keep the cake in the freezer until right before serving.
If the cake sits at room temperature for too long, the whipped frosting can start to soften.
Serving it slightly frozen or at a cool room temperature is ideal for perfect slices.
4. Can I make the cake ahead of time?
Yes! This ice cream cake can be made a day or two in advance.
Just store it in the freezer, covered tightly in plastic wrap or foil.
Be sure to add any decorations just before serving to keep them fresh.
5. How can I make the cake more festive?
For a more festive touch, add colorful sprinkles, edible glitter, or themed decorations on top.
You can also pipe fun shapes or messages using extra whipped frosting.
The possibilities are endless—just let your creativity shine!

Carvel Ice Cream Cake
Equipment
- 9-inch springform pan (1)
- Large mixing bowl (1)
- Spatula (1)
- Hand Mixer or Stand Mixer (1)
- Plastic wrap (for lining the pan) (1 roll)
- Measuring cups and spoons (1 set)
- Sharp knife (for slicing) (1)
Ingredients
- Vanilla ice cream: 1.5 quarts
- Chocolate ice cream: 1.5 quarts
- Chocolate wafer cookies: 1 cup crushed
- Melted butter: ¼ cup
- Chocolate fudge sauce: ½ cup
- Heavy whipping cream: 2 cups
- Powdered sugar: ½ cup
- Vanilla extract: 1 teaspoon
- Sprinkles/Chocolate shavings optional for decoration: ¼ cup
Instructions
Prepare the Ice Cream Layers
- Line a 9-inch springform pan with plastic wrap for easy release. Allow the chocolate ice cream to soften at room temperature for 10 minutes. Spread the softened chocolate ice cream into the bottom of the pan and smooth it out. Freeze for 30–45 minutes until the ice cream firms up.
Make the Crunchy Chocolate Layer
- In a bowl, mix the crushed chocolate wafer cookies with melted butter and chocolate fudge sauce. Sprinkle the crunchy mixture evenly over the frozen chocolate ice cream layer, pressing gently. Freeze for another 15 minutes to set the crunch layer.
Add the Vanilla Ice Cream Layer
- Soften the vanilla ice cream at room temperature for 10 minutes, then spread it evenly over the crunchy chocolate layer. Freeze for 3–4 hours until completely solid.
Make the Whipped Frosting
- In a mixing bowl, beat the heavy whipping cream, powdered sugar, and vanilla extract with a hand or stand mixer until stiff peaks form.
Frost the Cake
- Remove the cake from the springform pan, peel off the plastic wrap, and frost the top and sides with the whipped cream. Smooth the frosting with a spatula and decorate with optional sprinkles or chocolate shavings. Freeze for 1 hour to set the frosting.
Serve and Enjoy
- Let the cake sit at room temperature for 5-10 minutes before slicing. Use a warm knife to cut clean slices. Enjoy!
Notes
- Flavor variations: Feel free to experiment with different ice cream flavors such as mint chocolate chip, strawberry, or cookies and cream.
- Crunch layer alternative: If you’re short on time, you can use store-bought chocolate cookie crumbs or even crushed graham crackers as an alternative.
- Storage: Store leftover cake in the freezer, tightly wrapped in plastic wrap or foil, to prevent freezer burn. It will keep for up to 1-2 weeks.


