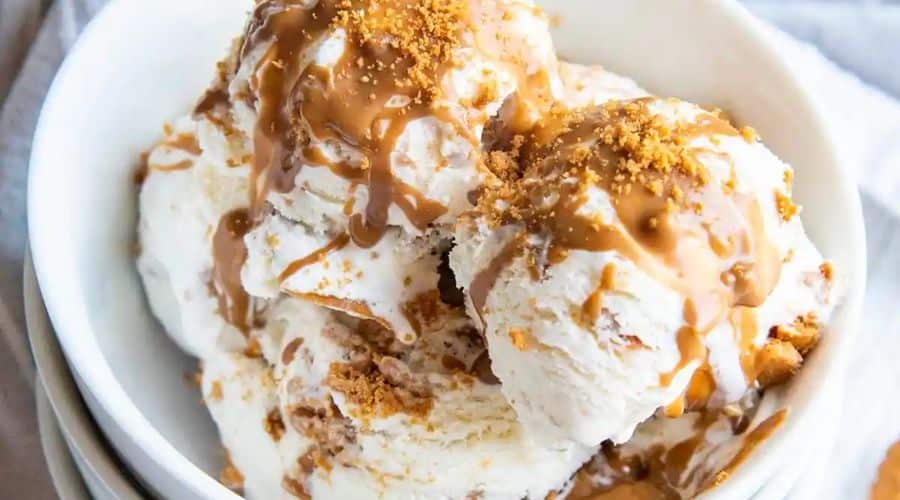
There’s something magical about Biscoff cookies—those crispy, caramelized treats with a hint of spice that make them irresistible on their own.
But when you combine them with creamy, homemade ice cream, you create a dessert that’s pure indulgence.
Biscoff ice cream brings together the best of both worlds, delivering a rich, velvety texture while keeping the unique, spiced flavor of the famous cookie at the forefront.
This recipe is perfect for anyone who loves the iconic flavor of Biscoff, whether you’re familiar with it or just discovering it.
In this post, I’ll walk you through every step of making this homemade ice cream, from mixing the ingredients to churning it to perfection.
Whether you’re a seasoned ice cream maker or a beginner, this guide will make it easy to create the most delicious Biscoff ice cream in your own kitchen.

What is Biscoff Ice Cream?
Biscoff ice cream is a delightful frozen treat that combines the irresistible flavor of Biscoff cookies (also known as Speculoos) with a creamy, rich ice cream base.
The key to its unique taste lies in the spices of the cookies—cinnamon, nutmeg, and ginger—along with their deep caramelized flavor.
When these cookies are crushed and blended into a smooth ice cream base, they bring an unforgettable taste that feels both comforting and indulgent.
What makes Biscoff ice cream so special is the way the cookies infuse the ice cream with their complex flavor, creating a balance of sweetness, spice, and richness.
The crunchiness of the cookie crumbs adds texture to the creamy base, elevating the dessert with every bite.
It’s a combination of smooth and crunchy that delivers a perfect balance of flavors.
Whether you’re a die-hard fan of Biscoff or simply looking for a new, exciting ice cream flavor, Biscoff ice cream is a must-try.
It’s a dessert that tastes as good as it sounds, offering a cozy, yet decadent experience with each scoop.
Why You’ll Love This Biscoff Ice Cream Recipe
If you’re a fan of creamy, indulgent desserts with a touch of spice and a hint of caramel, then Biscoff ice cream is going to become your new favorite treat.
This homemade version captures everything you love about the iconic Biscoff cookies, but in a cool, refreshing ice cream form.
What makes this recipe stand out is how simple it is to make while still delivering a high-end, luxurious taste.
Homemade ice cream is often creamier than store-bought versions because you control the ingredients and textures.
Plus, this Biscoff ice cream doesn’t just rely on the flavor of the cookies—you get a perfect balance of sweetness, smoothness, and a delicious crunch that makes every spoonful a pleasure.
Whether served in a cone, bowl, or alongside a slice of warm cake, this ice cream is guaranteed to impress.
The best part? You can easily make this recipe at home with just a few ingredients and a little bit of time.
Plus, it’s customizable—you can add extra Biscoff crumbles or mix in a swirl of caramel sauce for a fun twist. Once you try this, you’ll be hooked!
Ingredients You’ll Need for Homemade Biscoff Ice Cream
To make this dreamy Biscoff ice cream, you’ll need just a handful of ingredients.
The best part is that they are simple and easy to find, making this an accessible treat to whip up anytime you’re craving something sweet.
1. Biscoff Cookies (Speculoos Cookies)
These iconic cookies are the star of the show! You’ll need about 10-12 Biscoff cookies.
You can crush them finely or leave some bigger chunks for extra texture.
They provide the distinctive caramelized, spiced flavor that gives the ice cream its unique taste.
2. Heavy Cream
Heavy cream is essential for creating the rich, velvety texture of your ice cream.
Its fat content helps the ice cream achieve that smooth, creamy consistency that’s so satisfying.
You’ll need around 2 cups of heavy cream.
3. Whole Milk
Whole milk is a great balance to the richness of the heavy cream.
Using milk with a higher fat content helps make the ice cream creamier, without being overly rich.
You’ll need about 1 cup of whole milk.
4. Granulated Sugar
Sugar is the sweetener that brings everything together.
You’ll need approximately 3/4 cup of granulated sugar to create the perfect level of sweetness without overpowering the flavor of the Biscoff cookies.
5. Vanilla Extract
Vanilla enhances the overall flavor of the ice cream, adding a subtle but important depth.
Just a teaspoon will do the trick.
6. A Pinch of Salt
A small pinch of salt helps balance out the sweetness and brings out the richness of the Biscoff flavor.
Optional Add-ins:
- Biscoff Cookie Butter (Spread): For a more intense Biscoff flavor, you can swirl in some cookie butter as the ice cream sets. It’ll add extra creaminess and a punch of caramelized taste.
- Extra Cookie Crumbles: You can mix in a few more crushed Biscoff cookies to make your ice cream even more textured and flavorful.
With these simple ingredients, you’re all set to make the most indulgent, creamy Biscoff ice cream right in your own kitchen.
Plus, no complicated steps—just pure, unadulterated deliciousness in every bite!
How to Make Biscoff Ice Cream from Scratch (Step-by-Step Guide)

Making Biscoff ice cream at home is simpler than you might think, and the results are worth every minute.
Whether you’re using an ice cream maker or going the no-churn route, this step-by-step guide will help you achieve the perfect creamy, crunchy Biscoff ice cream.
Step 1: Crush the Biscoff Cookies
The first step is to prepare the Biscoff cookies. You can decide whether you want a smooth or more textured ice cream.
For a smooth, uniform flavor, crush the cookies into fine crumbs using a food processor.
If you prefer a little extra crunch in your ice cream, break the cookies into larger chunks by placing them in a ziplock bag and gently crushing them with a rolling pin.
Once you’ve crushed your cookies, set them aside to incorporate into the ice cream later.
Step 2: Prepare the Ice Cream Base
In a large mixing bowl, combine the heavy cream, whole milk, sugar, and vanilla extract.
Whisk them together until the sugar is completely dissolved.
This step is crucial as it ensures the ice cream is sweet without any grainy texture.
For a smooth base, make sure the mixture is fully blended, and there are no clumps of sugar left.
Step 3: Incorporate the Biscoff Flavor
Now, it’s time to add the crushed Biscoff cookies to the base.
Gently fold the crushed cookies into the cream mixture.
If you’re adding cookie butter for a richer flavor, swirl in about 2 tablespoons of it at this stage, making sure to distribute it evenly for that extra caramelized, spiced kick.
You can leave the mixture in a swirled pattern if you like, or mix the cookie butter thoroughly for a fully flavored base.
Step 4: Churn the Ice Cream
Once your mixture is well-combined, transfer it to your ice cream maker. Churn the ice cream according to the manufacturer’s instructions.
This typically takes about 20-25 minutes in most home ice cream makers.
The ice cream should thicken to a soft-serve consistency as it churns.
If you want to add extra cookie chunks, now is the time to fold them in gently.
Once done, the ice cream should have a smooth texture with just enough cookie crumbles mixed throughout.
Step 5: Freeze and Firm Up
Transfer the churned ice cream into an airtight container.
Use a spatula to smooth the top and make sure it’s evenly distributed.
Cover the container tightly with a lid or plastic wrap, and place it in the freezer for at least 4 hours, or overnight, to allow it to firm up.
When it’s ready, scoop into bowls or cones and enjoy the creamy, spiced goodness of homemade Biscoff ice cream!
Tips and Tricks for Perfect Biscoff Ice Cream
Achieving the perfect texture and flavor takes a little practice, but these tips will ensure you get the best Biscoff ice cream every time.
1. Use Full-Fat Ingredients
For a rich and creamy texture, make sure to use full-fat heavy cream and whole milk.
The higher fat content will give your ice cream the luxurious mouthfeel that homemade ice cream is known for.
2. Don’t Over-Churn
Over-churning the ice cream can cause it to become too hard or icy.
Keep an eye on it as it churns and stop once the mixture reaches a soft-serve consistency.
It’s important to catch the right texture before freezing.
3. Let the Ice Cream Base Cool
If you’re making the ice cream base in advance, allow it to cool to room temperature before transferring it to the ice cream maker.
This prevents it from melting prematurely and ensures a smooth churn.
You can even refrigerate it for a few hours if you want to speed up the chilling process.
4. Add Cookie Butter for Extra Flavor
Swirling in some Biscoff cookie butter not only enhances the flavor but also adds an extra creamy texture.
If you love the taste of Biscoff, this is a great way to take the ice cream to the next level.
5. Play with Texture
You can adjust the texture of the ice cream based on your personal preference.
For a smoother experience, finely crush the cookies.
For more crunch, leave bigger chunks of Biscoff cookies in the mix.
Both options are delicious, so it’s all about what you like best!
6. Freeze the Ice Cream Properly
After churning, make sure to transfer the ice cream to an airtight container and store it properly.
Homemade ice cream can become too hard if it’s stored in a shallow dish or left uncovered, so a tight-fitting lid is essential for maintaining the perfect texture.
Conclusion
Homemade Biscoff ice cream is a true treat for the senses, offering the perfect blend of smooth, creamy texture and the irresistible, spiced flavor of Biscoff cookies.
Whether you’re looking to impress guests at a dinner party or simply satisfy your own sweet tooth, this recipe is sure to be a hit.
With just a few simple ingredients and a little bit of patience, you can enjoy a rich, decadent dessert that feels like a special indulgence.
The beauty of making this ice cream at home is in the customization—whether you prefer a smoother consistency with finely crushed cookies or more texture with chunky crumbles, this recipe offers plenty of flexibility.
Plus, with the option to add Biscoff cookie butter or caramel ribbons, there are endless ways to elevate the flavor and make it truly your own.
So, gather your ingredients, get your ice cream maker ready, and treat yourself to this sweet, creamy dream of a dessert.
Once you try it, you’ll be hooked!
Frequently Asked Questions (FAQs)
1. Can I make Biscoff ice cream without an ice cream maker?
Yes, you can! If you don’t have an ice cream maker, simply follow the recipe up to the point of mixing the ingredients.
After that, transfer the mixture into an airtight container and place it in the freezer.
Every 30-45 minutes, stir the mixture with a fork to break up any ice crystals, until the ice cream reaches the consistency you like.
It may take a little longer, but the result will still be delicious!
2. How long will homemade Biscoff ice cream last in the freezer?
Homemade Biscoff ice cream will last about 1-2 weeks in the freezer when stored properly in an airtight container.
For the best texture and flavor, try to consume it within that time frame, as the longer it sits, the more likely it is to become icy.
3. Can I make a dairy-free version of Biscoff ice cream?
Yes! To make a dairy-free version, swap the heavy cream and whole milk with plant-based alternatives such as coconut milk or almond milk.
Use a dairy-free Biscoff cookie and make sure any added ingredients, like the cookie butter, are also dairy-free.
4. How can I make the Biscoff flavor stronger in my ice cream?
To intensify the Biscoff flavor, you can add more crushed cookies, swirl in extra Biscoff cookie butter, or even incorporate a few spoonfuls of Biscoff spread into the ice cream base.
The more Biscoff cookies and cookie butter you add, the stronger the flavor will be.
5. Can I add other mix-ins, like chocolate or caramel?
Absolutely! Biscoff ice cream pairs beautifully with various mix-ins.
Try adding chocolate chips, caramel ribbons, or even chunks of brownie for a more indulgent treat.
The combination of Biscoff’s spiced caramel flavor with a sweet, chocolatey or gooey mix-in creates a fun and delicious twist on the classic recipe.

Biscoff Ice Cream
Equipment
- Ice cream maker (Optional)
- Mixing bowl
- Whisk
- Food Processor (Optional)
- Airtight container
Ingredients
Biscoff Cookies
- Amount: 10-12
- Unit: cookies
- Name: Biscoff cookies crushed
Heavy Cream
- Amount: 2
- Unit: cups
- Name: Heavy cream
Whole Milk
- Amount: 1
- Unit: cup
- Name: Whole milk
Granulated Sugar
- Amount: 3/4
- Unit: cup
- Name: Granulated sugar
Vanilla Extract
- Amount: 1
- Unit: teaspoon
- Name: Vanilla extract
Salt
- Amount: 1
- Unit: pinch
- Name: Salt
Biscoff Cookie Butter (Optional)
- Amount: 2
- Unit: tablespoons
- Name: Biscoff cookie butter for extra flavor
Instructions
Crush the Biscoff Cookies:
- Using a food processor or a rolling pin and ziplock bag, crush the Biscoff cookies into fine crumbs or chunks, depending on your preference.
Prepare the Ice Cream Base:
- In a large mixing bowl, whisk together the heavy cream, whole milk, sugar, and vanilla extract until the sugar has fully dissolved.
Add the Cookie Crumbs:
- Fold the crushed Biscoff cookies into the ice cream base. If using, add the Biscoff cookie butter and gently swirl it into the mixture for extra flavor.
Churn the Ice Cream:
- Pour the mixture into an ice cream maker and churn according to the manufacturer’s instructions (usually about 20-25 minutes). The ice cream should reach a soft-serve consistency.
Freeze the Ice Cream:
- Transfer the churned ice cream into an airtight container and smooth out the top. Cover tightly and freeze for 4-6 hours or overnight until firm.
Serve and Enjoy:
- Scoop the Biscoff ice cream into bowls or cones, and enjoy the rich, spiced flavor!
Notes
-
No Ice Cream Maker?
If you don’t have an ice cream maker, simply pour the mixture into an airtight container and place it in the freezer. Stir every 30 minutes for 3-4 hours to break up ice crystals and achieve a creamy texture. -
Storage:
Store homemade ice cream in an airtight container in the freezer for up to 1-2 weeks. Be sure to keep it tightly covered to maintain its texture and flavor. -
Customizations:
Add other mix-ins such as chocolate chips, caramel ribbons, or crushed nuts for an extra flavor twist. You can also mix in extra crushed Biscoff cookies if you want a more intense cookie flavor. -
Dairy-Free Version:
To make this recipe dairy-free, swap the heavy cream and milk for coconut milk or almond milk. Also, check that the Biscoff cookies and cookie butter are dairy-free.


